Origami Inside Reverse Fold
If you have learn about the two foundational folds in origami- the mountain and valley folds. Now let’s move to a more interesting fold- inside reverse fold.
What’s inside Reverse Fold
Inside Reverse Fold is often used in origami to create details and features like heads, tails, and beaks on animals or other shapes. It is where the paper is folded inside the model. Another similar but folding the part outside the paper is outside reverse fold.
How to make an inside reverse fold
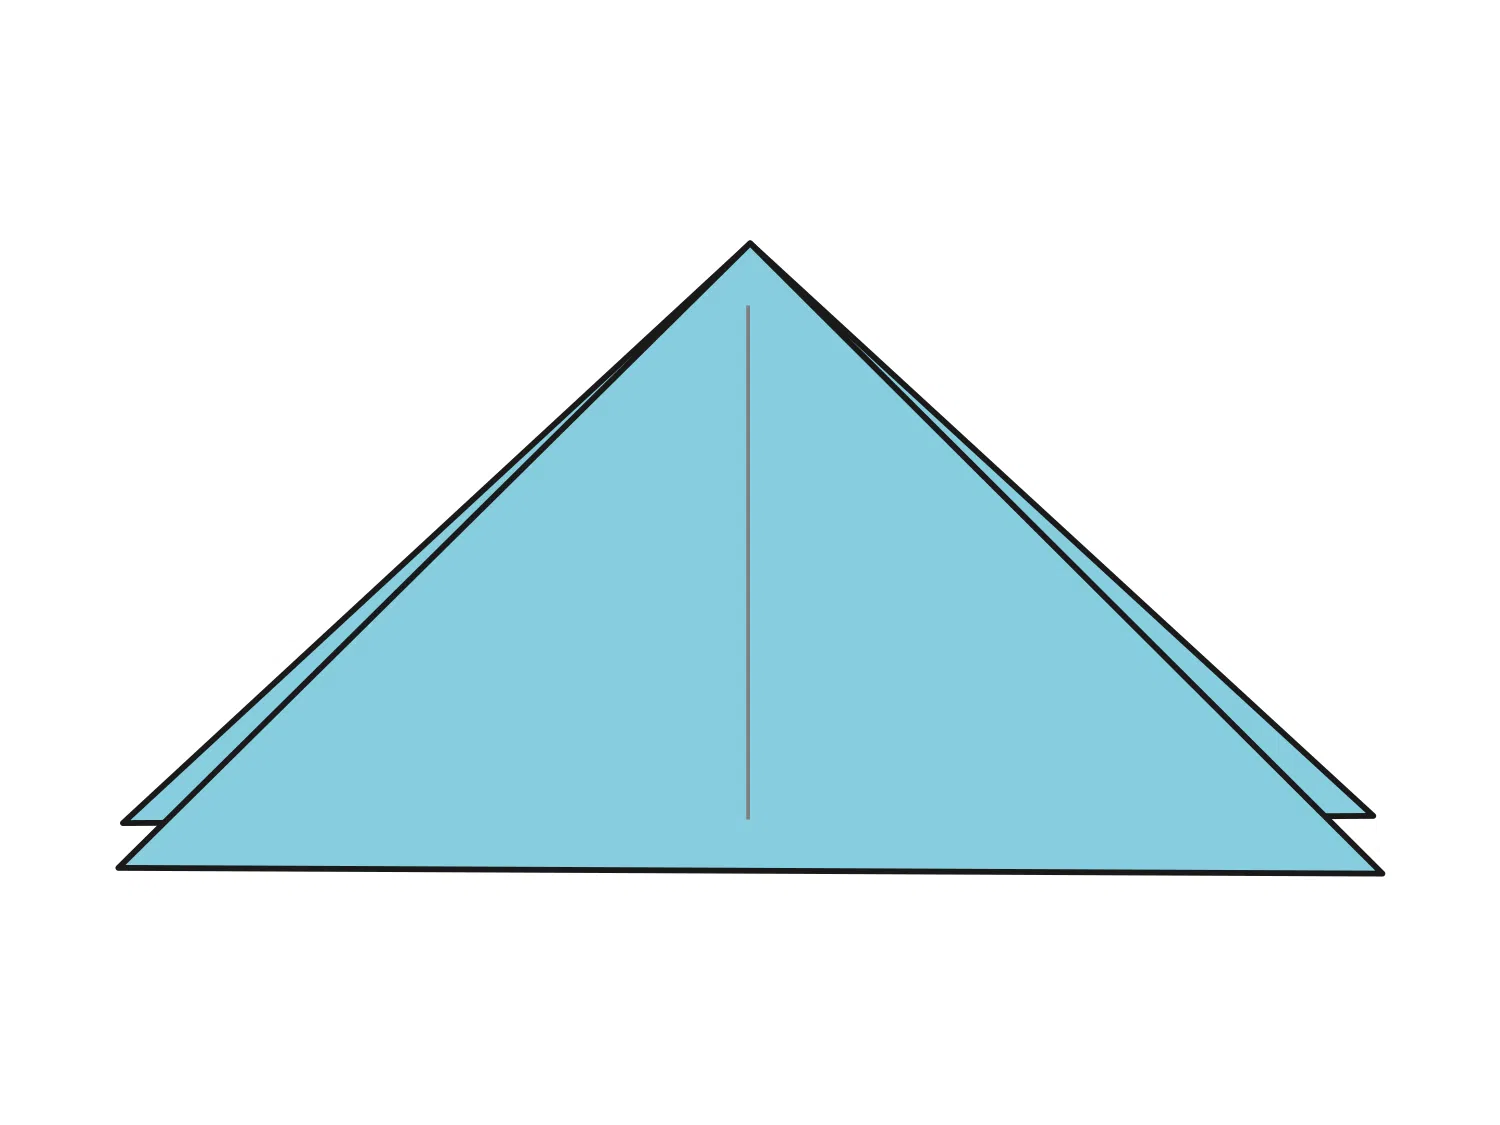
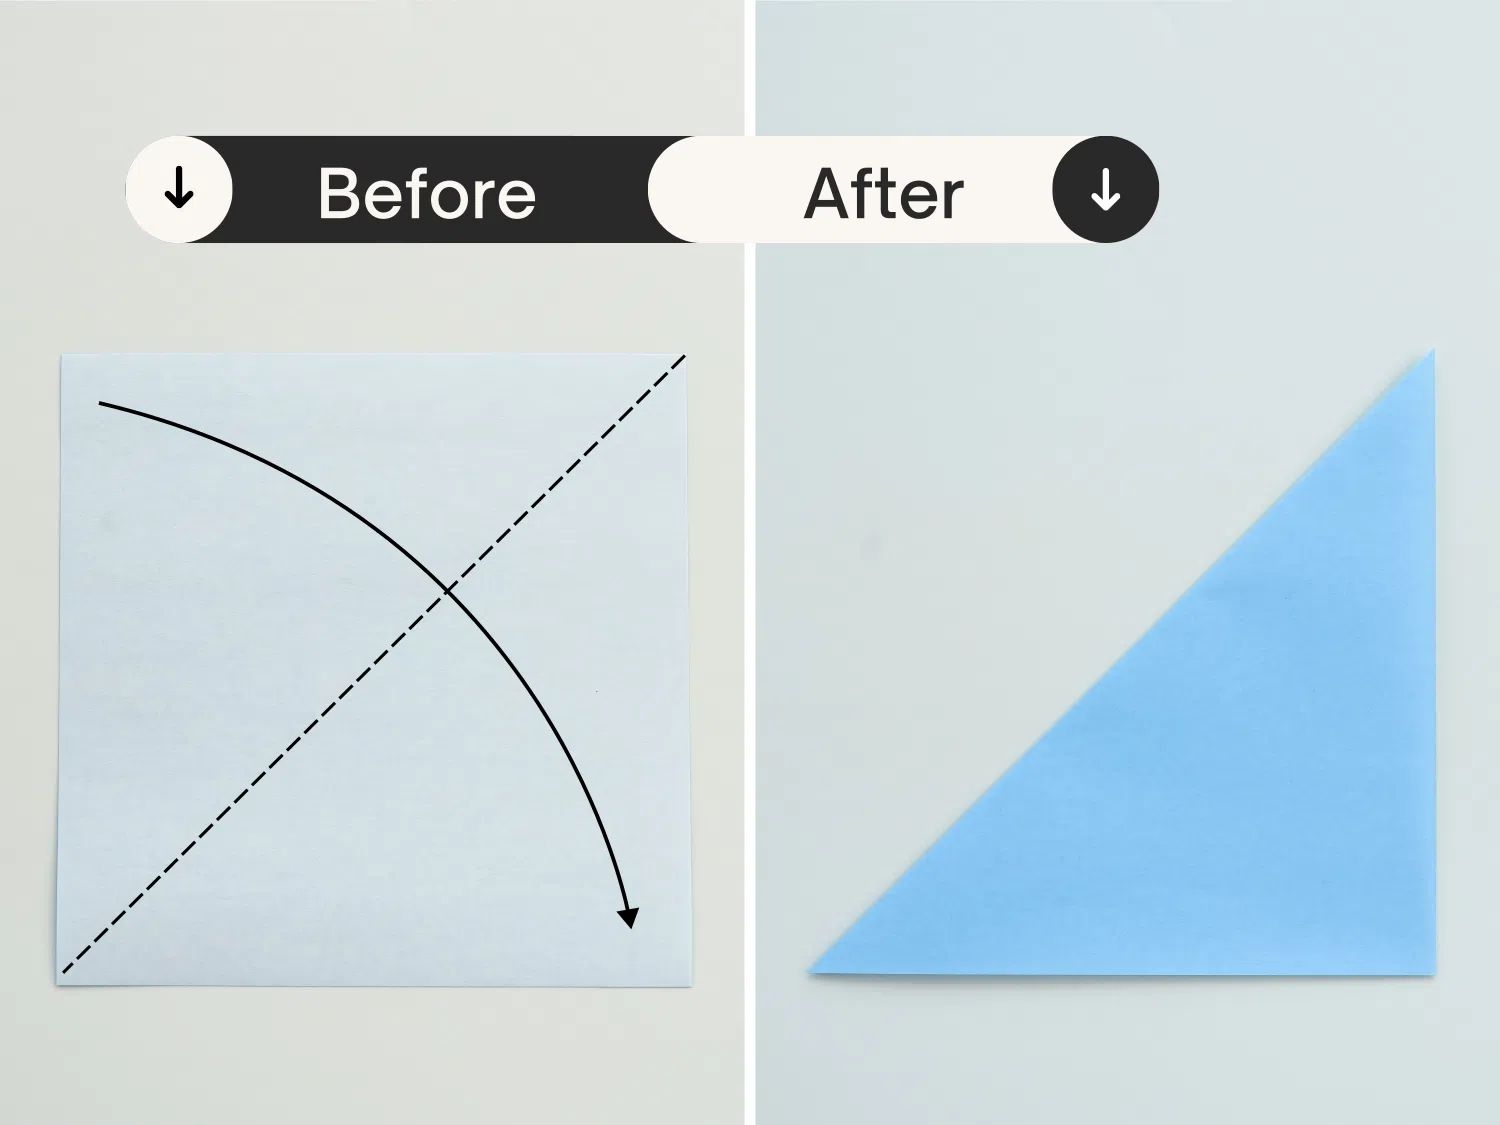
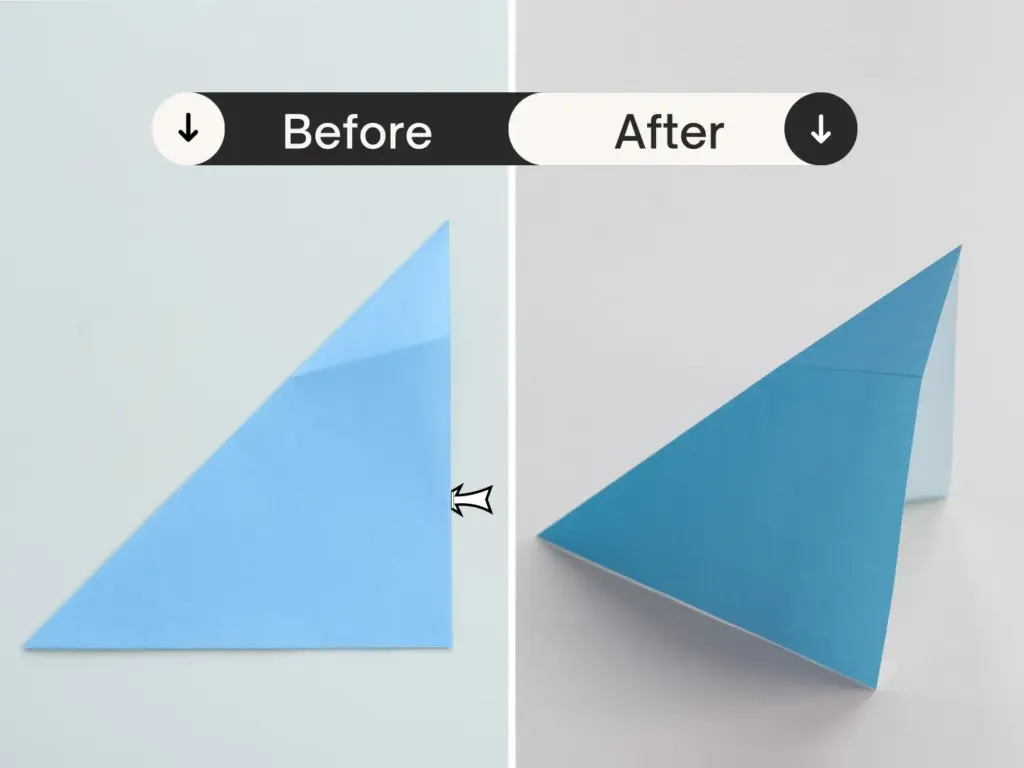
Step 1
Start with a flat piece of origami paper. Fold the paper in half to create a triangle.
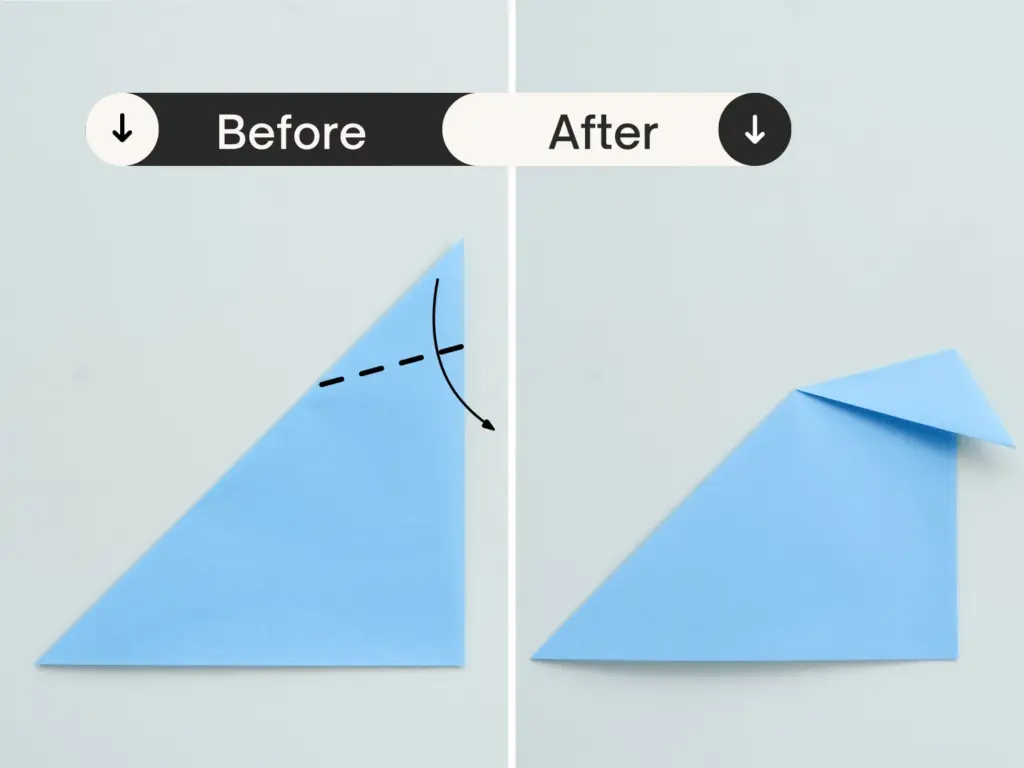
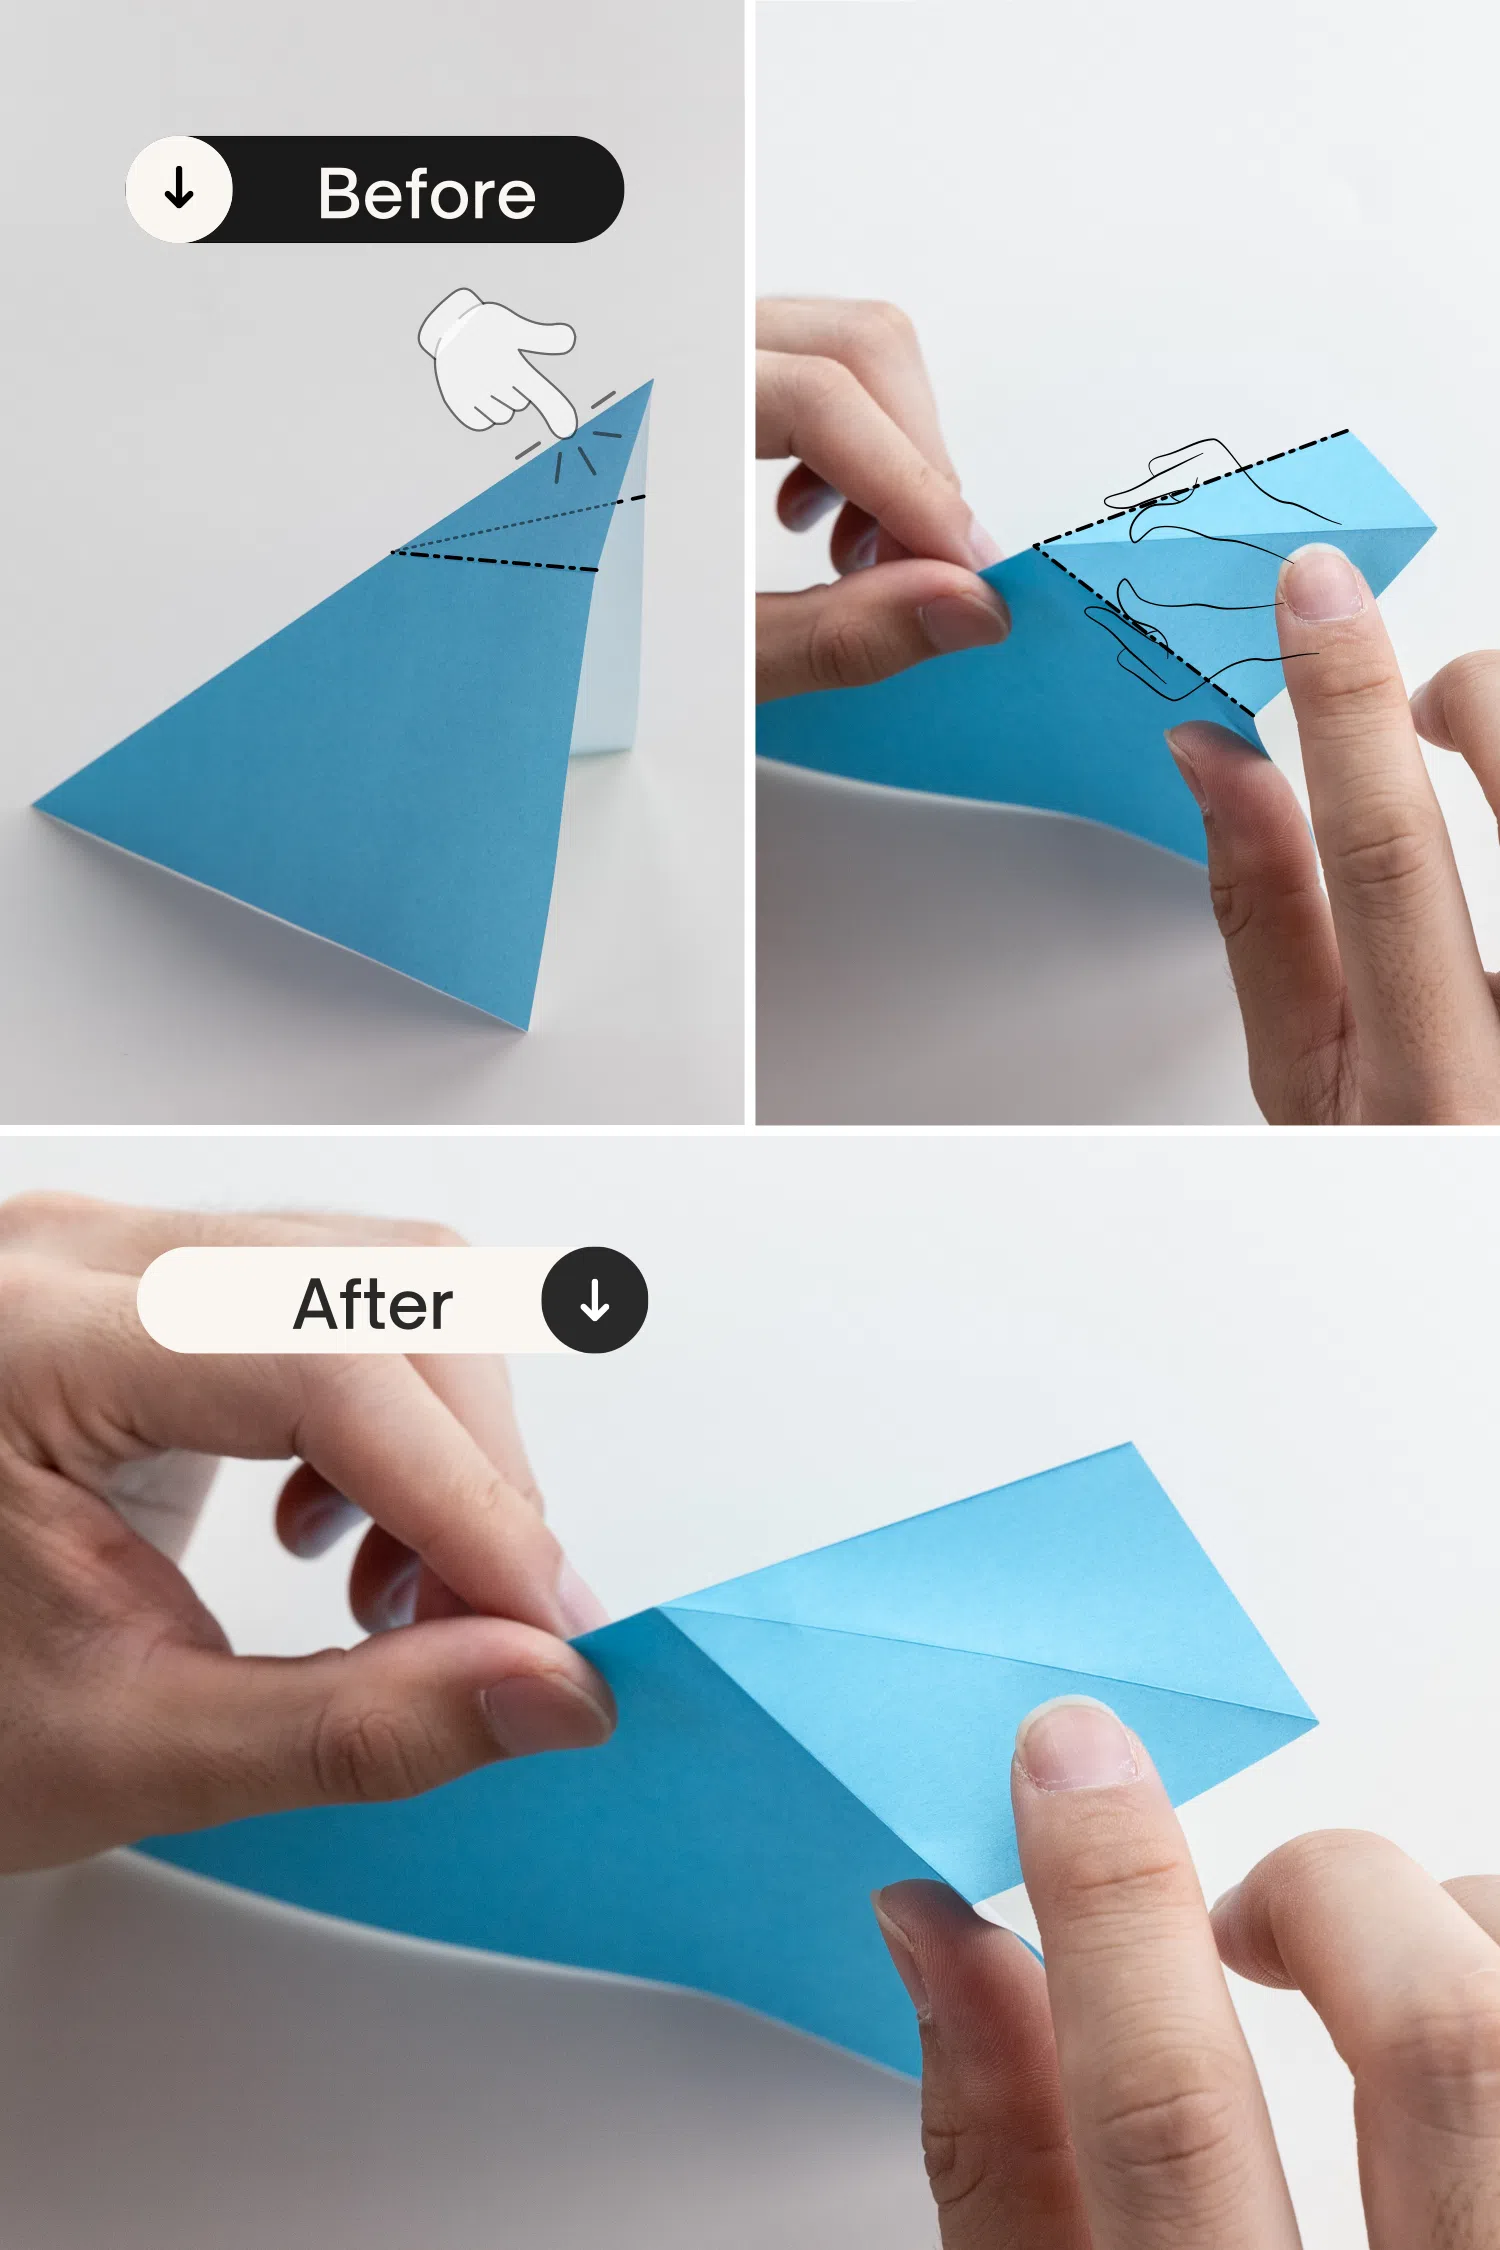
Step 2
Fold one corner down diagonally to the opposite side.
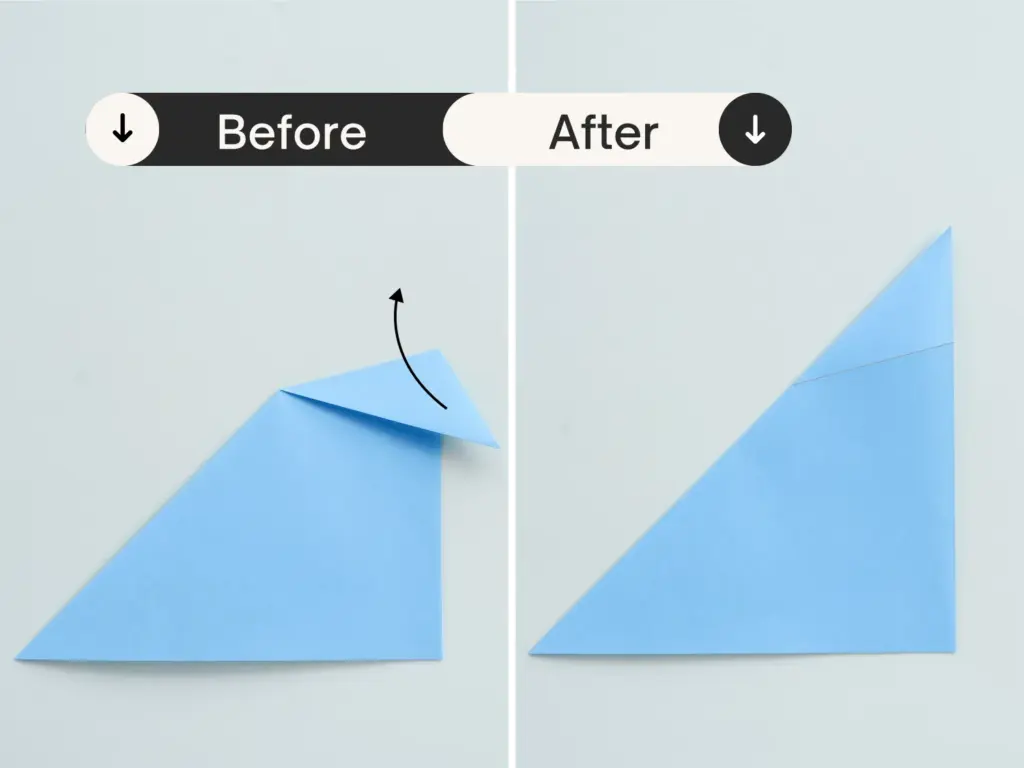
Step 3
Unfold it and leave a crease.
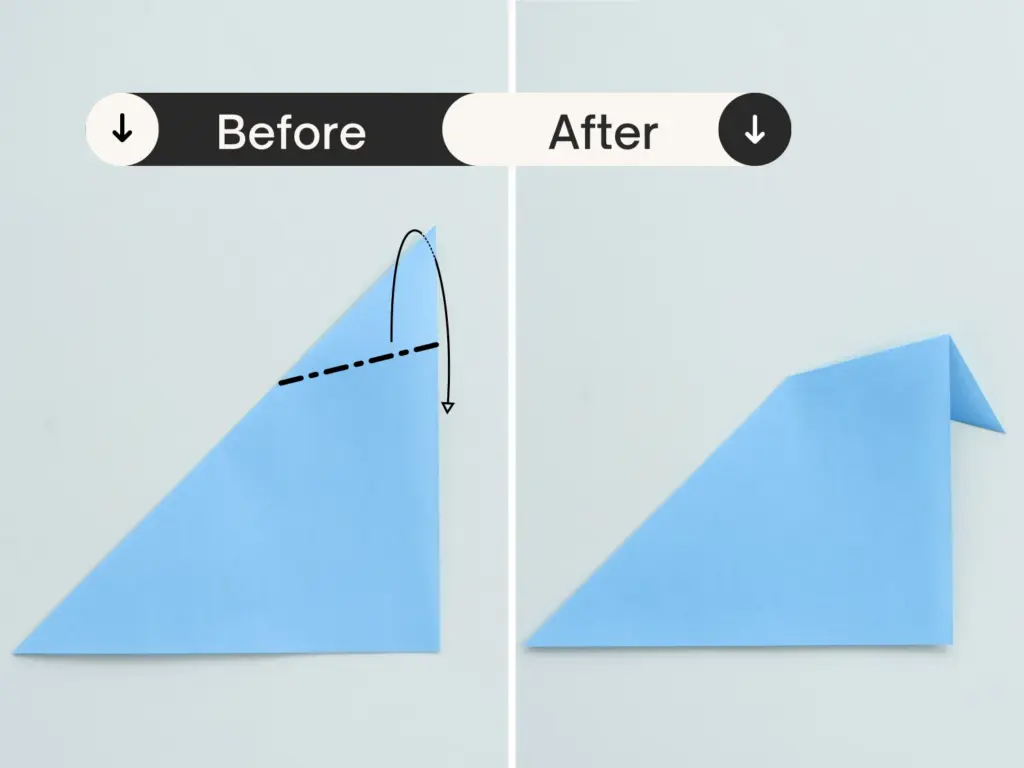
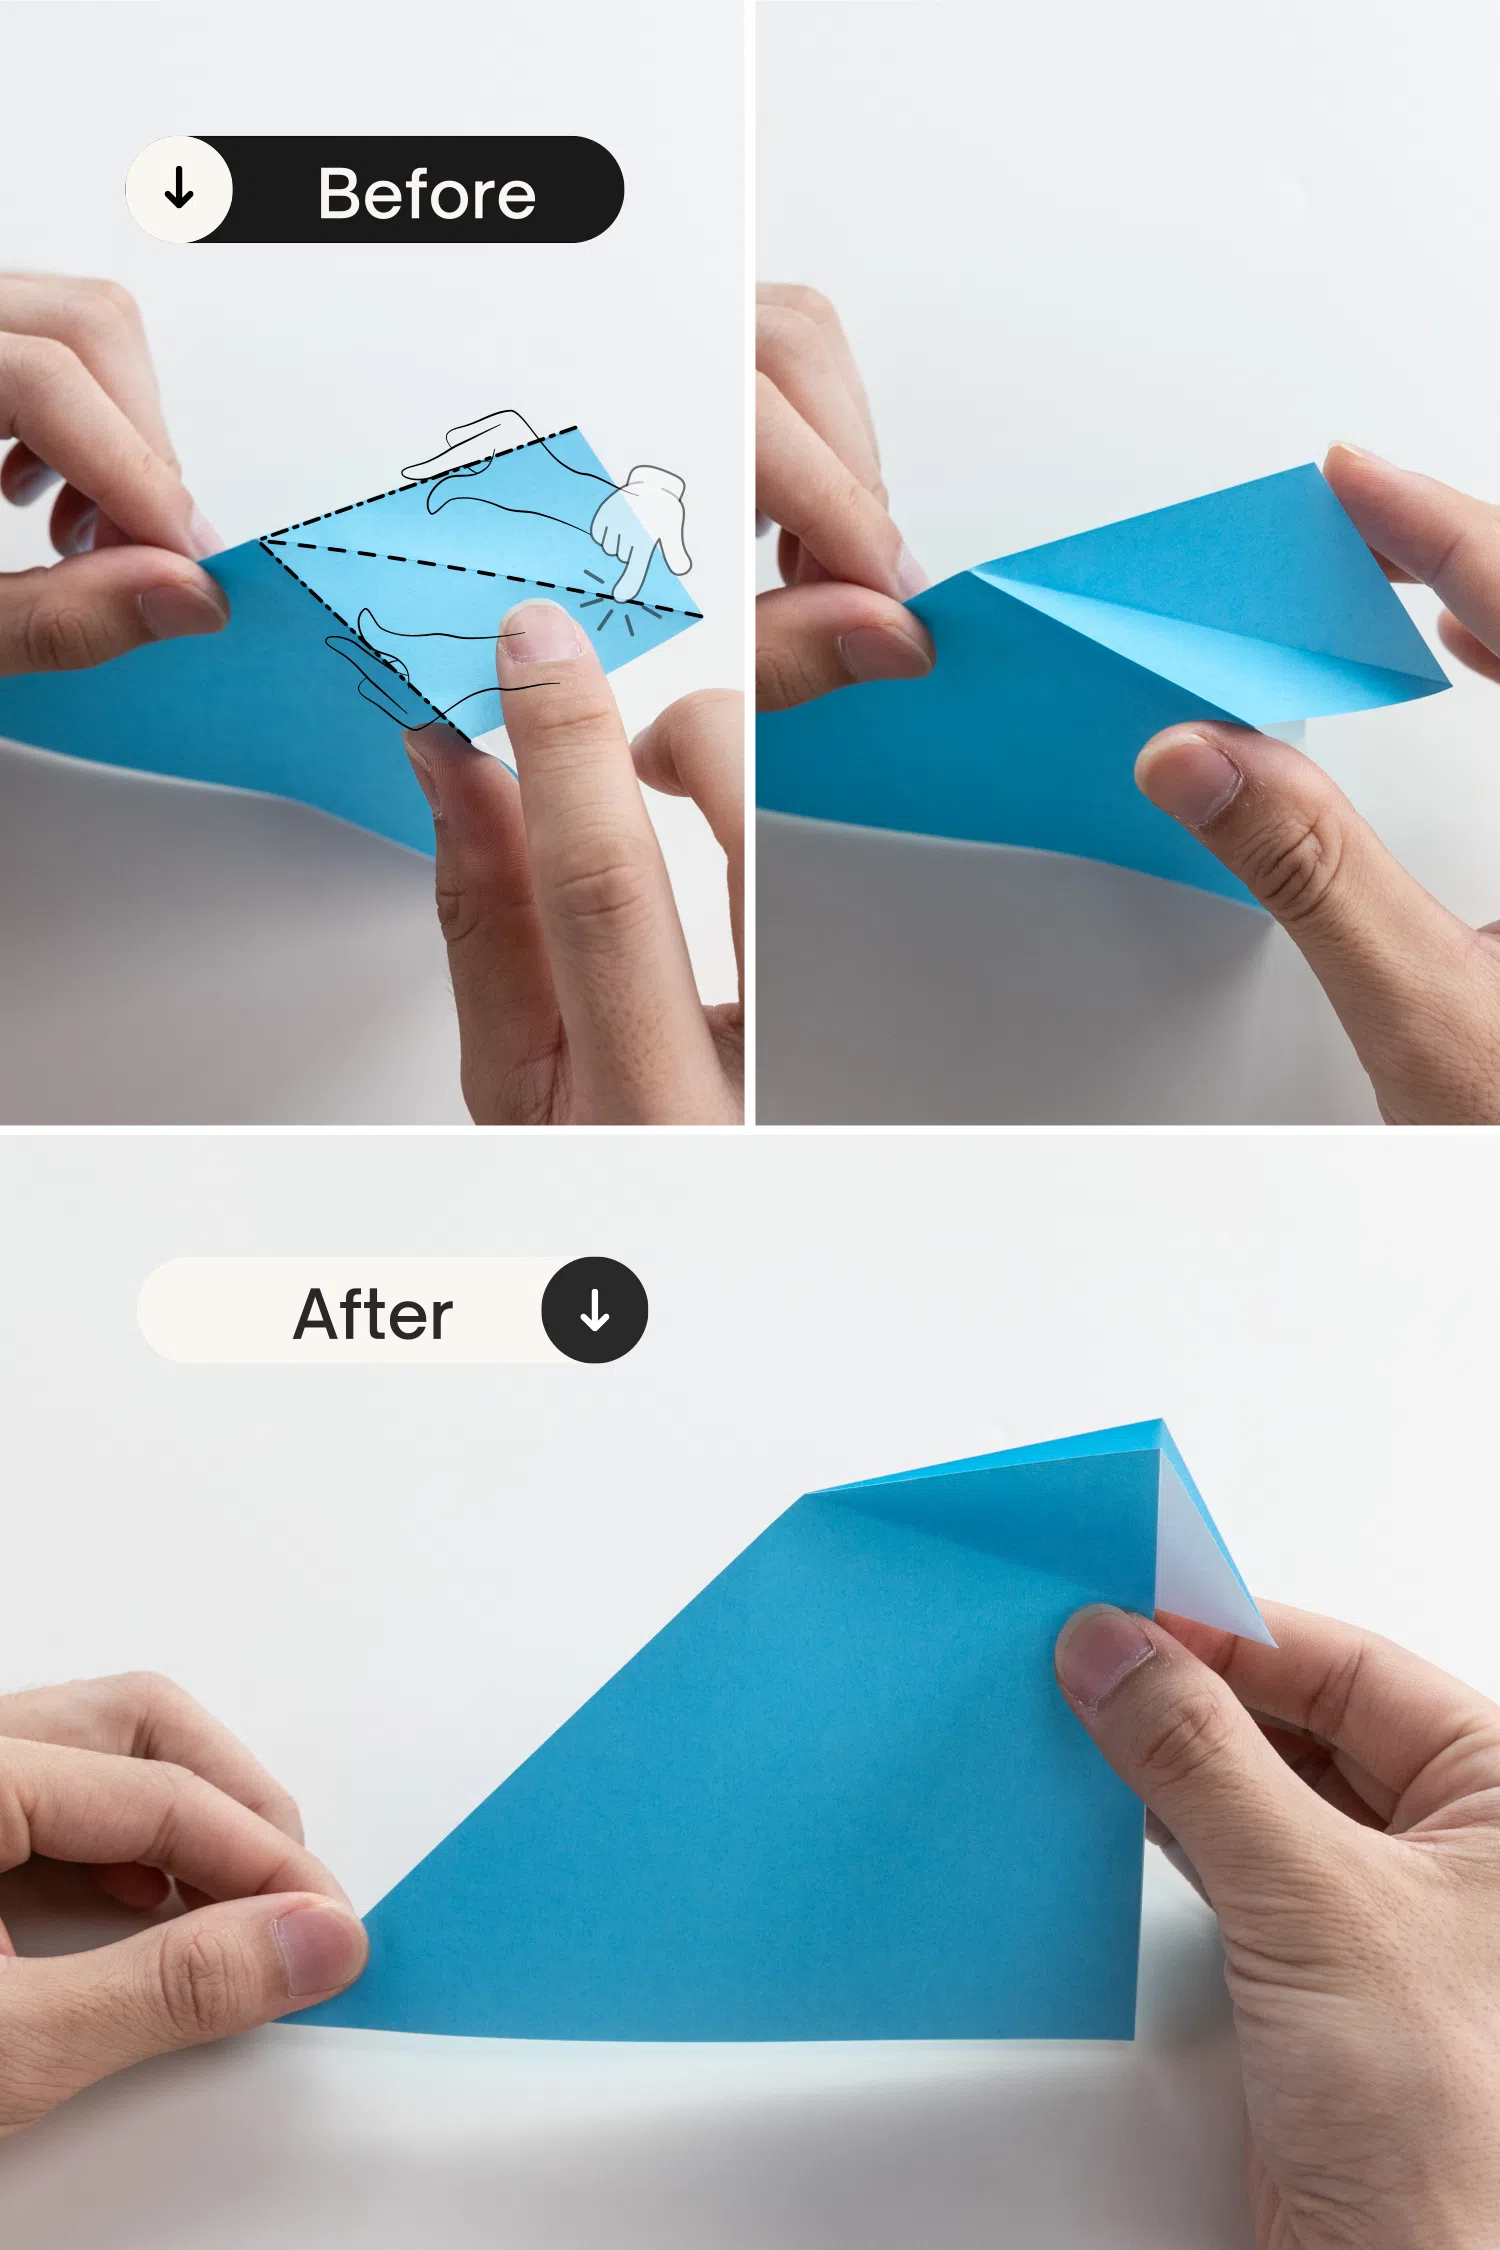
Step 4
This step is optional, but will make your further steps easier. You can skip this one once you are familiar with this fold.
Fold one corner down diagonally to the opposite side.
Step 5
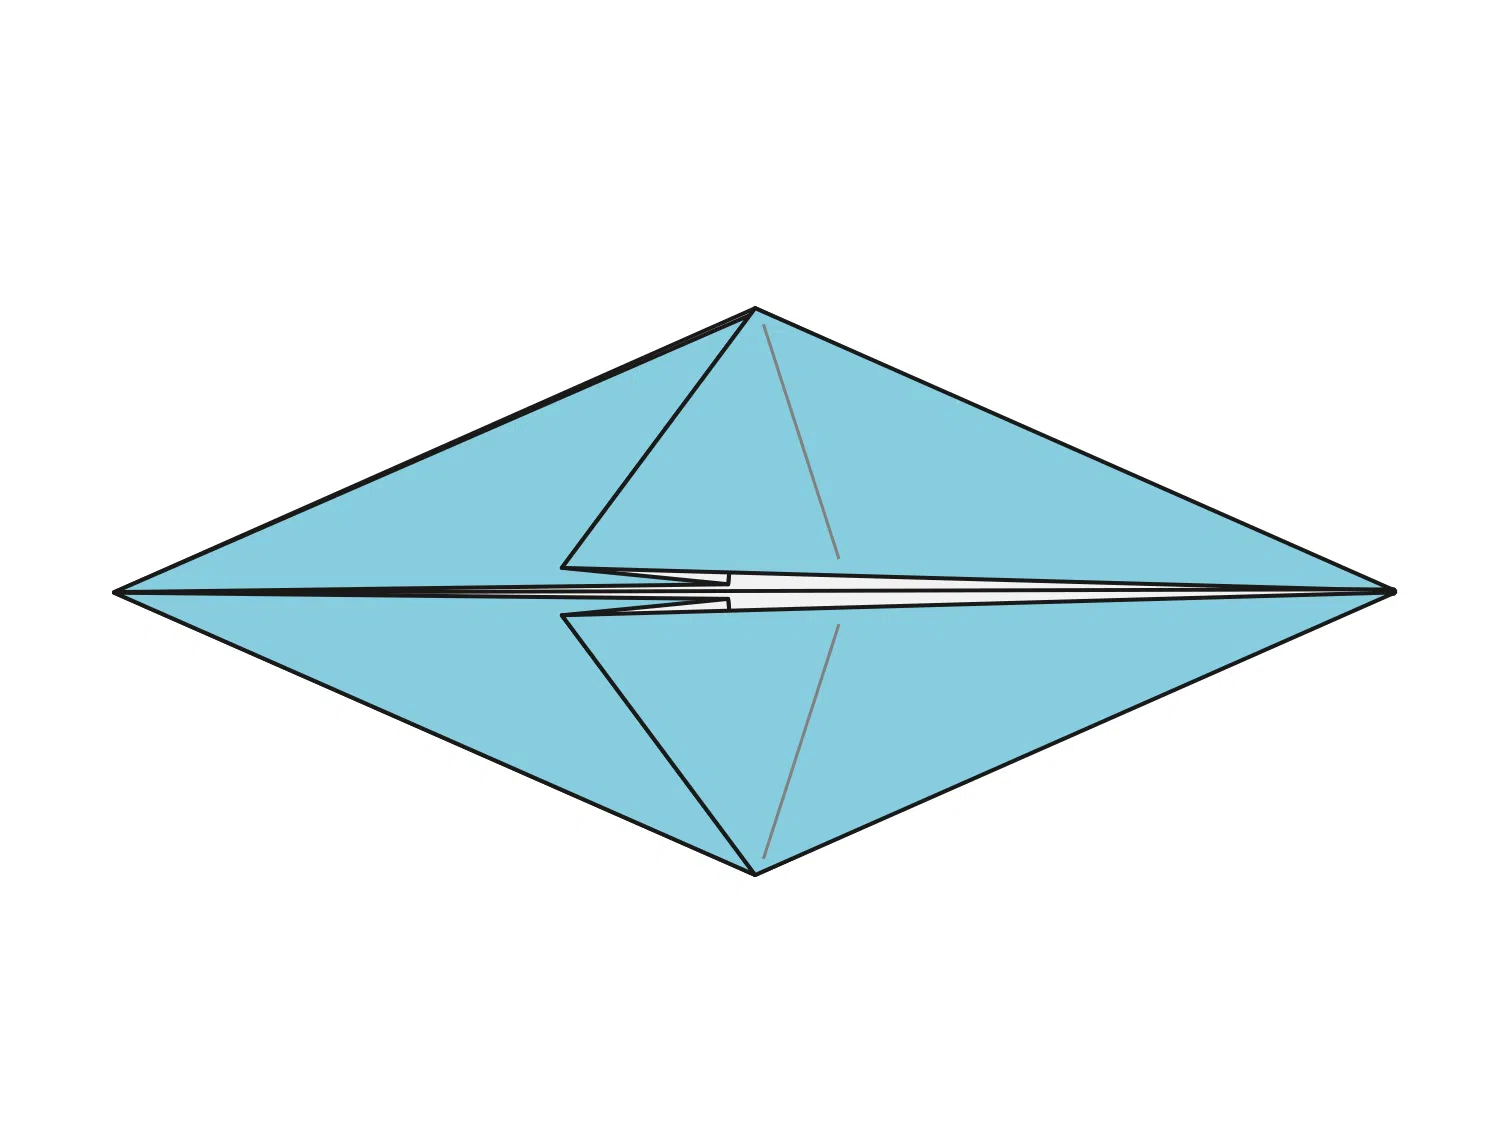
Unfold the crease and open it up.
Step 6
Slightly press the tip and use your finger to shape the creases on both sides.
- Push the corner you just folded inwards, tucking it between the two layers of paper.
- Flatten the fold.
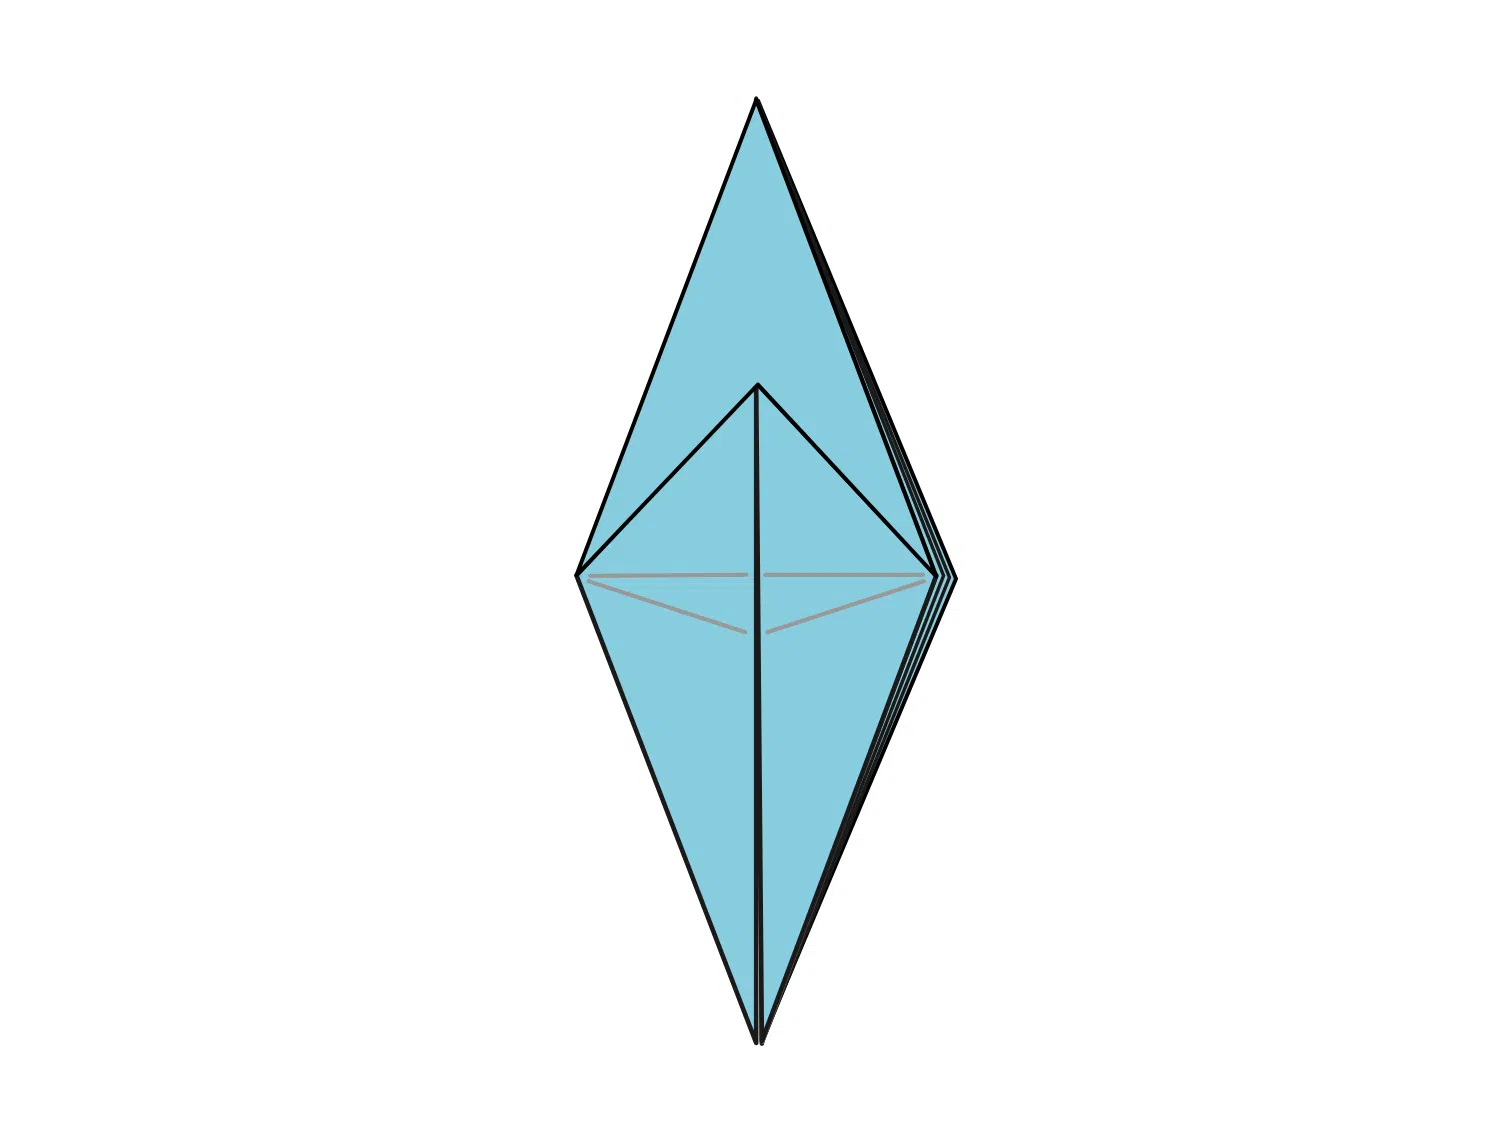
Step 7
Press the center mountain crease into valley crease and flatten the fold. Now our inside reverse fold is finished.
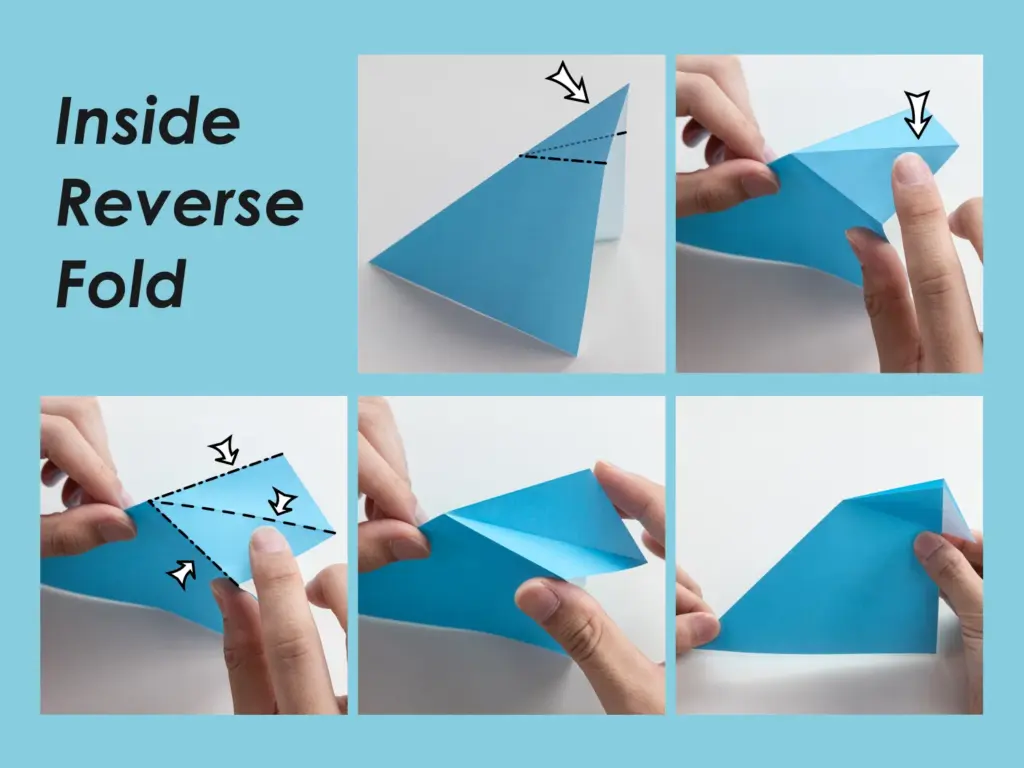
We have included every step in the following diagram, remember to save for reference.
Other Origami basic fold and bases