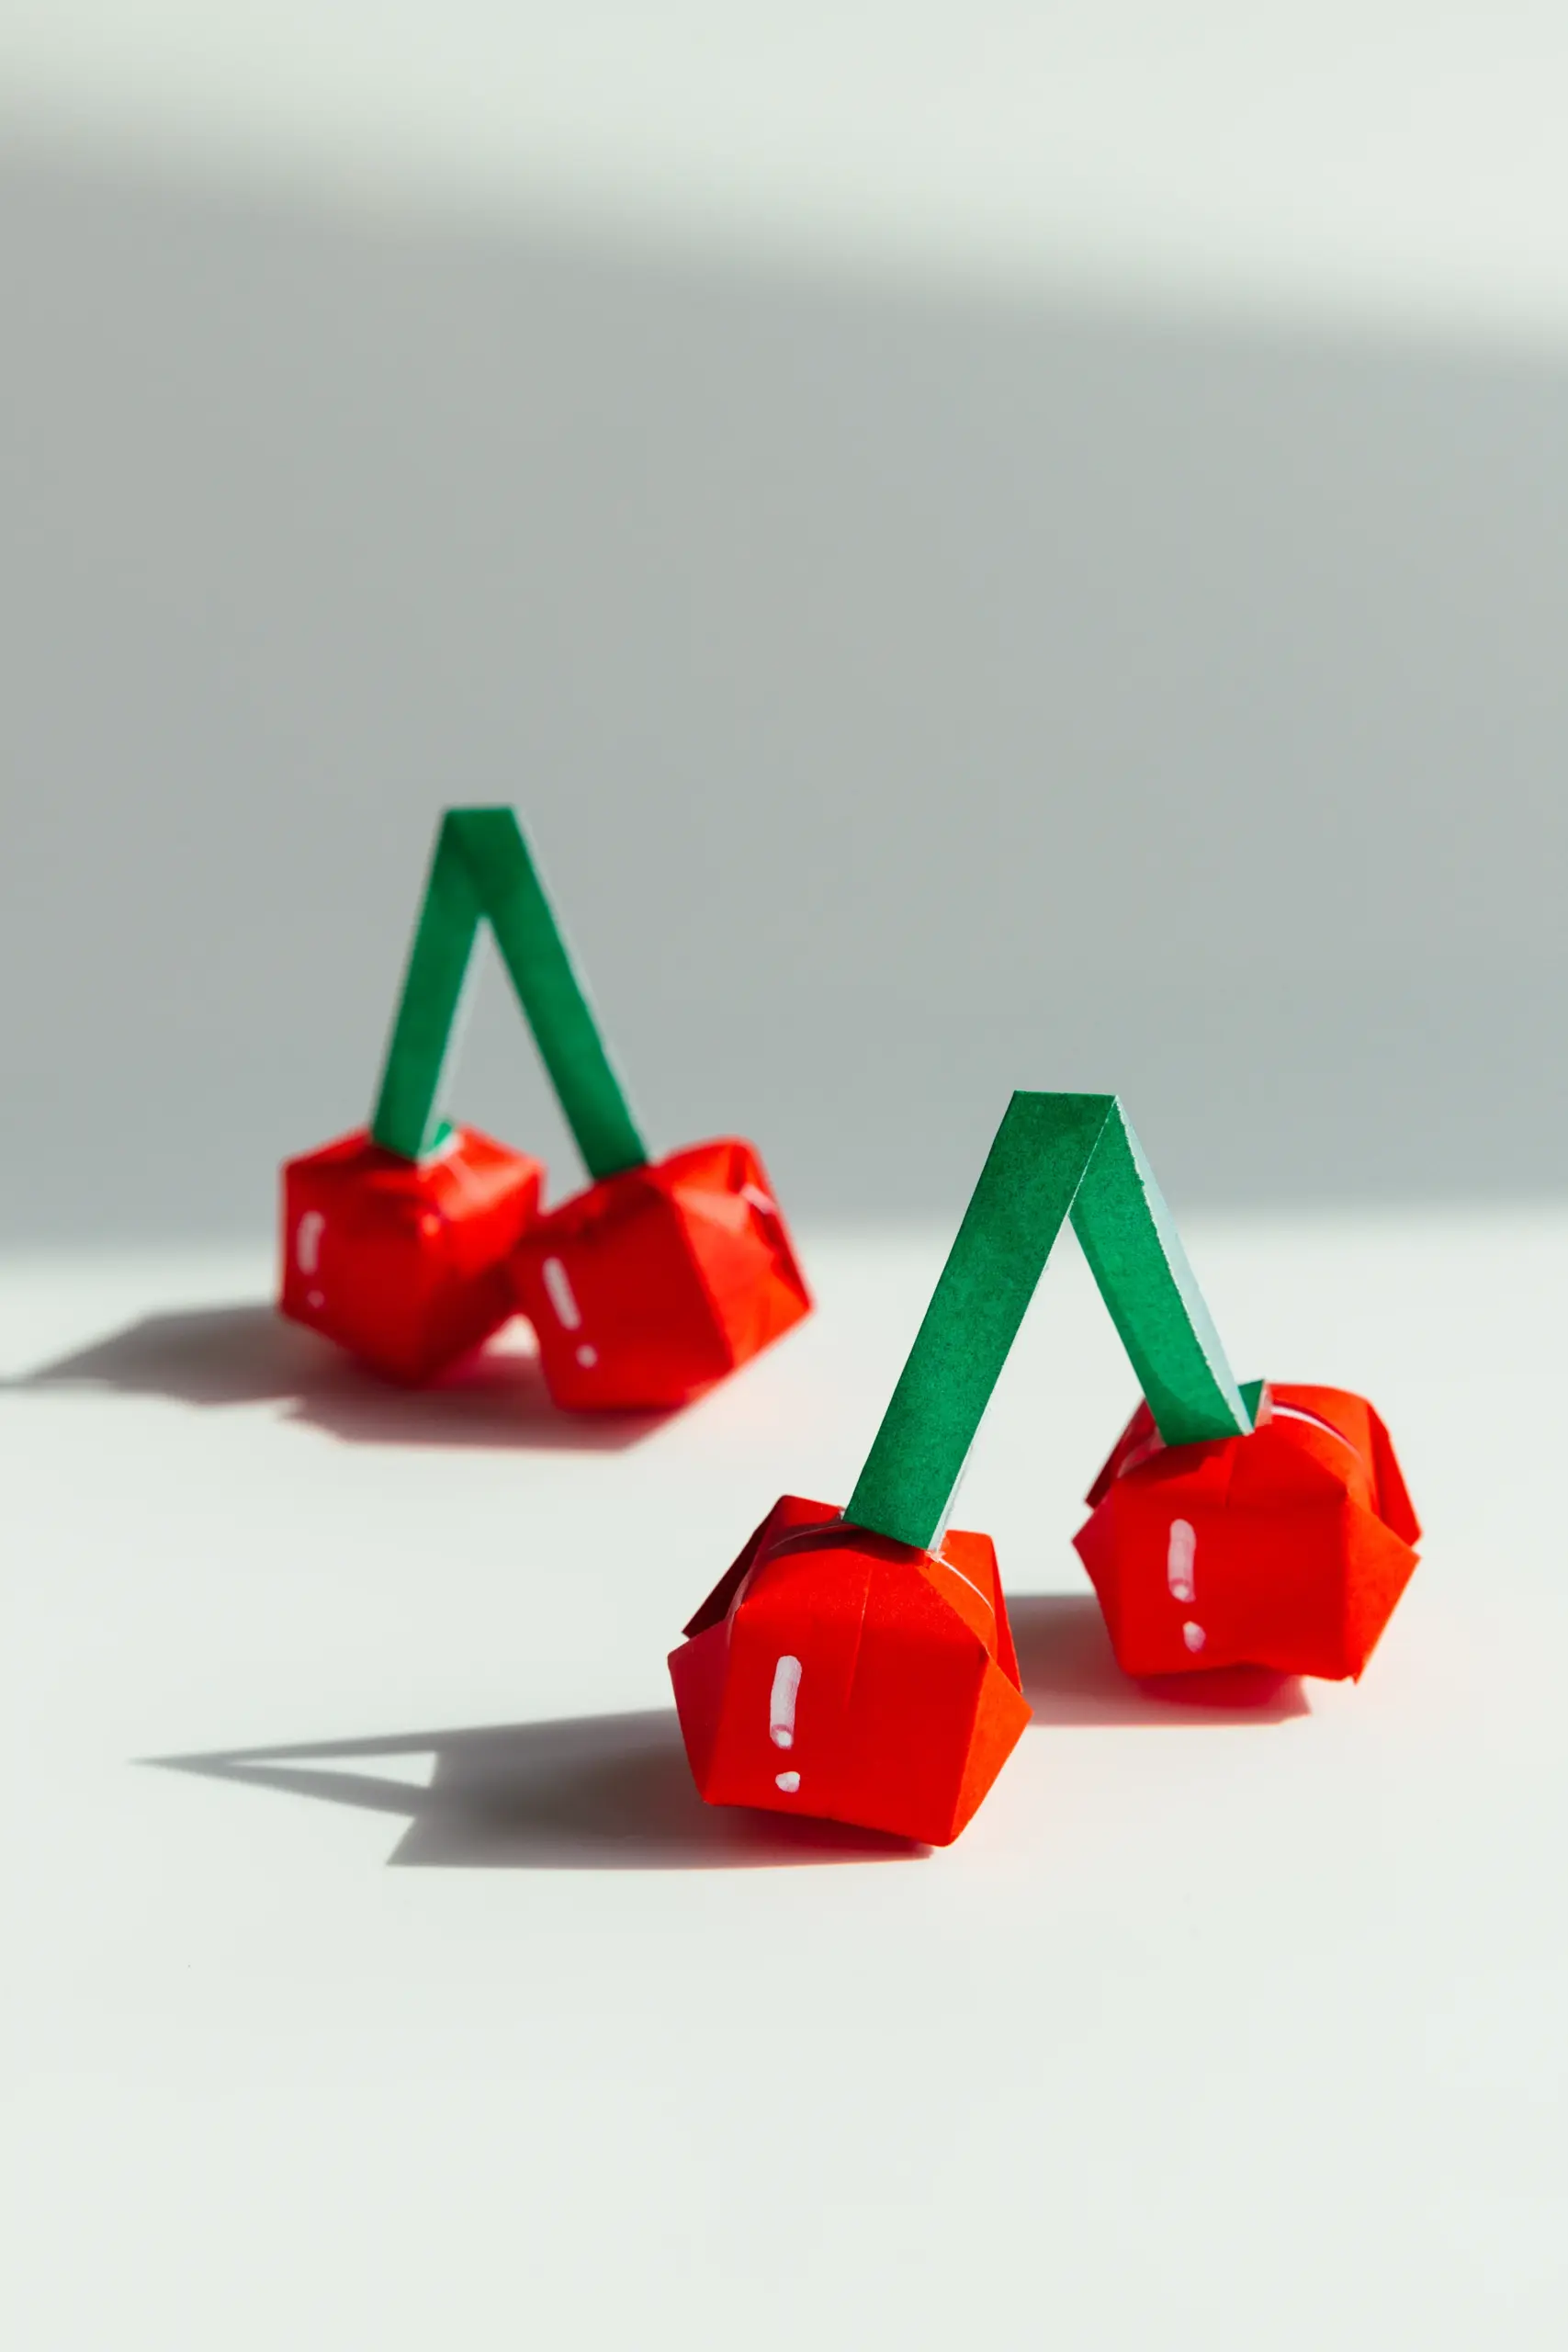
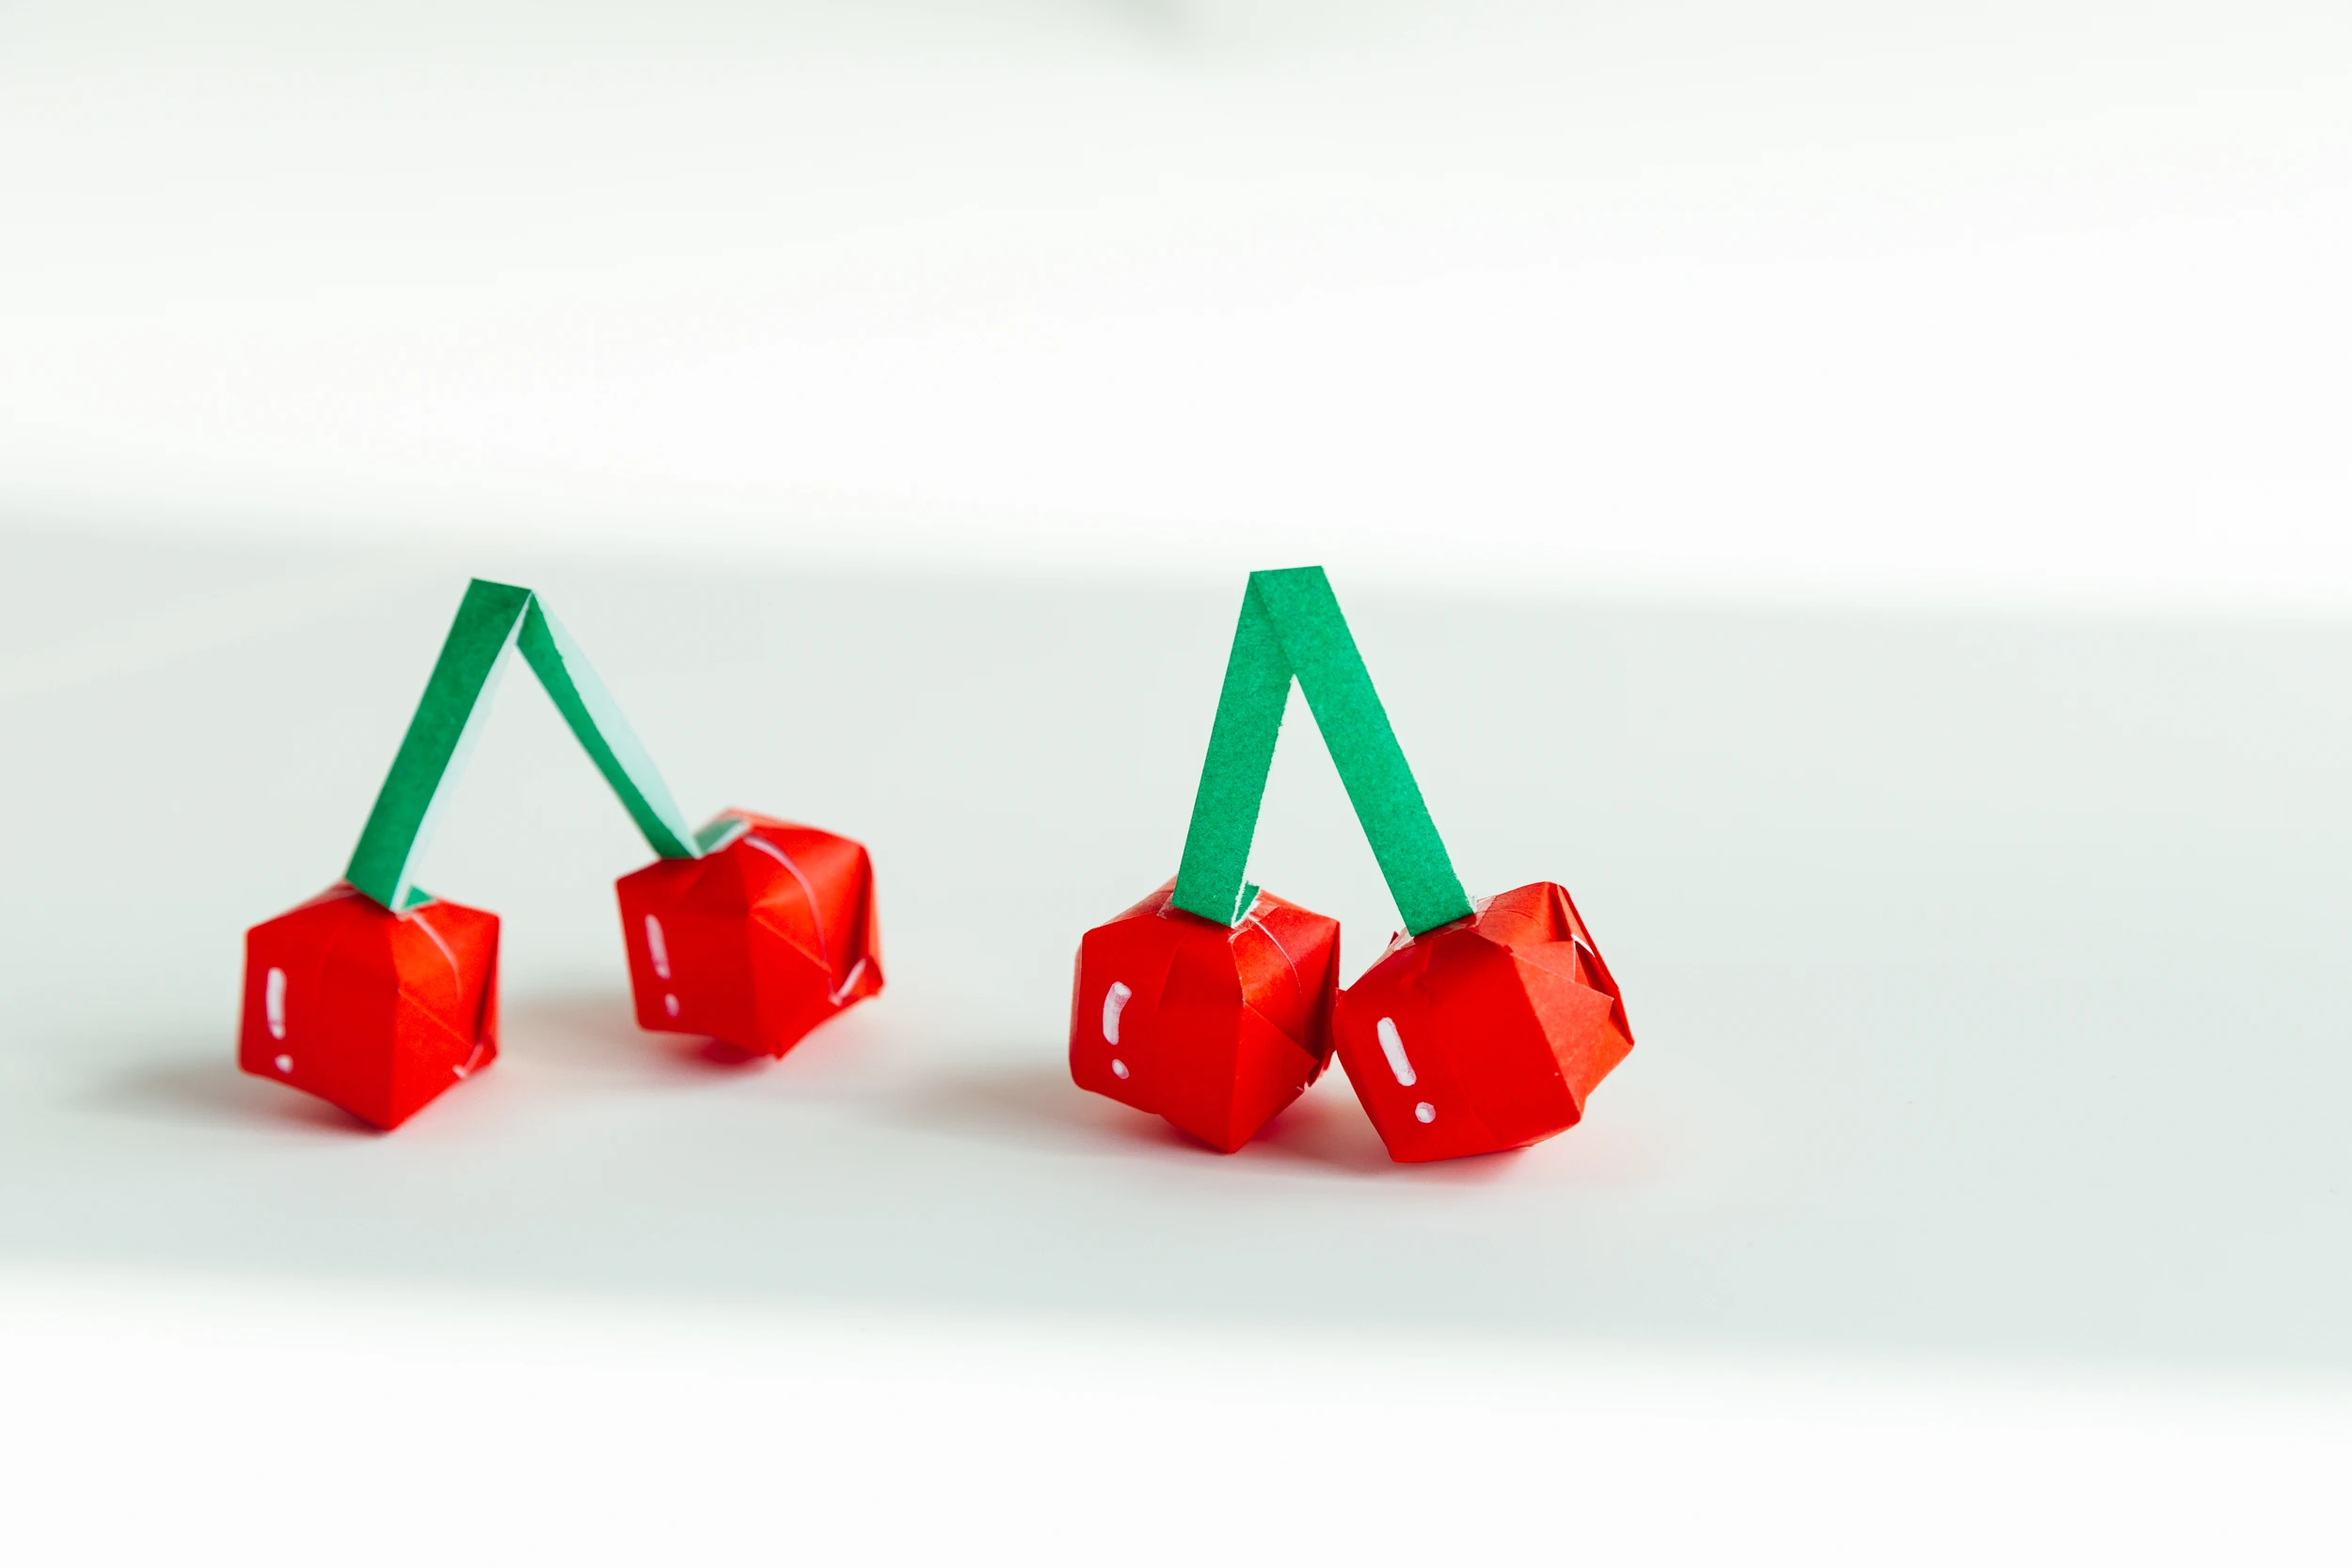
How to Make Origami Cherry
Super cute origami cherry in three dimensions, this is my favorite one among the fruit series. Due to the finished product is so small, you may need to be a little patient and careful. However, once you succeed in folding it, you will definitely fall in love with it!
We provide step-by-step diagram instructions and beginner-friendly videos. Check both for quicker learning.
If you are new to origami, start here from our beginner guide to know the basics and how to read the step-by-step instructions.
- Folding time: 10 minutes
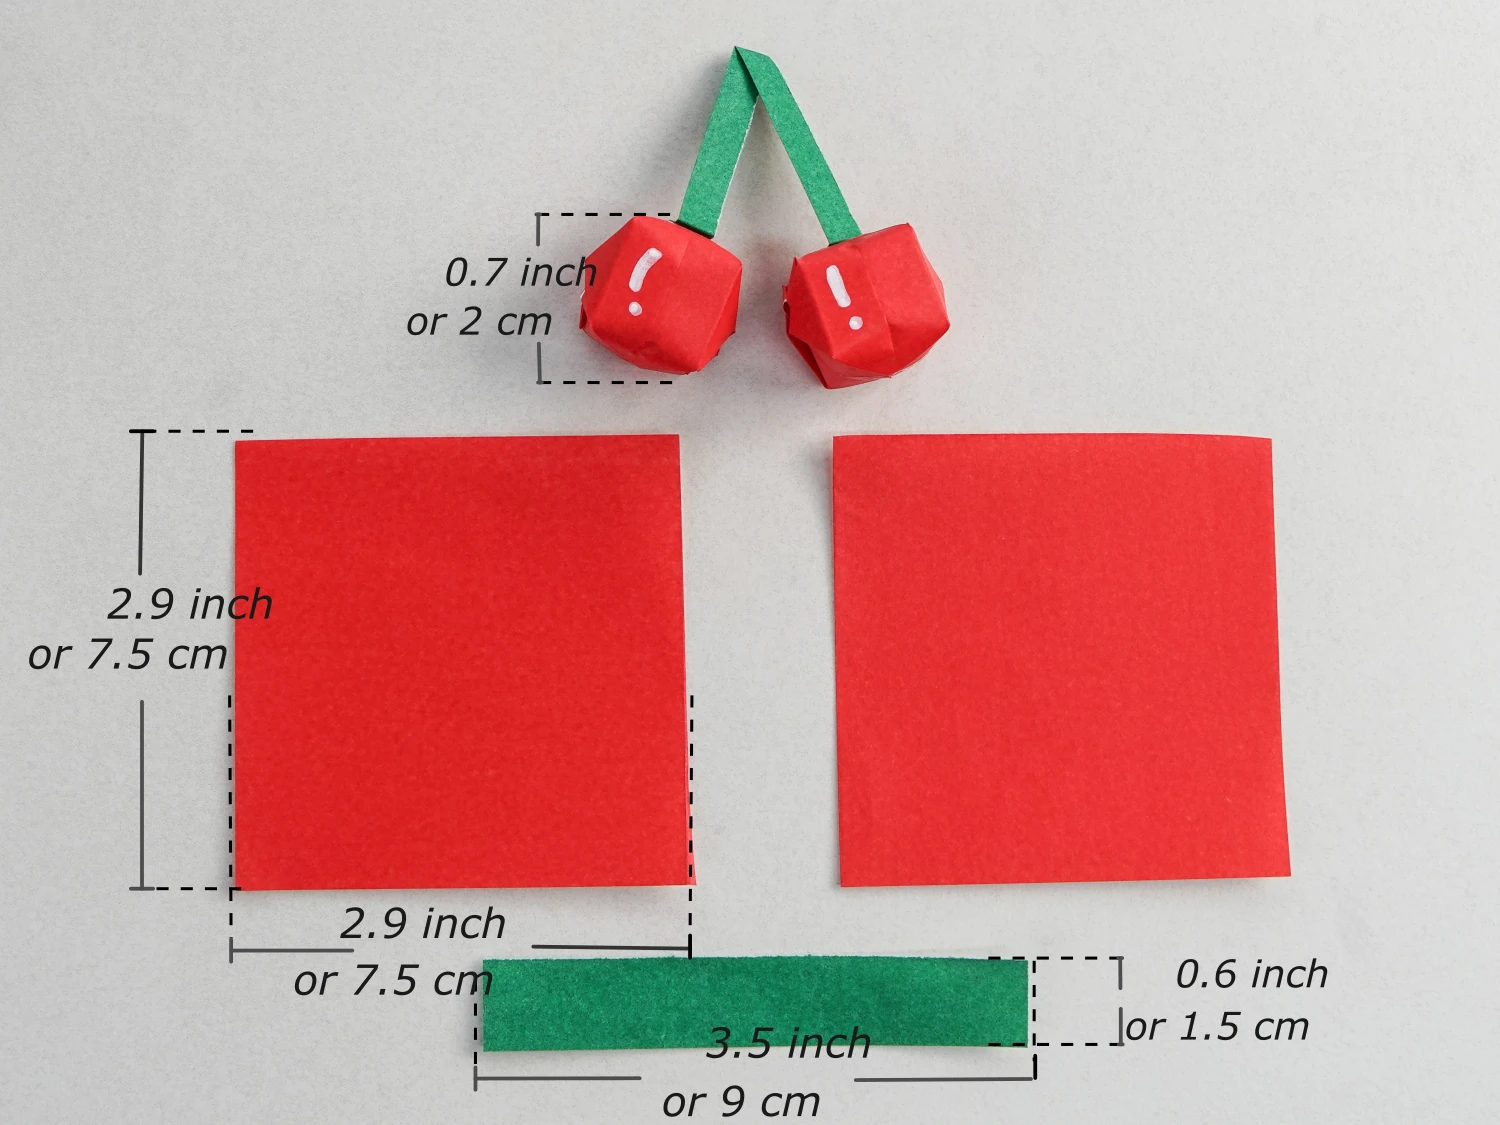
- Paper: 7.5×7.5 cm✖️2, 1.5×9 cm✖️1
- Difficulty: Easy, Beginner friendly
Material
Get 2 pieces of 7.5*7.5 cm square origami paper, one red and one white side, for the cherry part. One piece of 1.5*9 cm paper for the stem part.
Easy Origami Cherry Video
Step by Step Instructions
Step 1
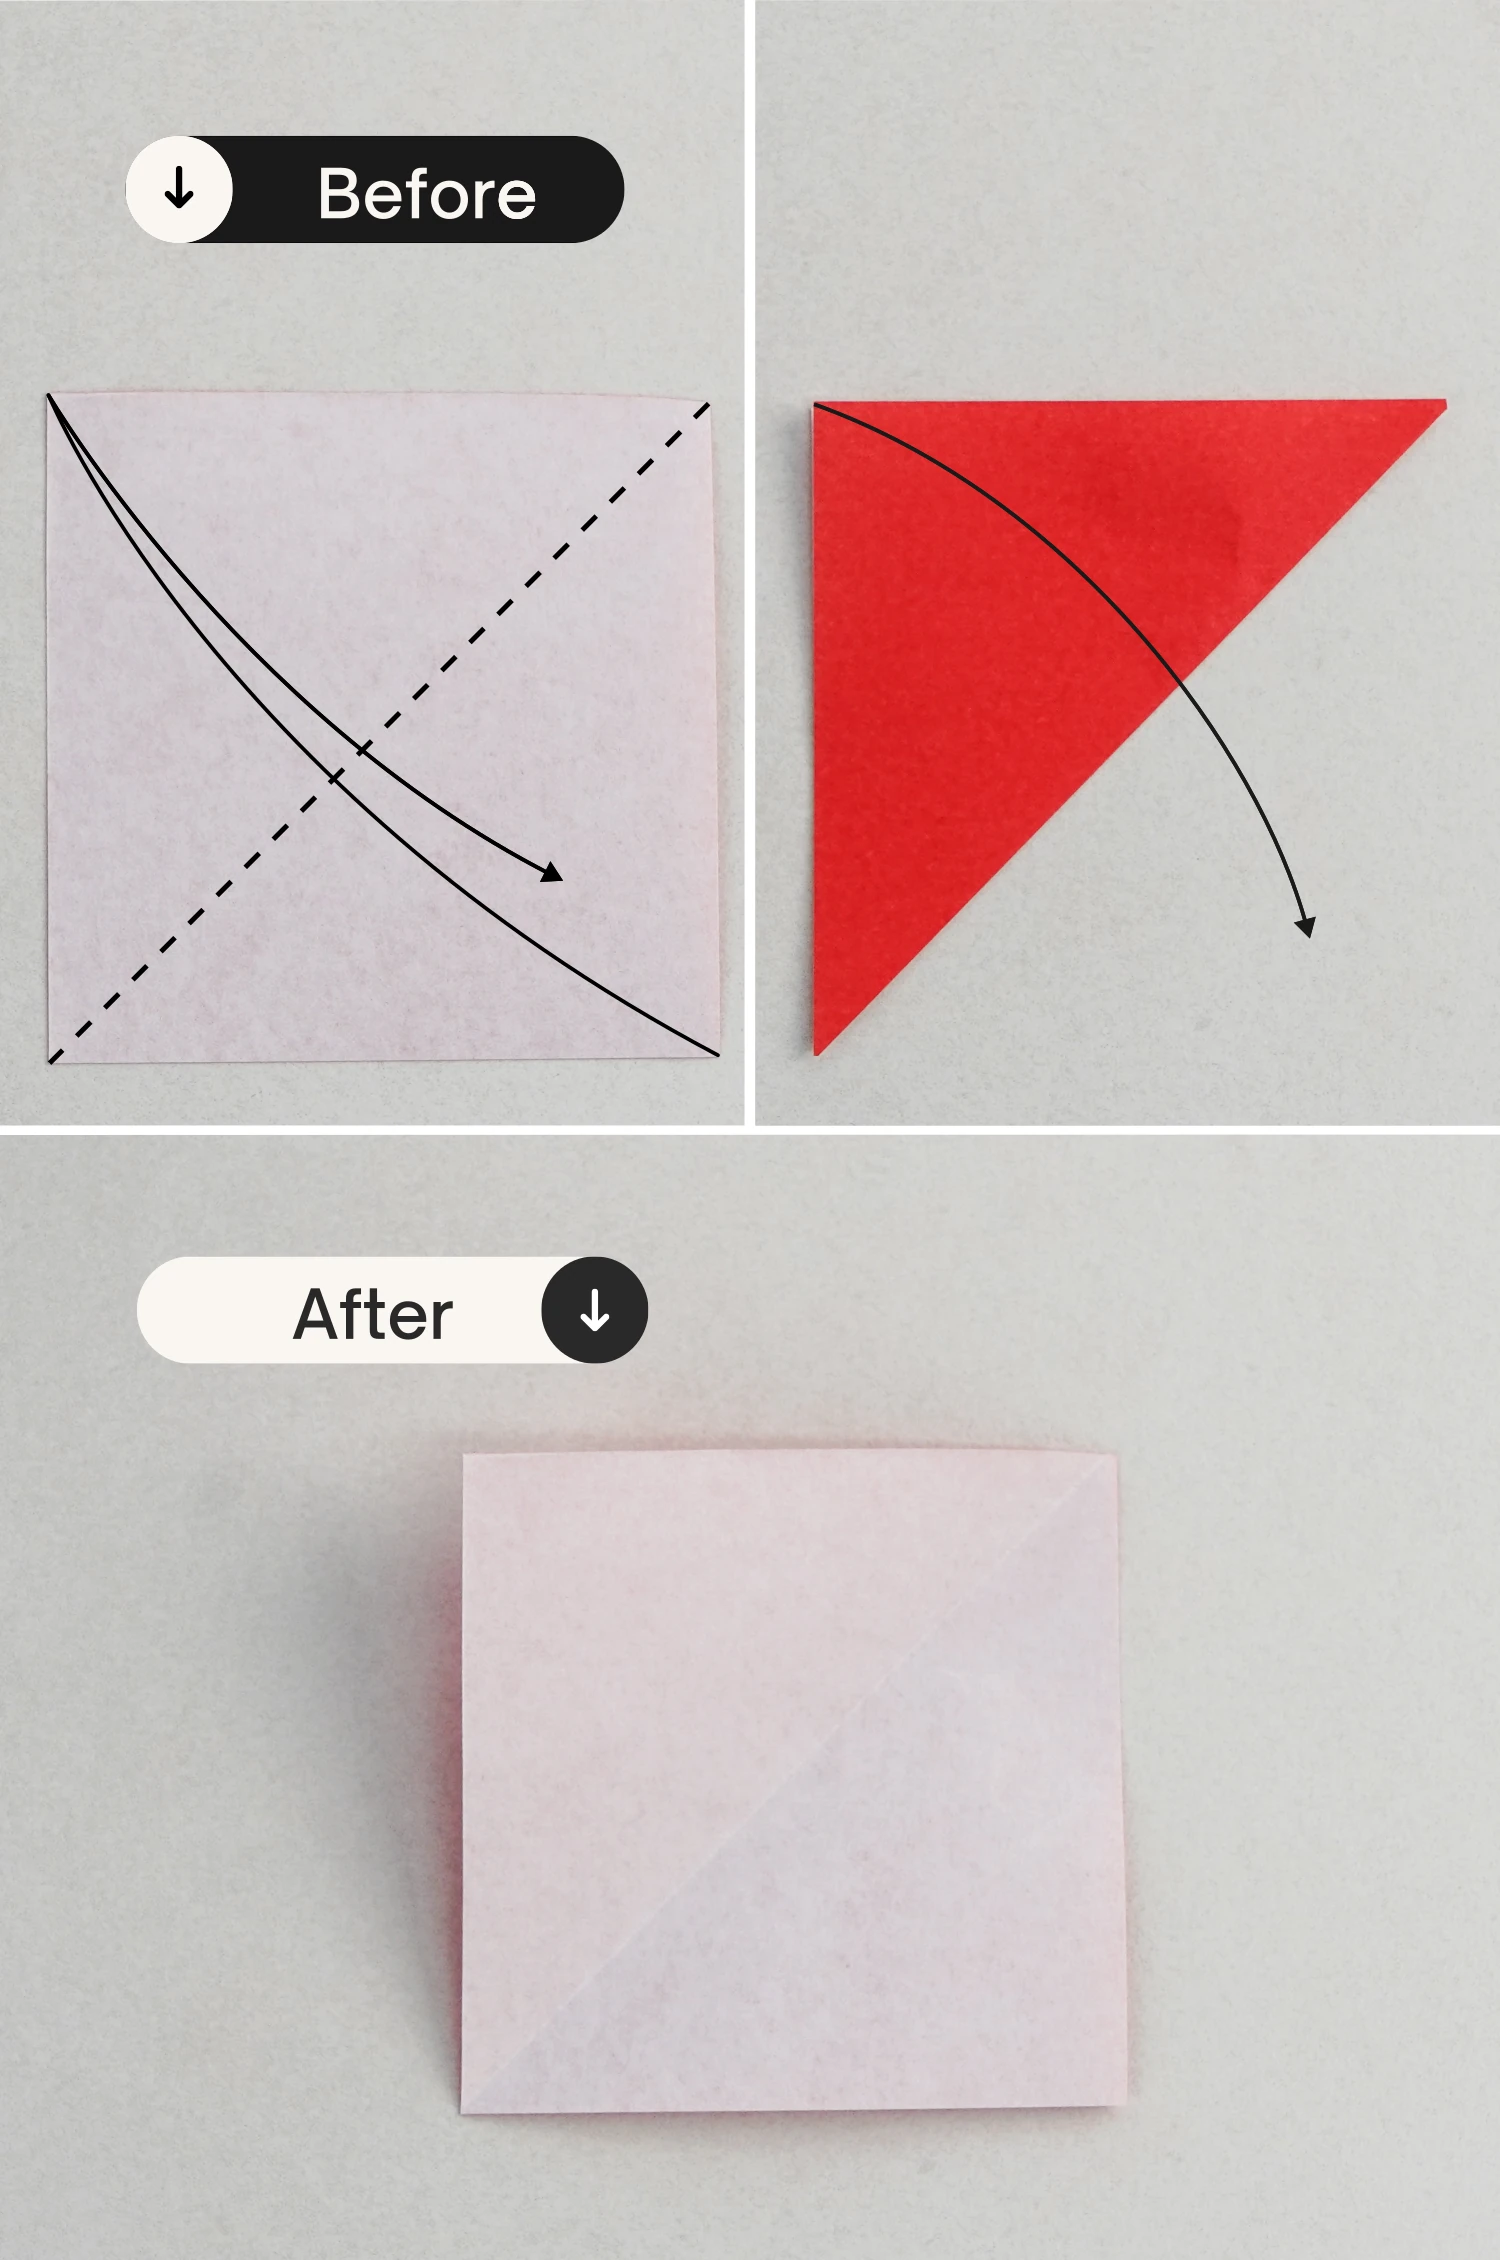
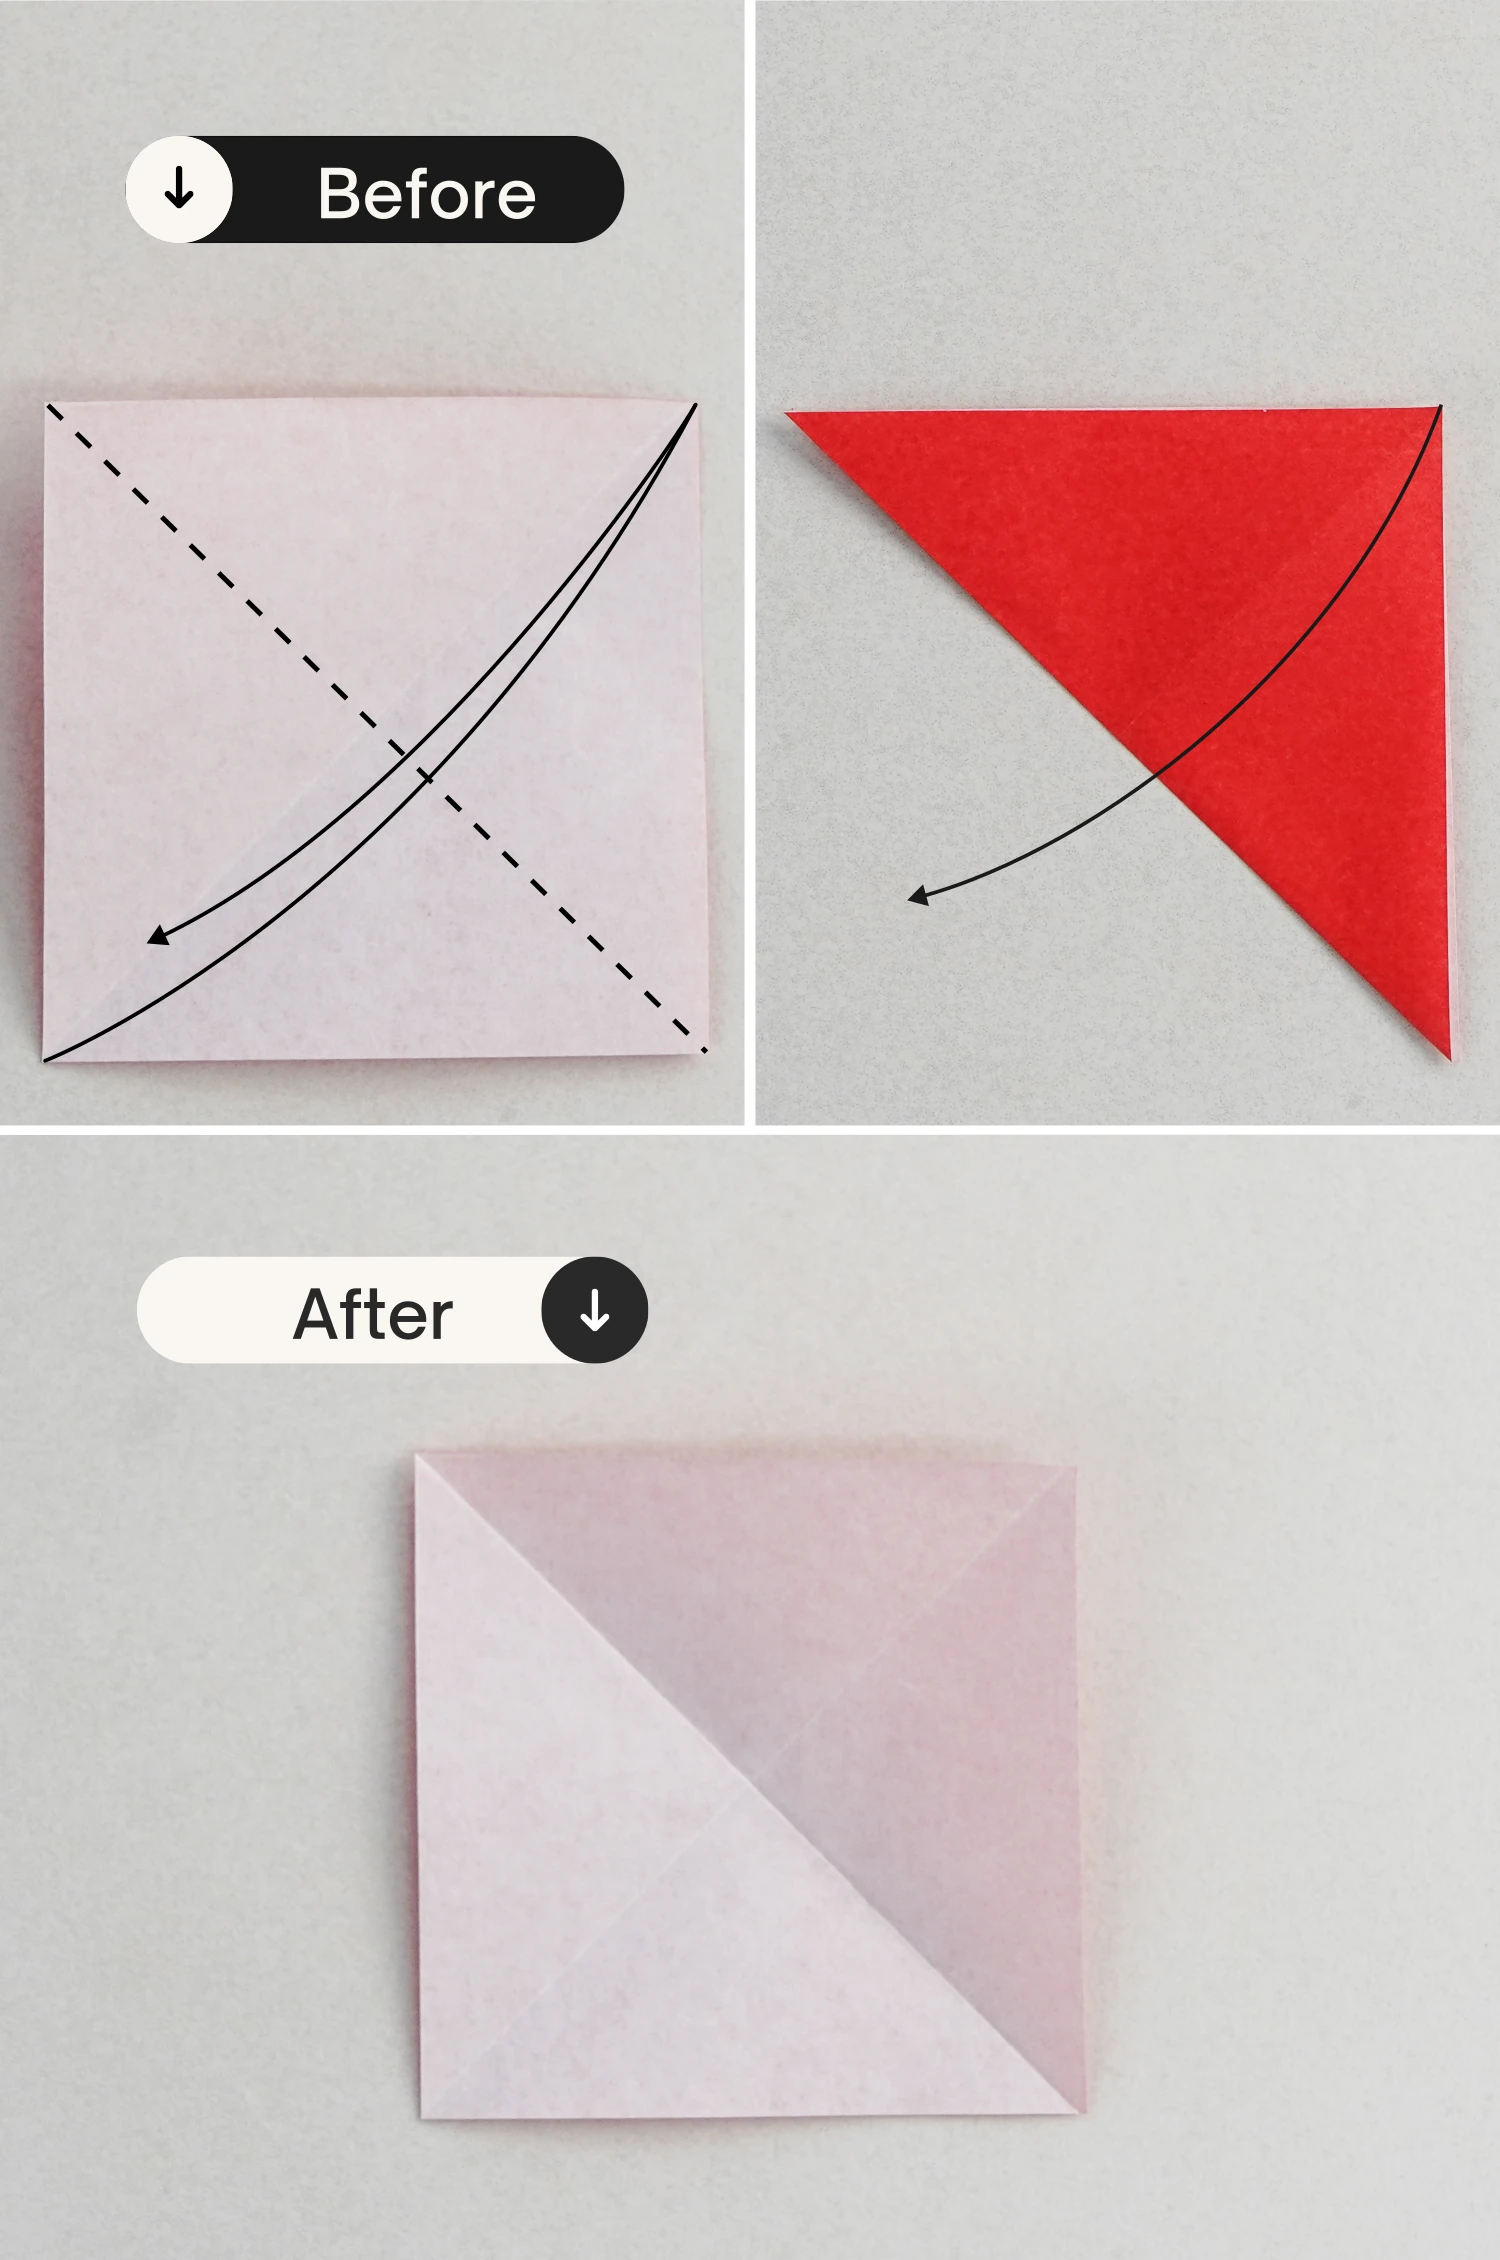
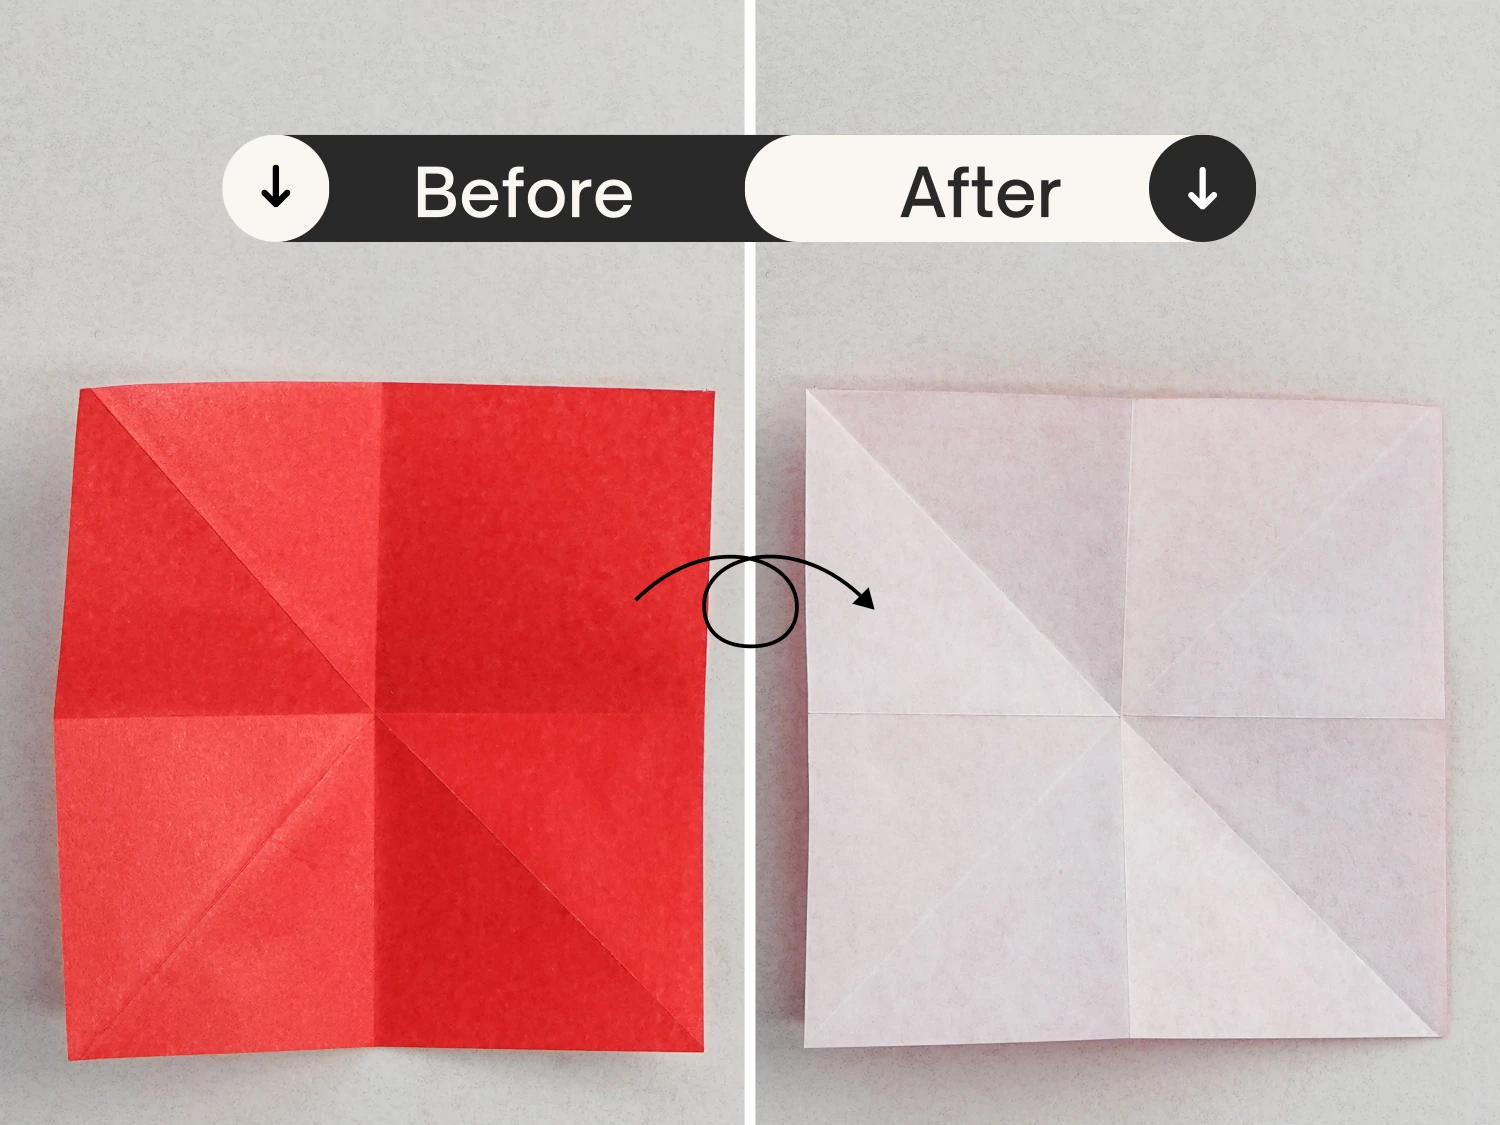
Start with the white side of the red paper facing up, fold it in half diagonally, crease it well then unfold.
Step 2
Fold it in half diagonally from the other side, crease it well then unfold.
Step 3
Flip it over.
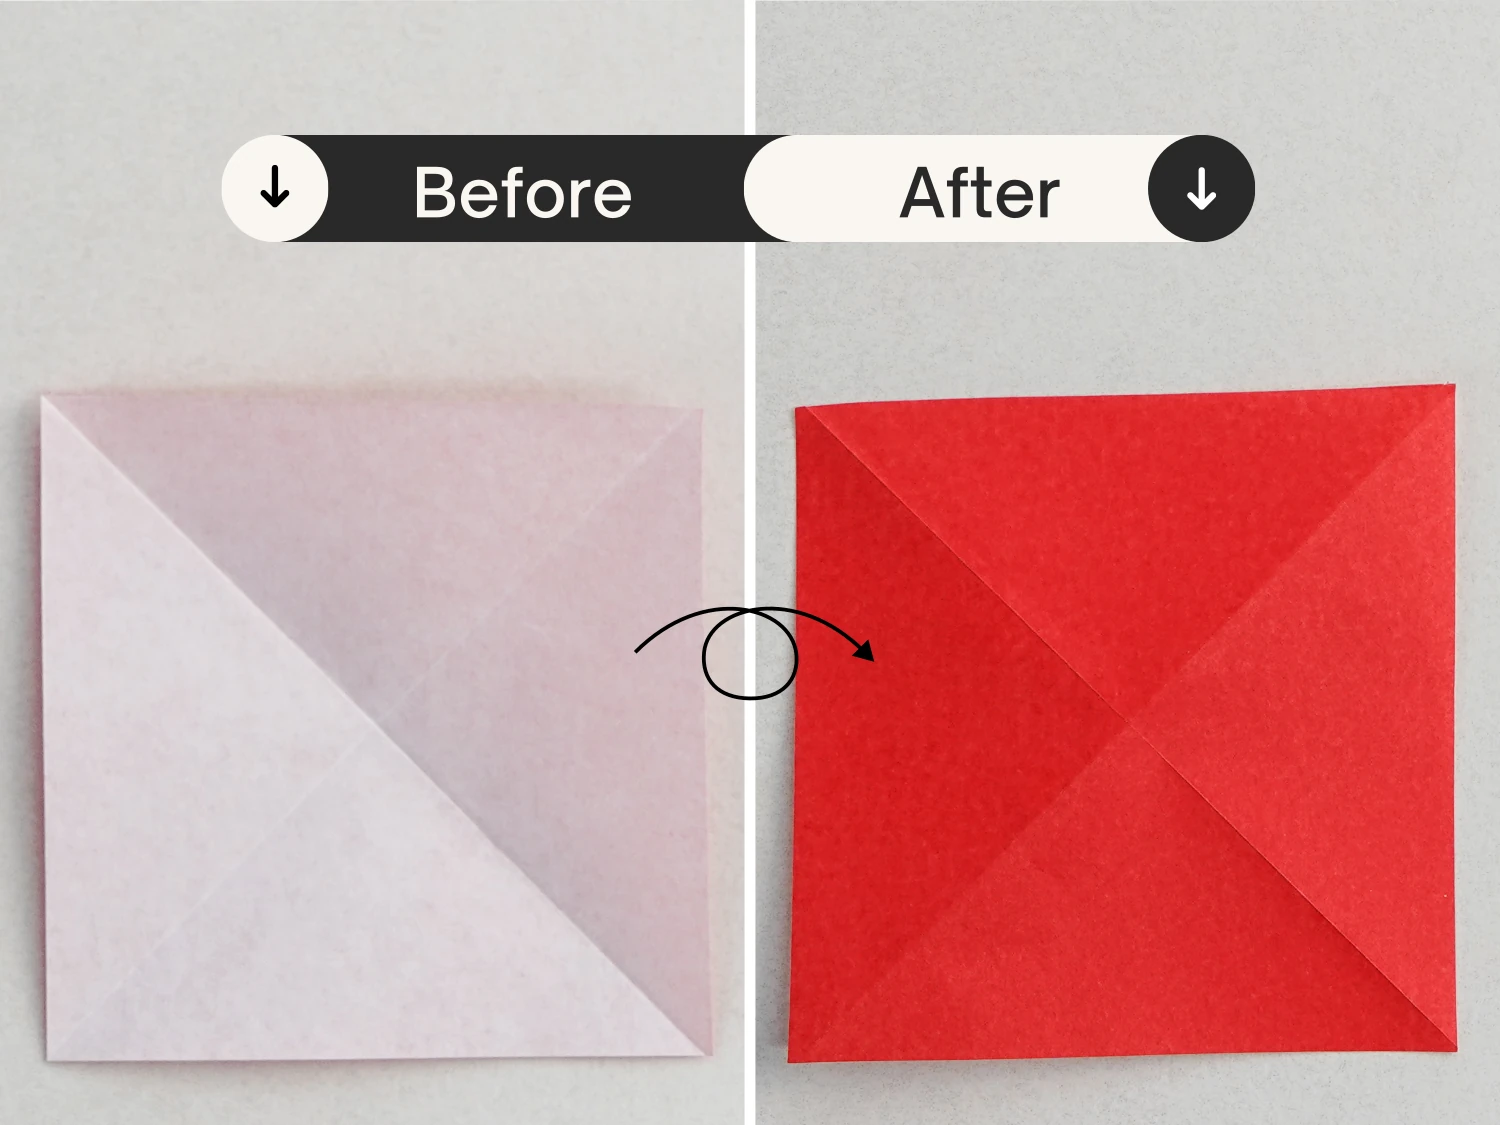
Step 4
Fold it in half horizontally, crease it well then unfold.
Step 5
Fold it in half vertically, crease it well then unfold.
Step 6
Flip it over.
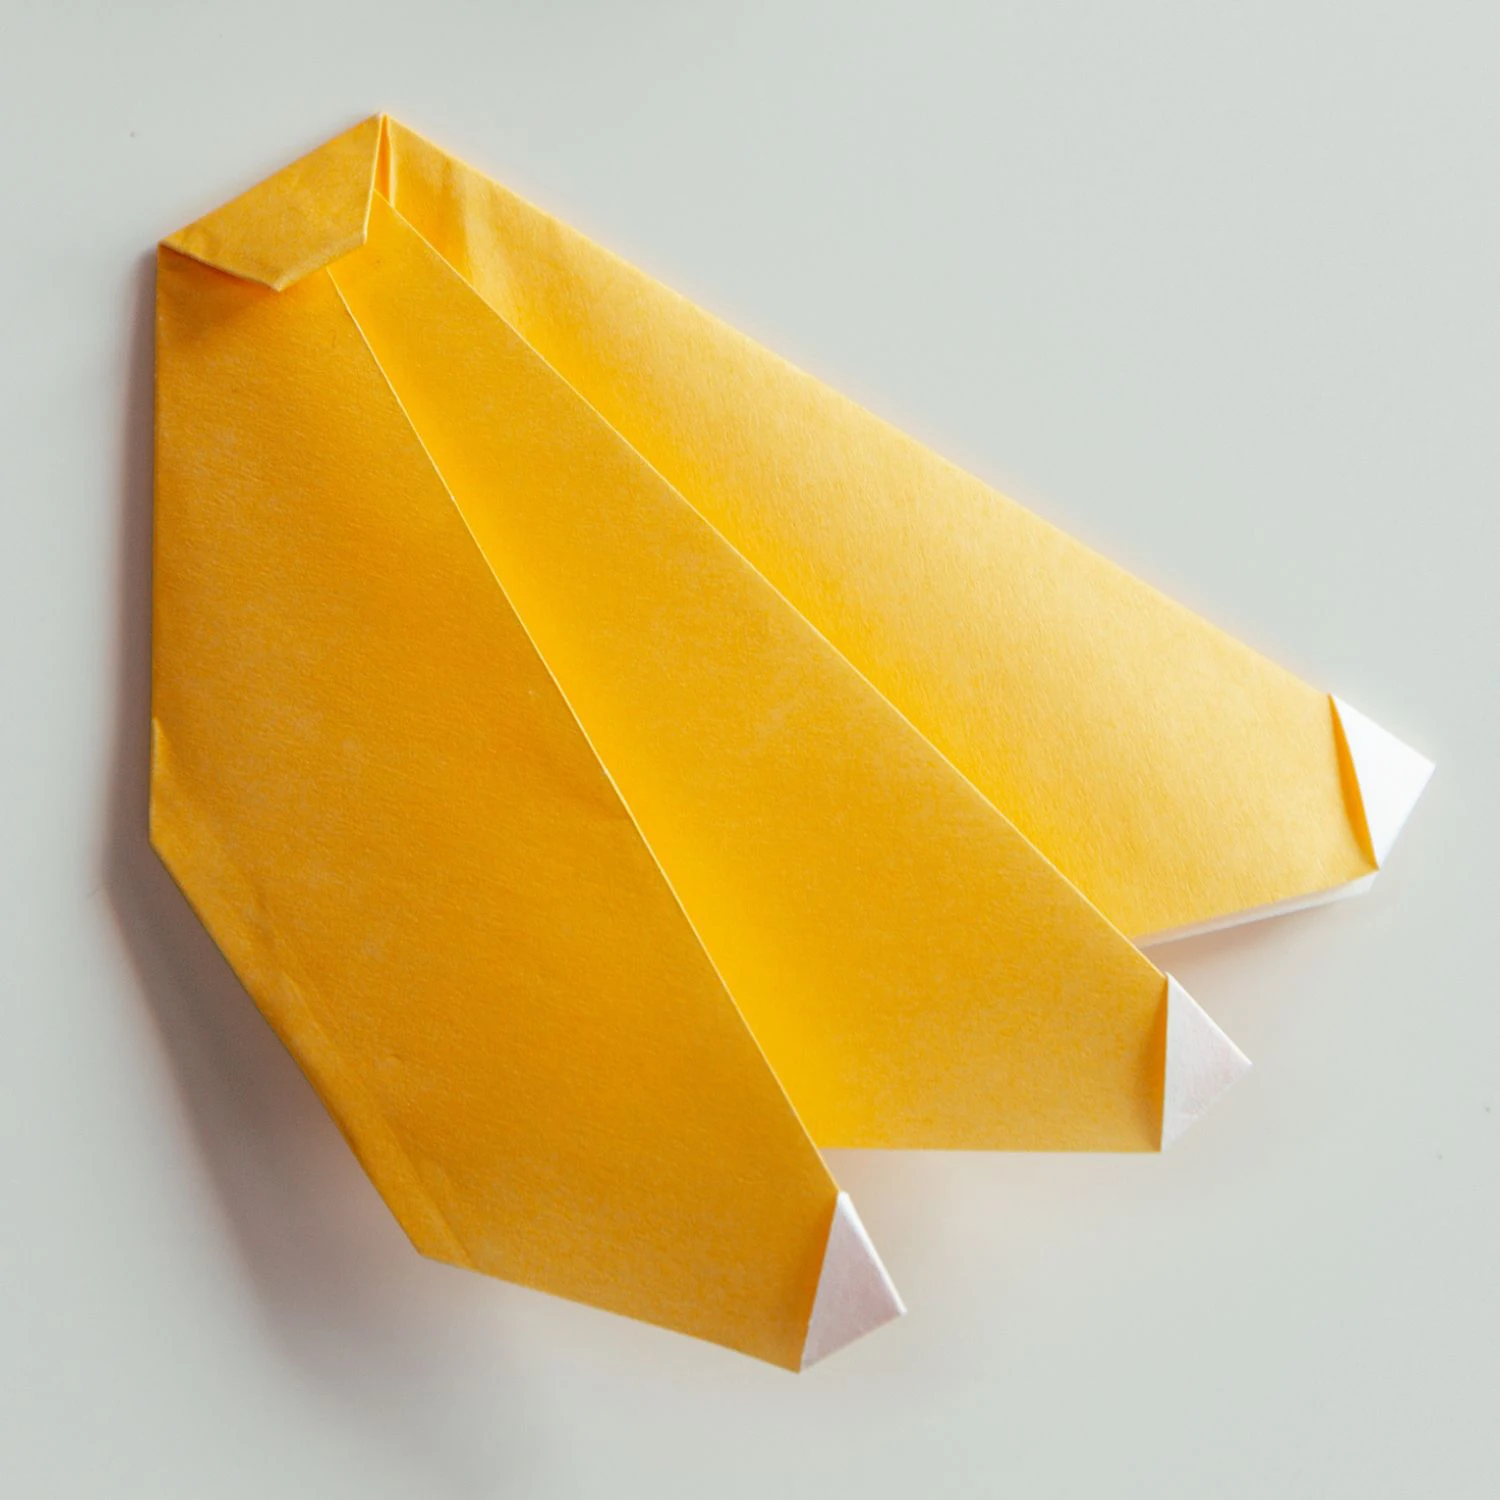
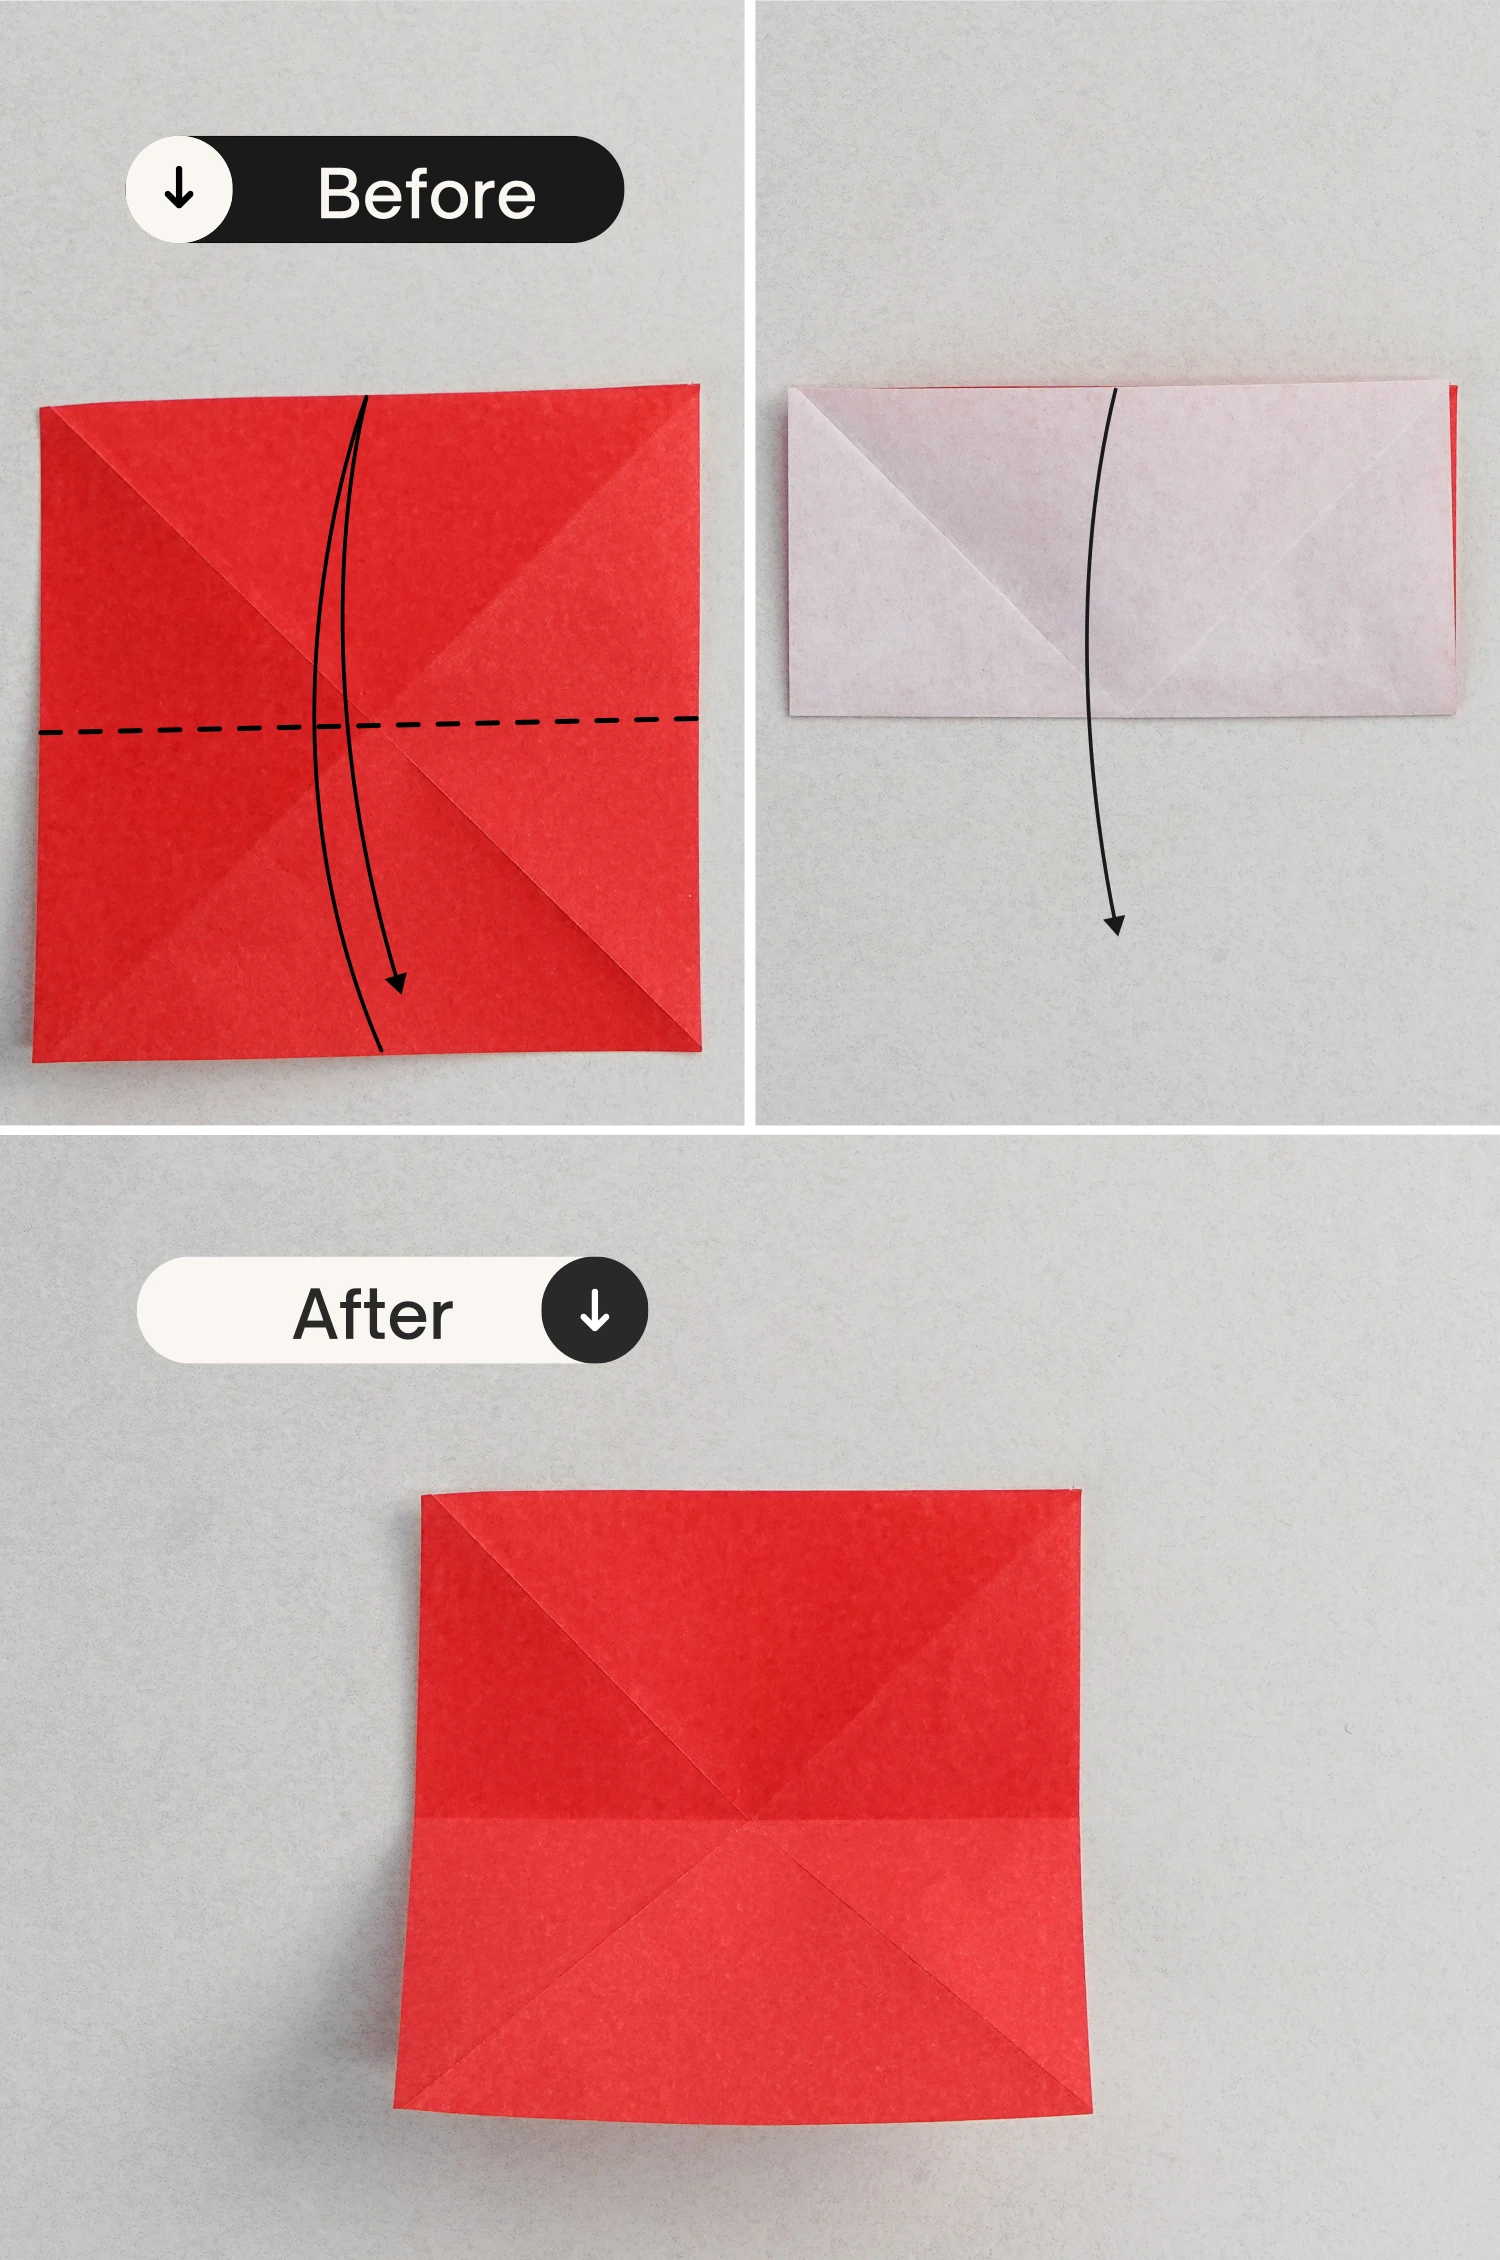
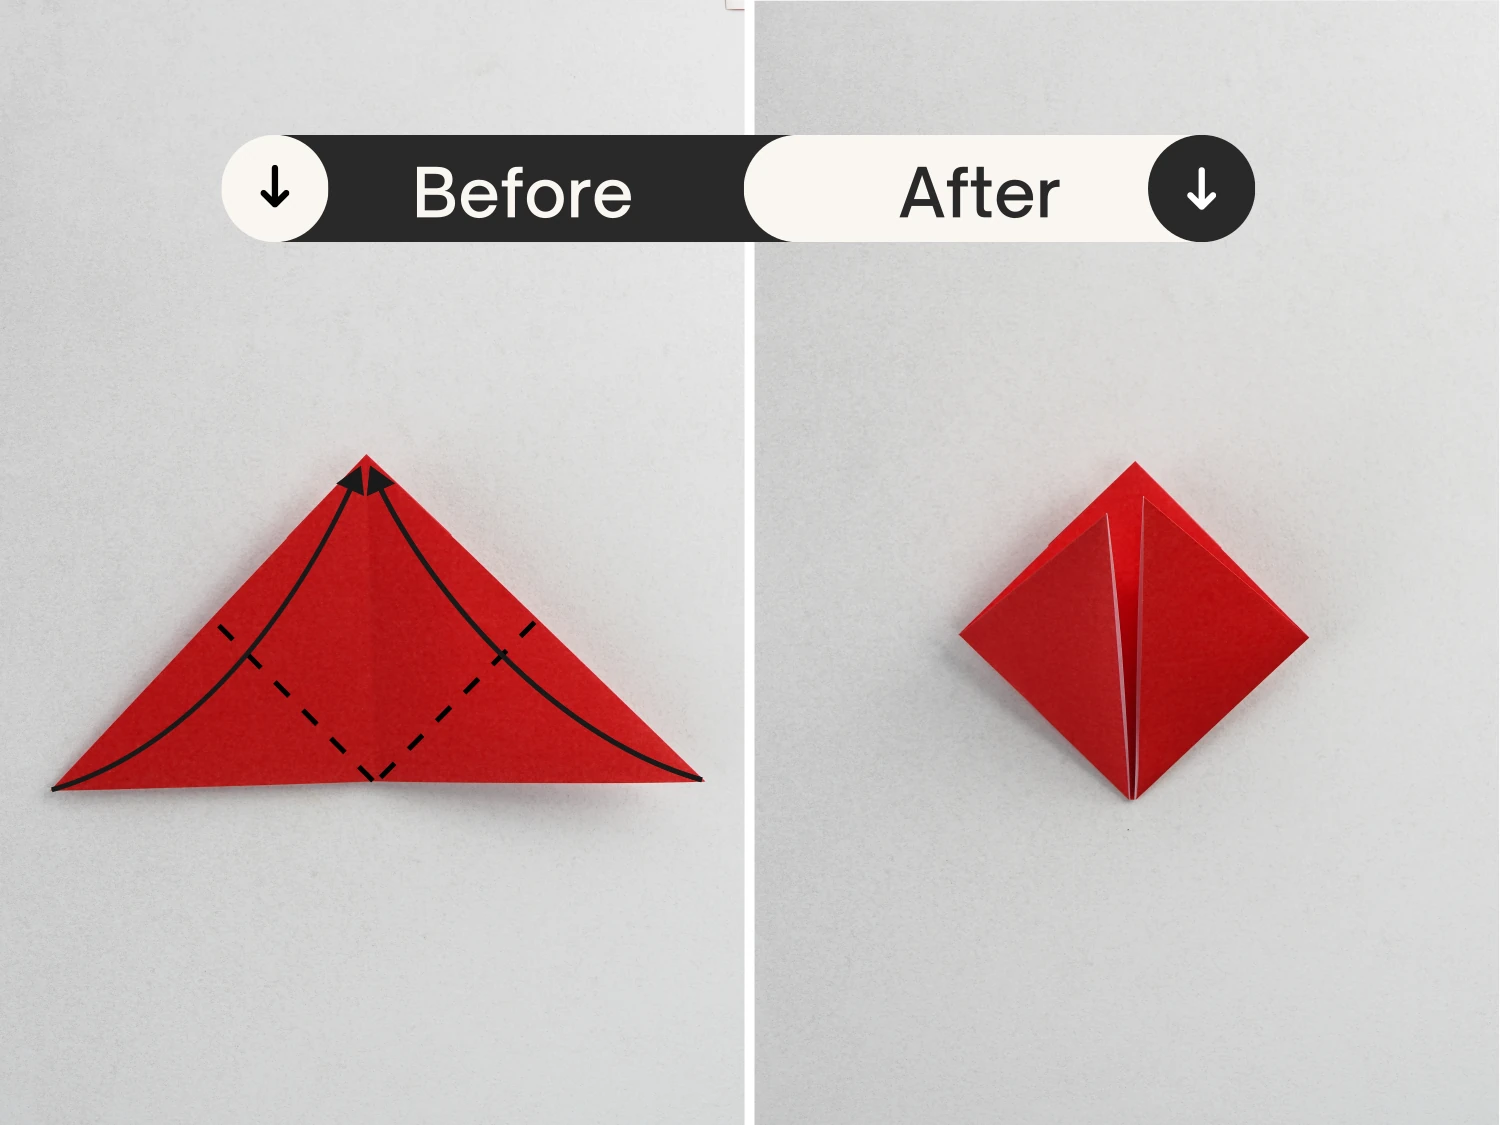
Step 7
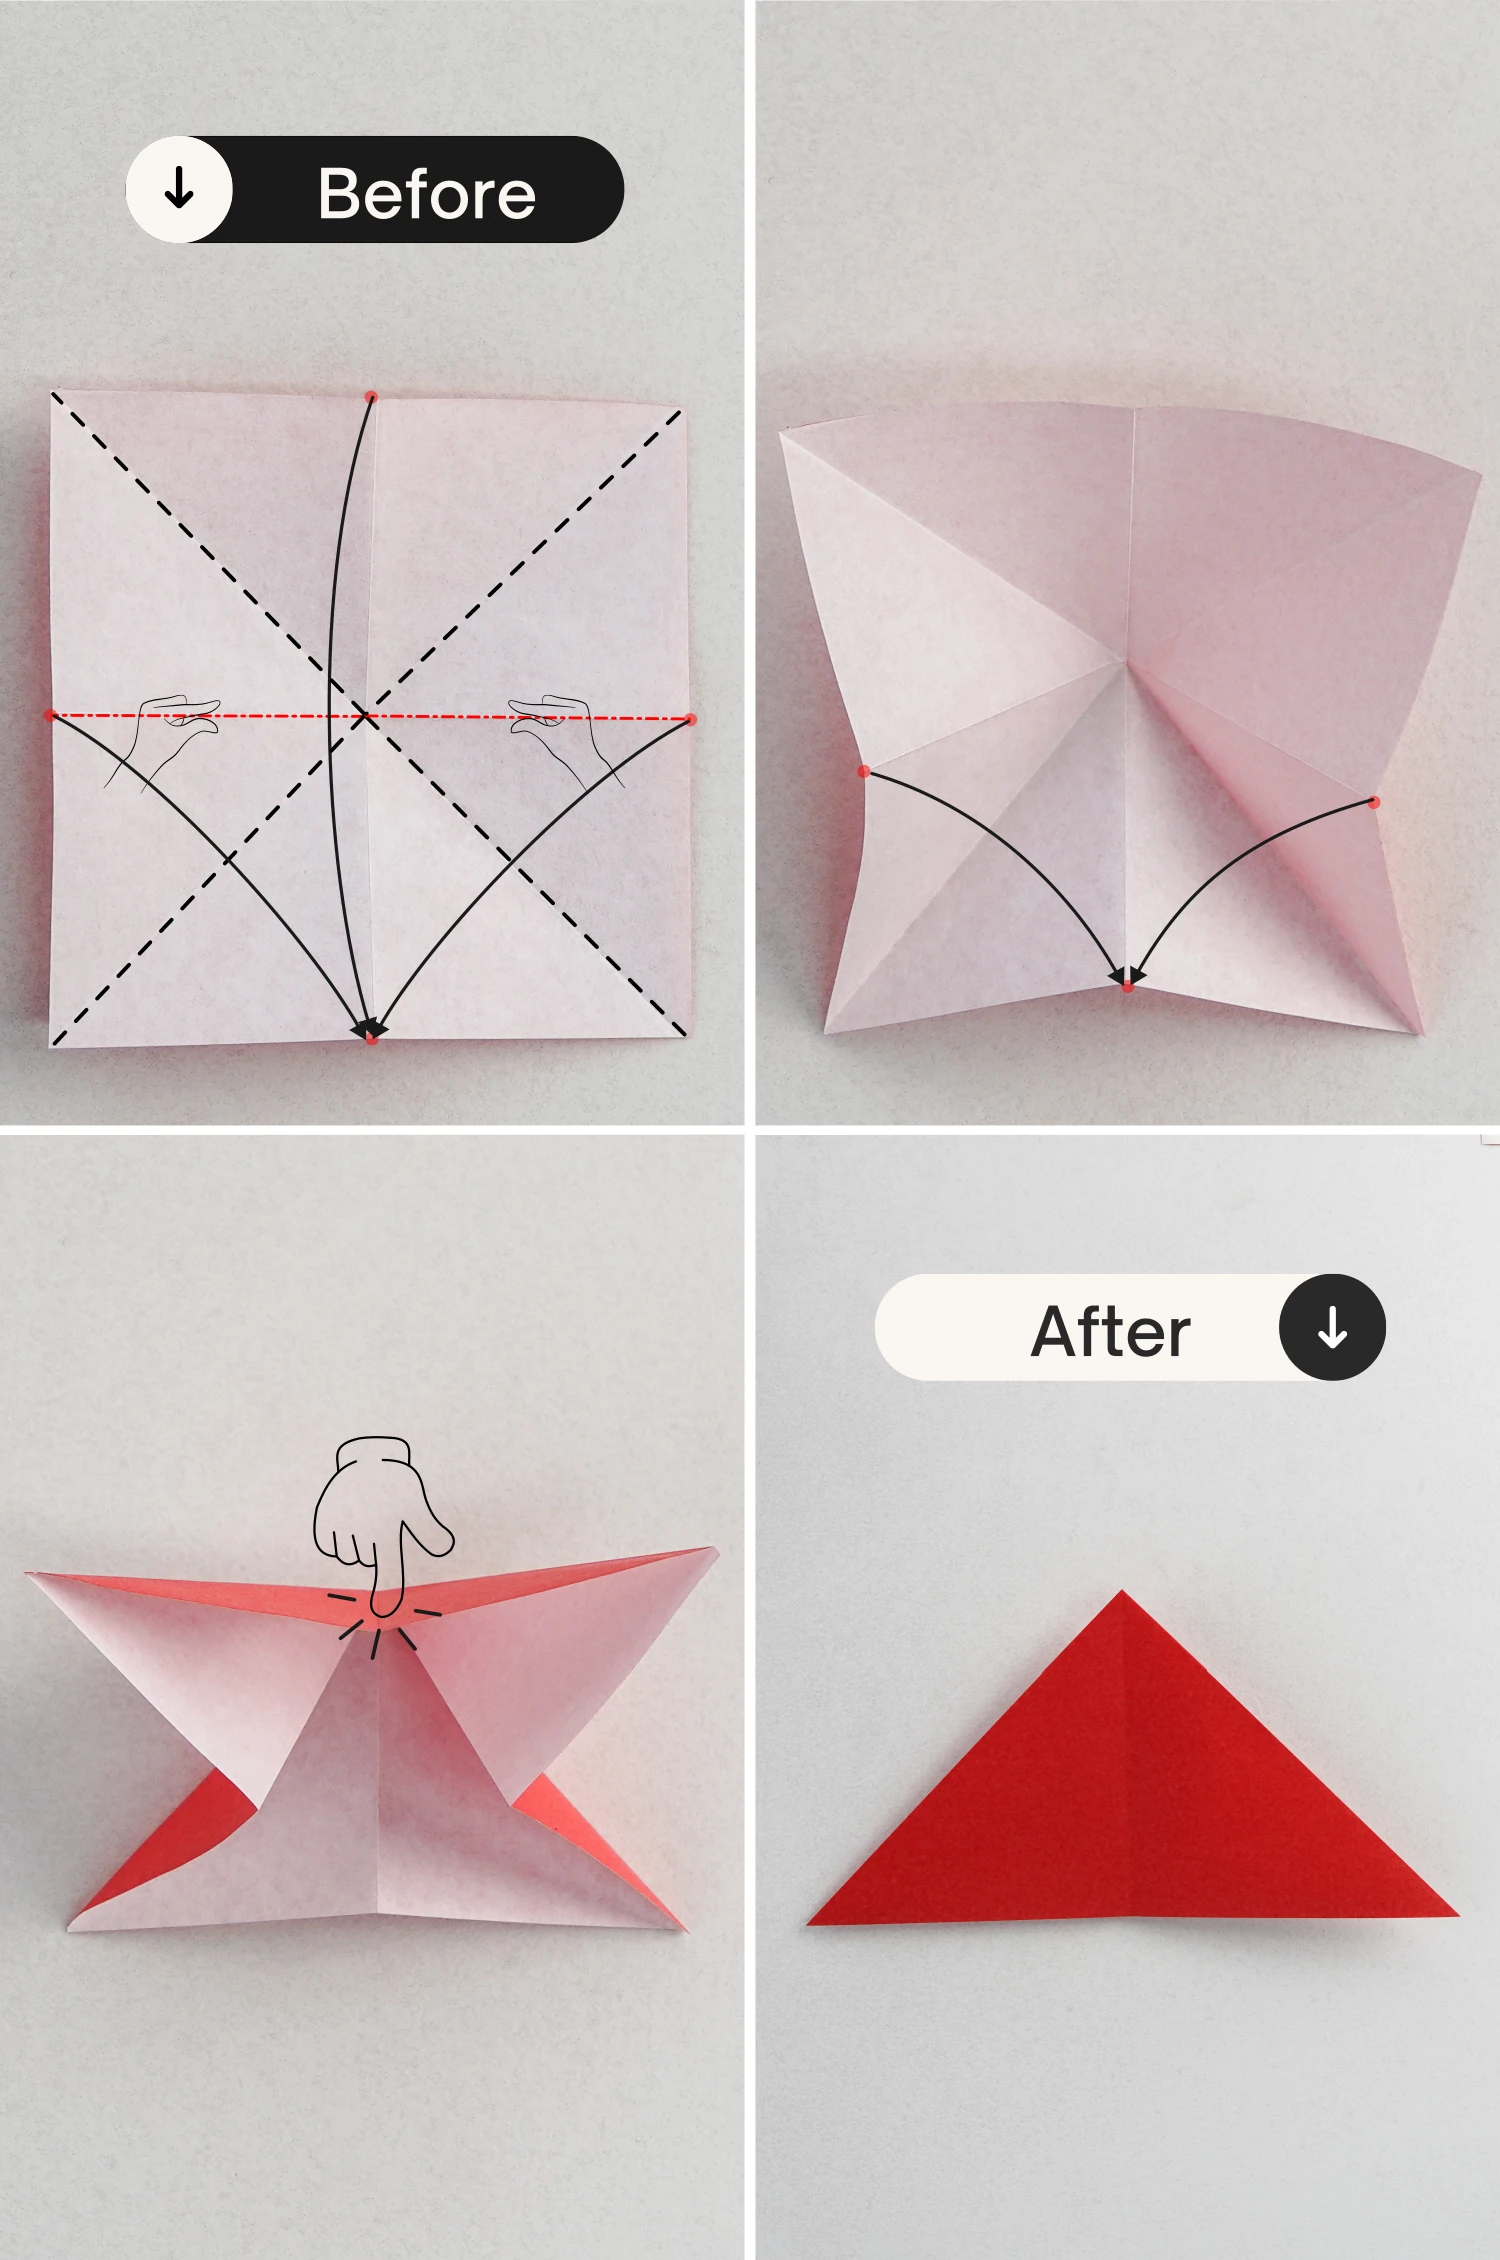
Now, we are going to make a water bomb fold. Use your both hands to press the two center points on the right and left edges. Then push it down to make the center points of the three edges meet the center point of the bottom edge.
Finally, flatten the fold, creating a triangle.
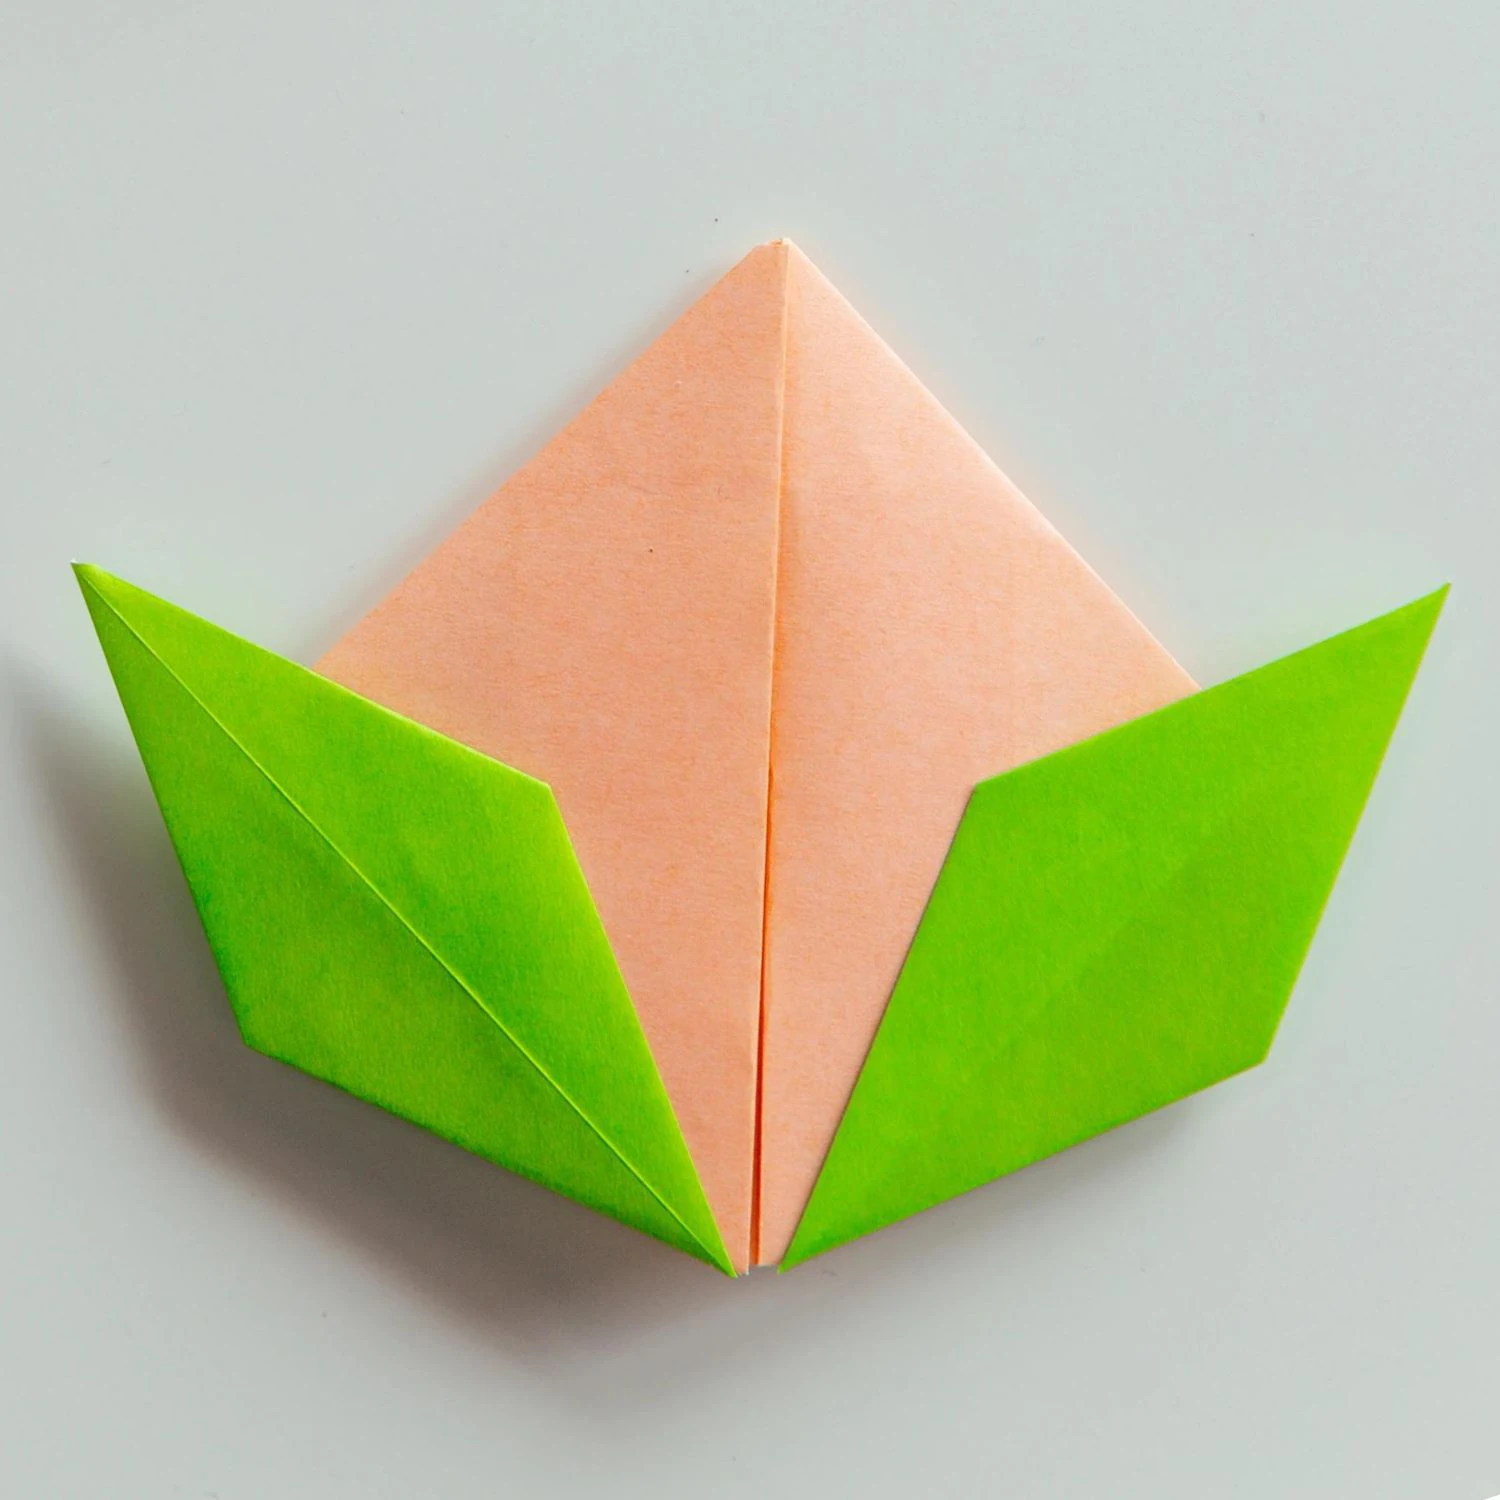
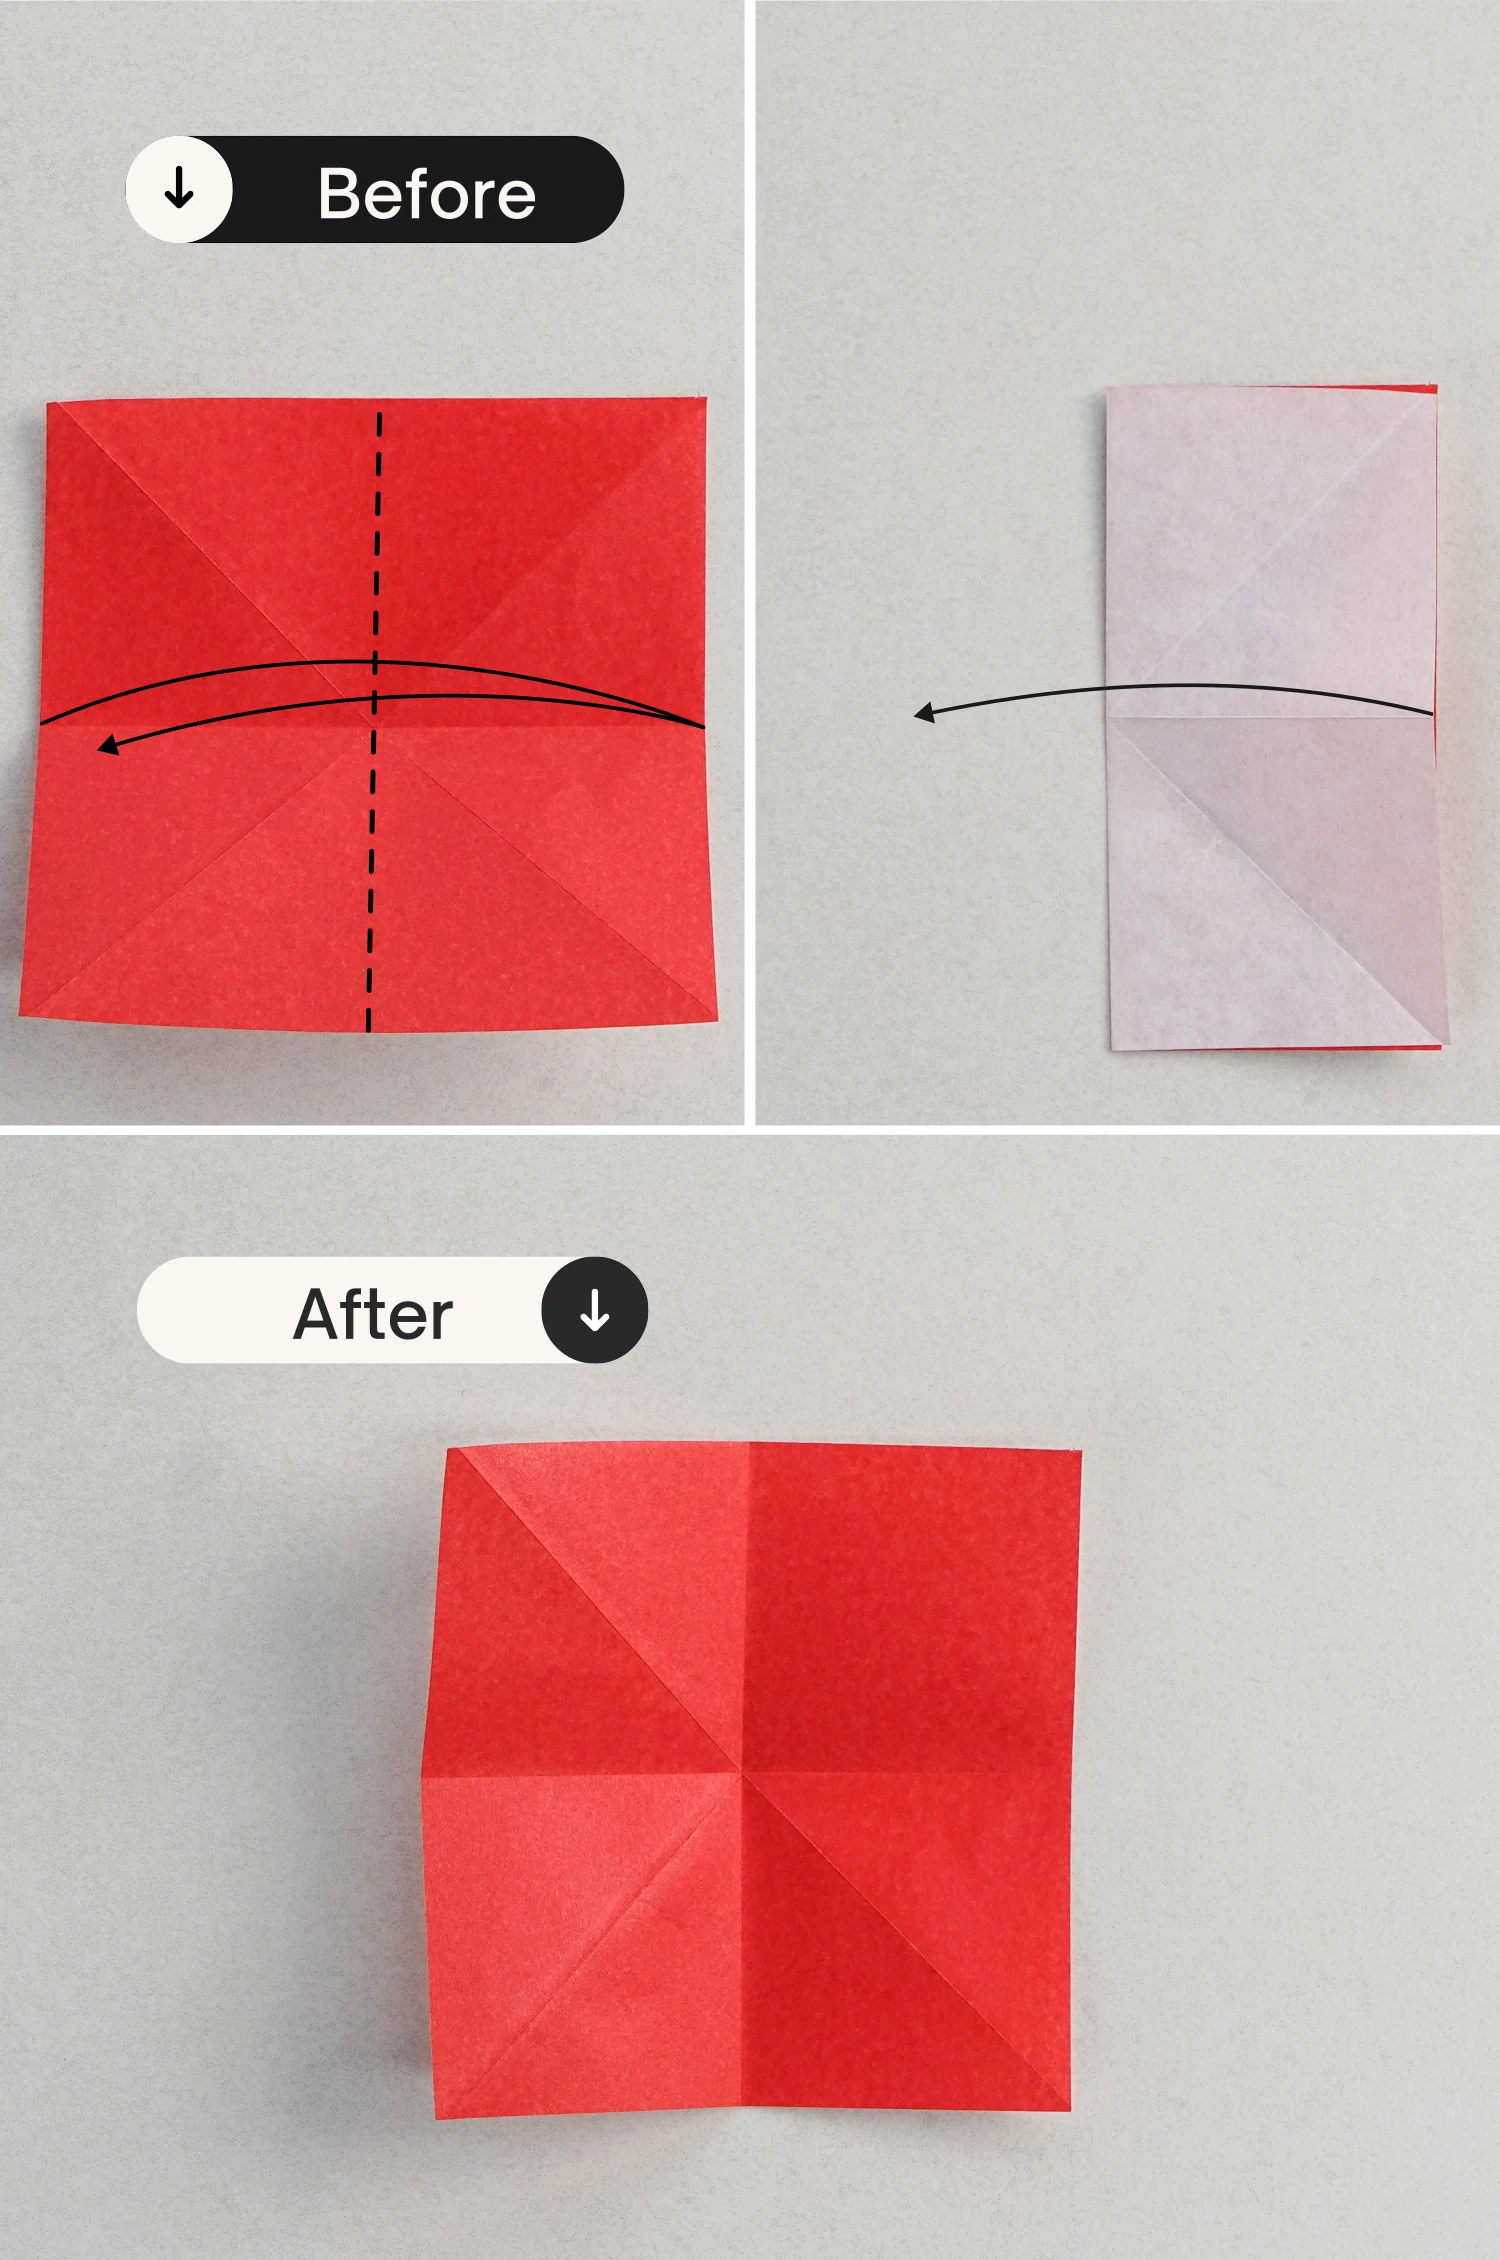
Step 8
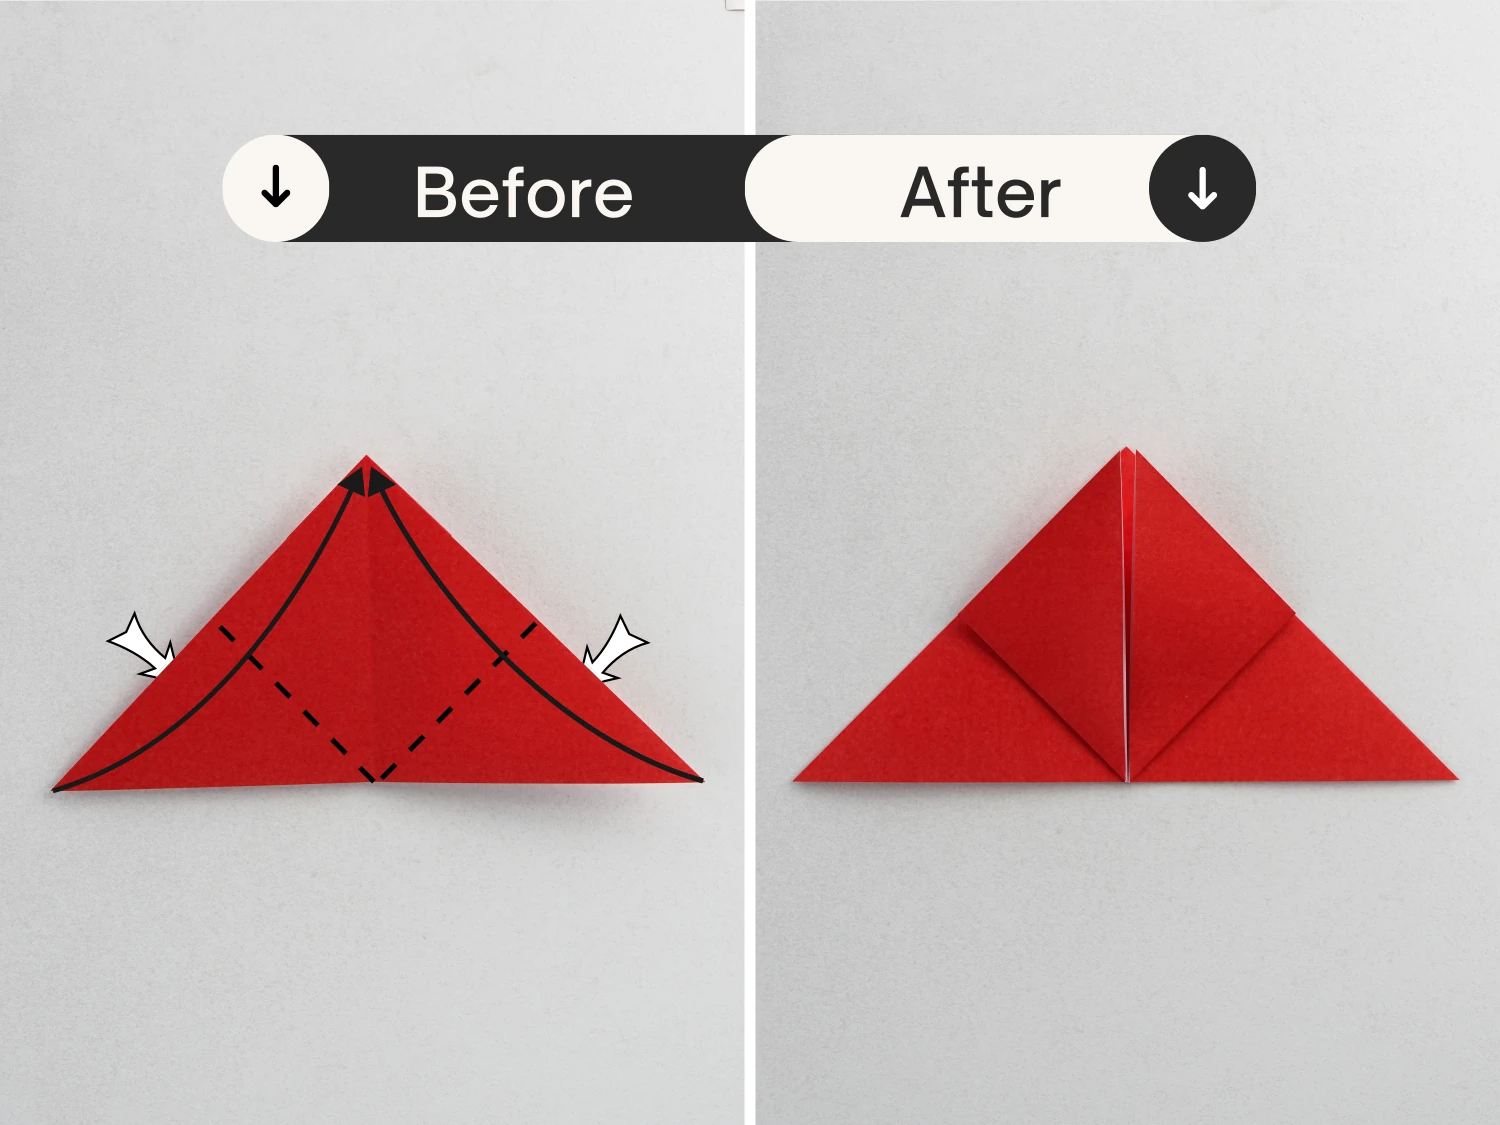
Take the left and right corners of the top layer, fold them up diagonally to meet the top corner.
Step 9
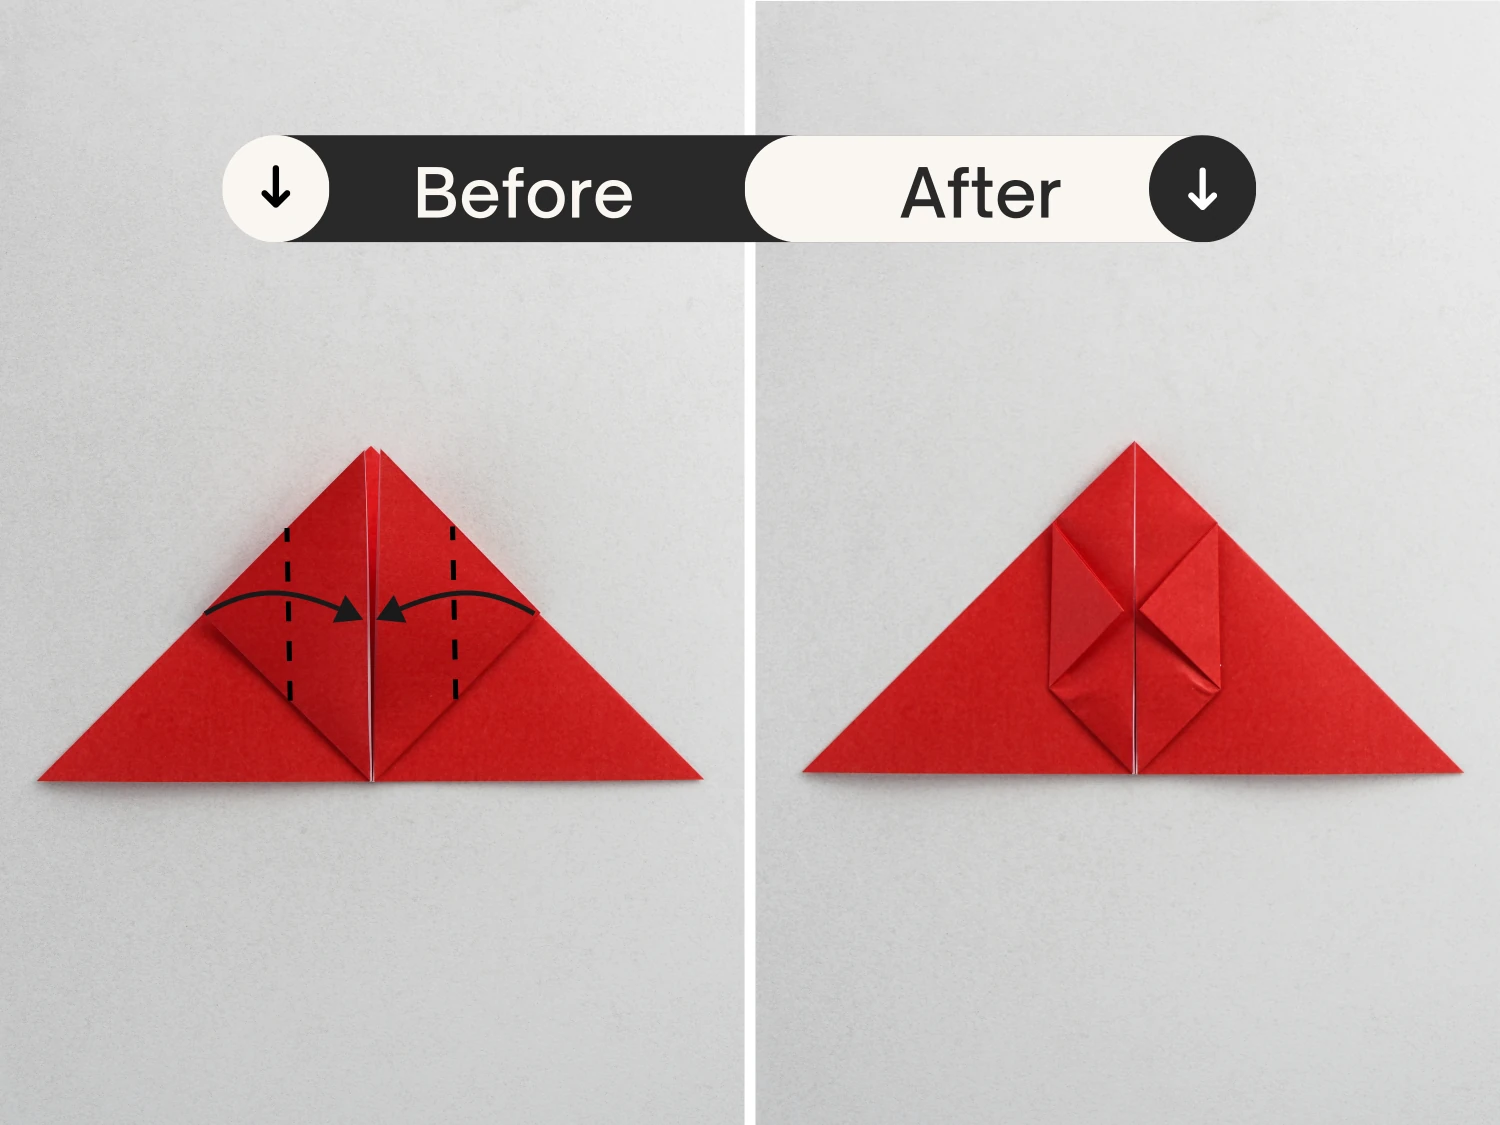
Fold the vertices of the two triangles towards the center, to meet the bottom edges.
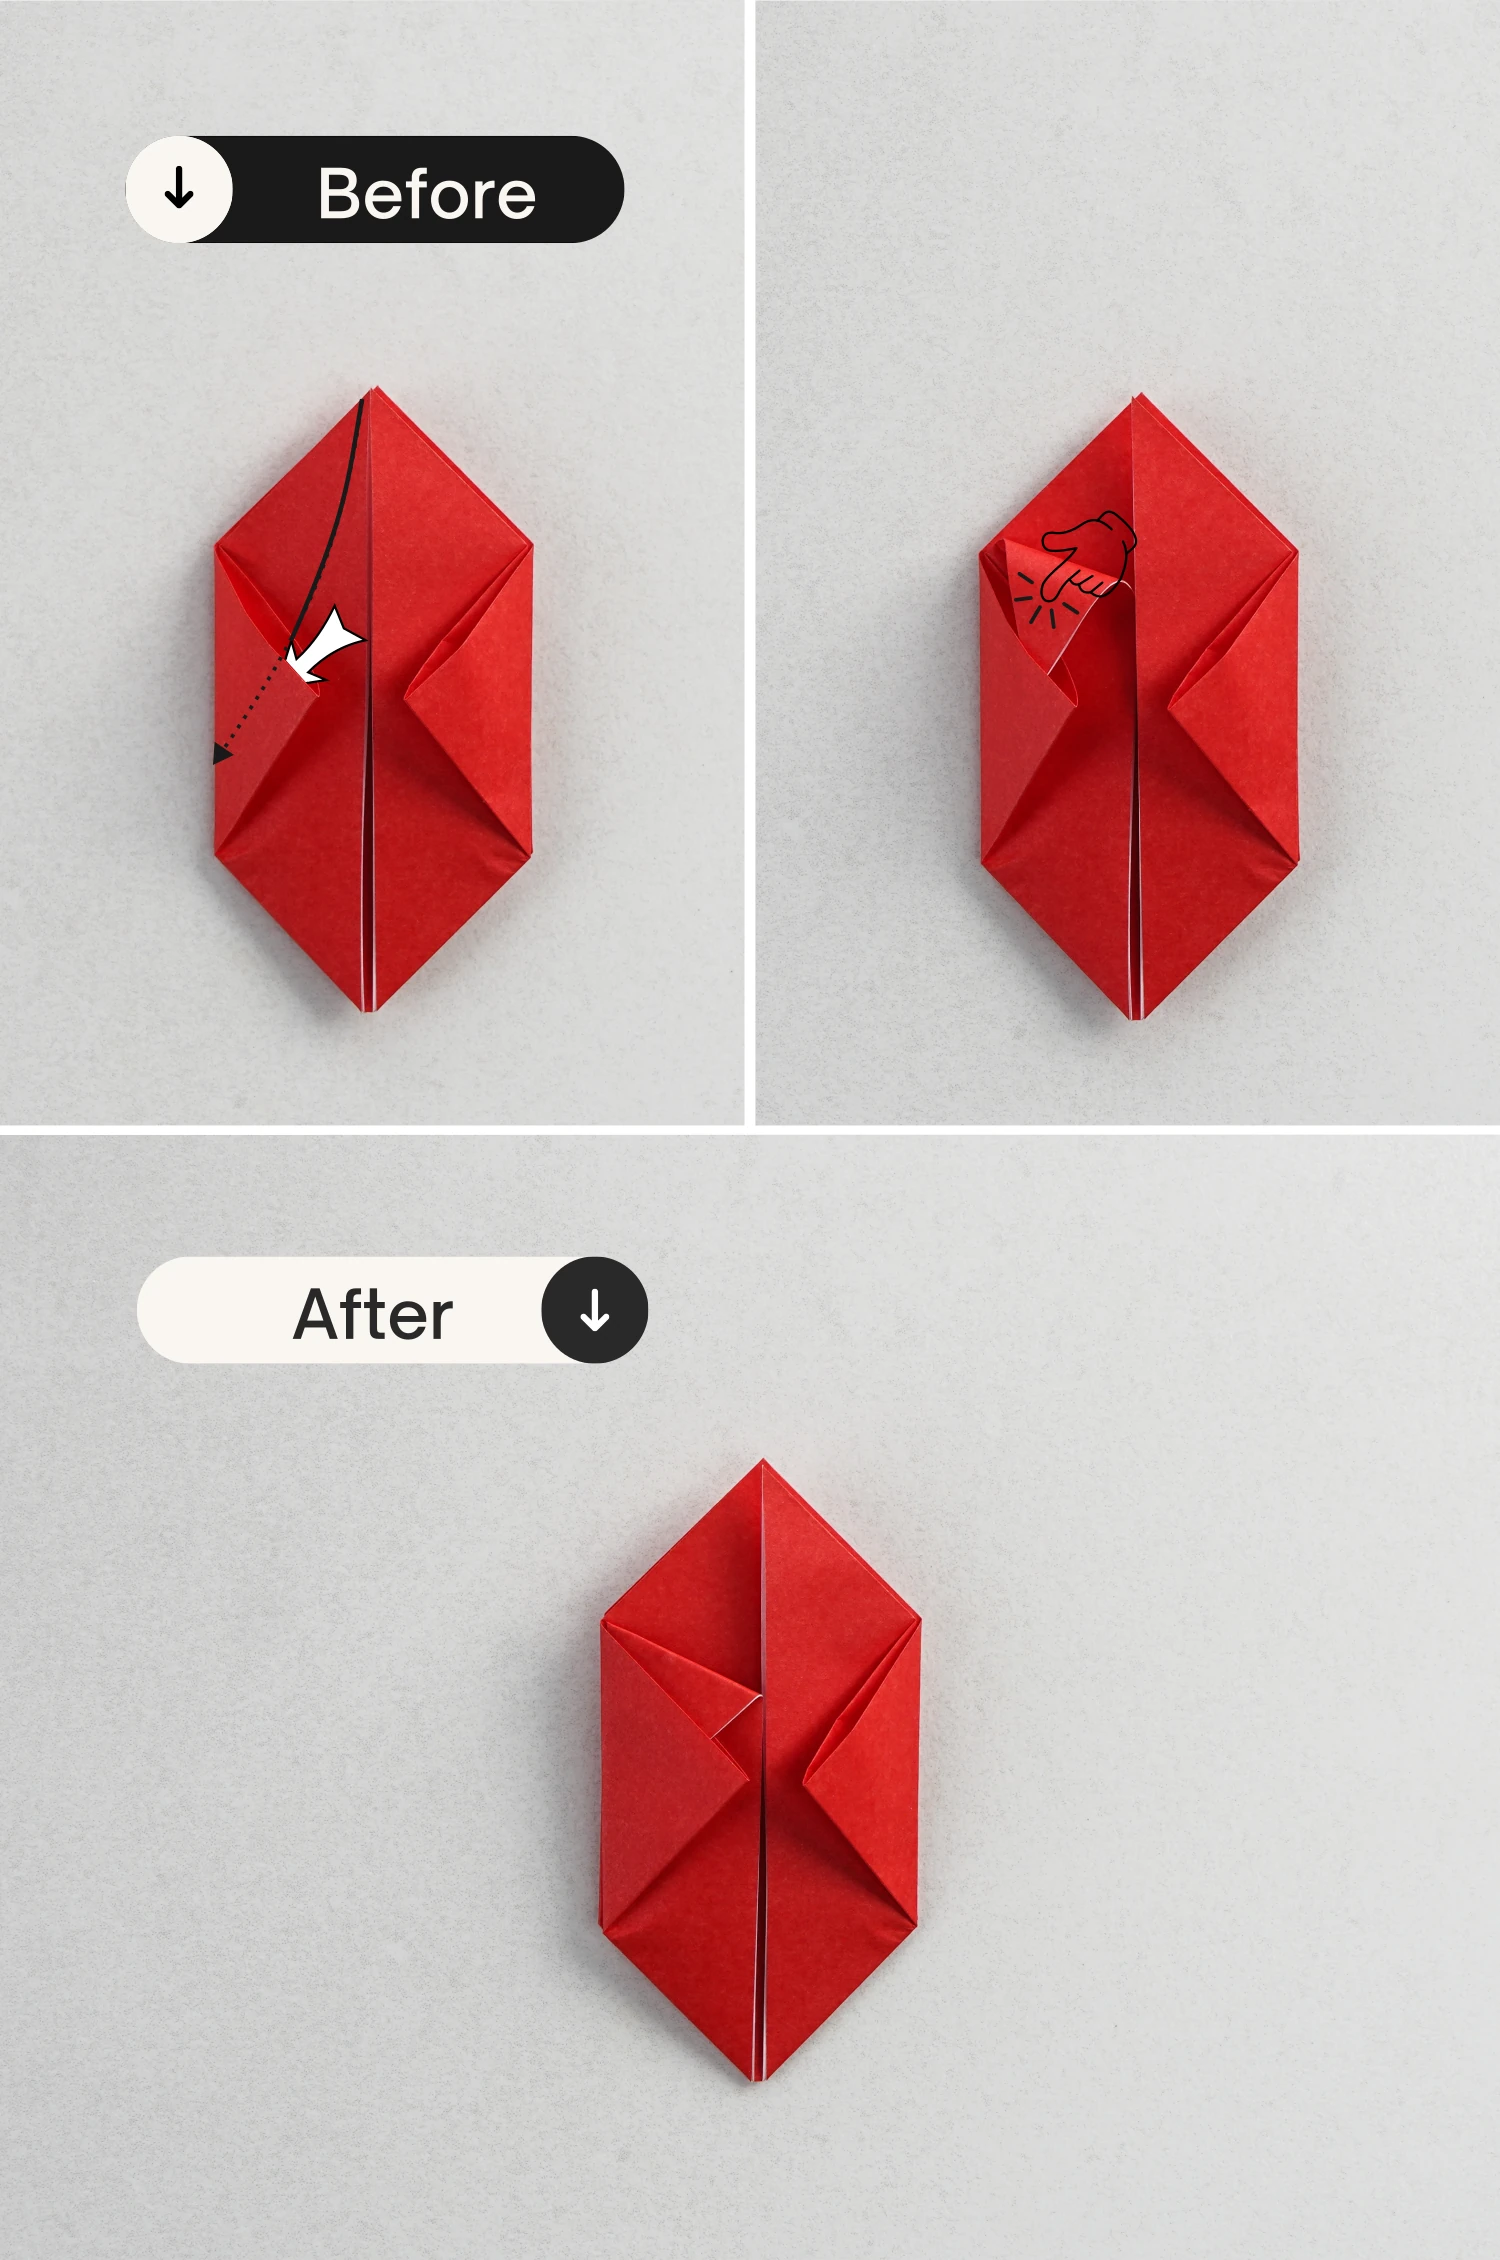
Step 10
Take the top left corner, and tuck it into the corner you just folded.
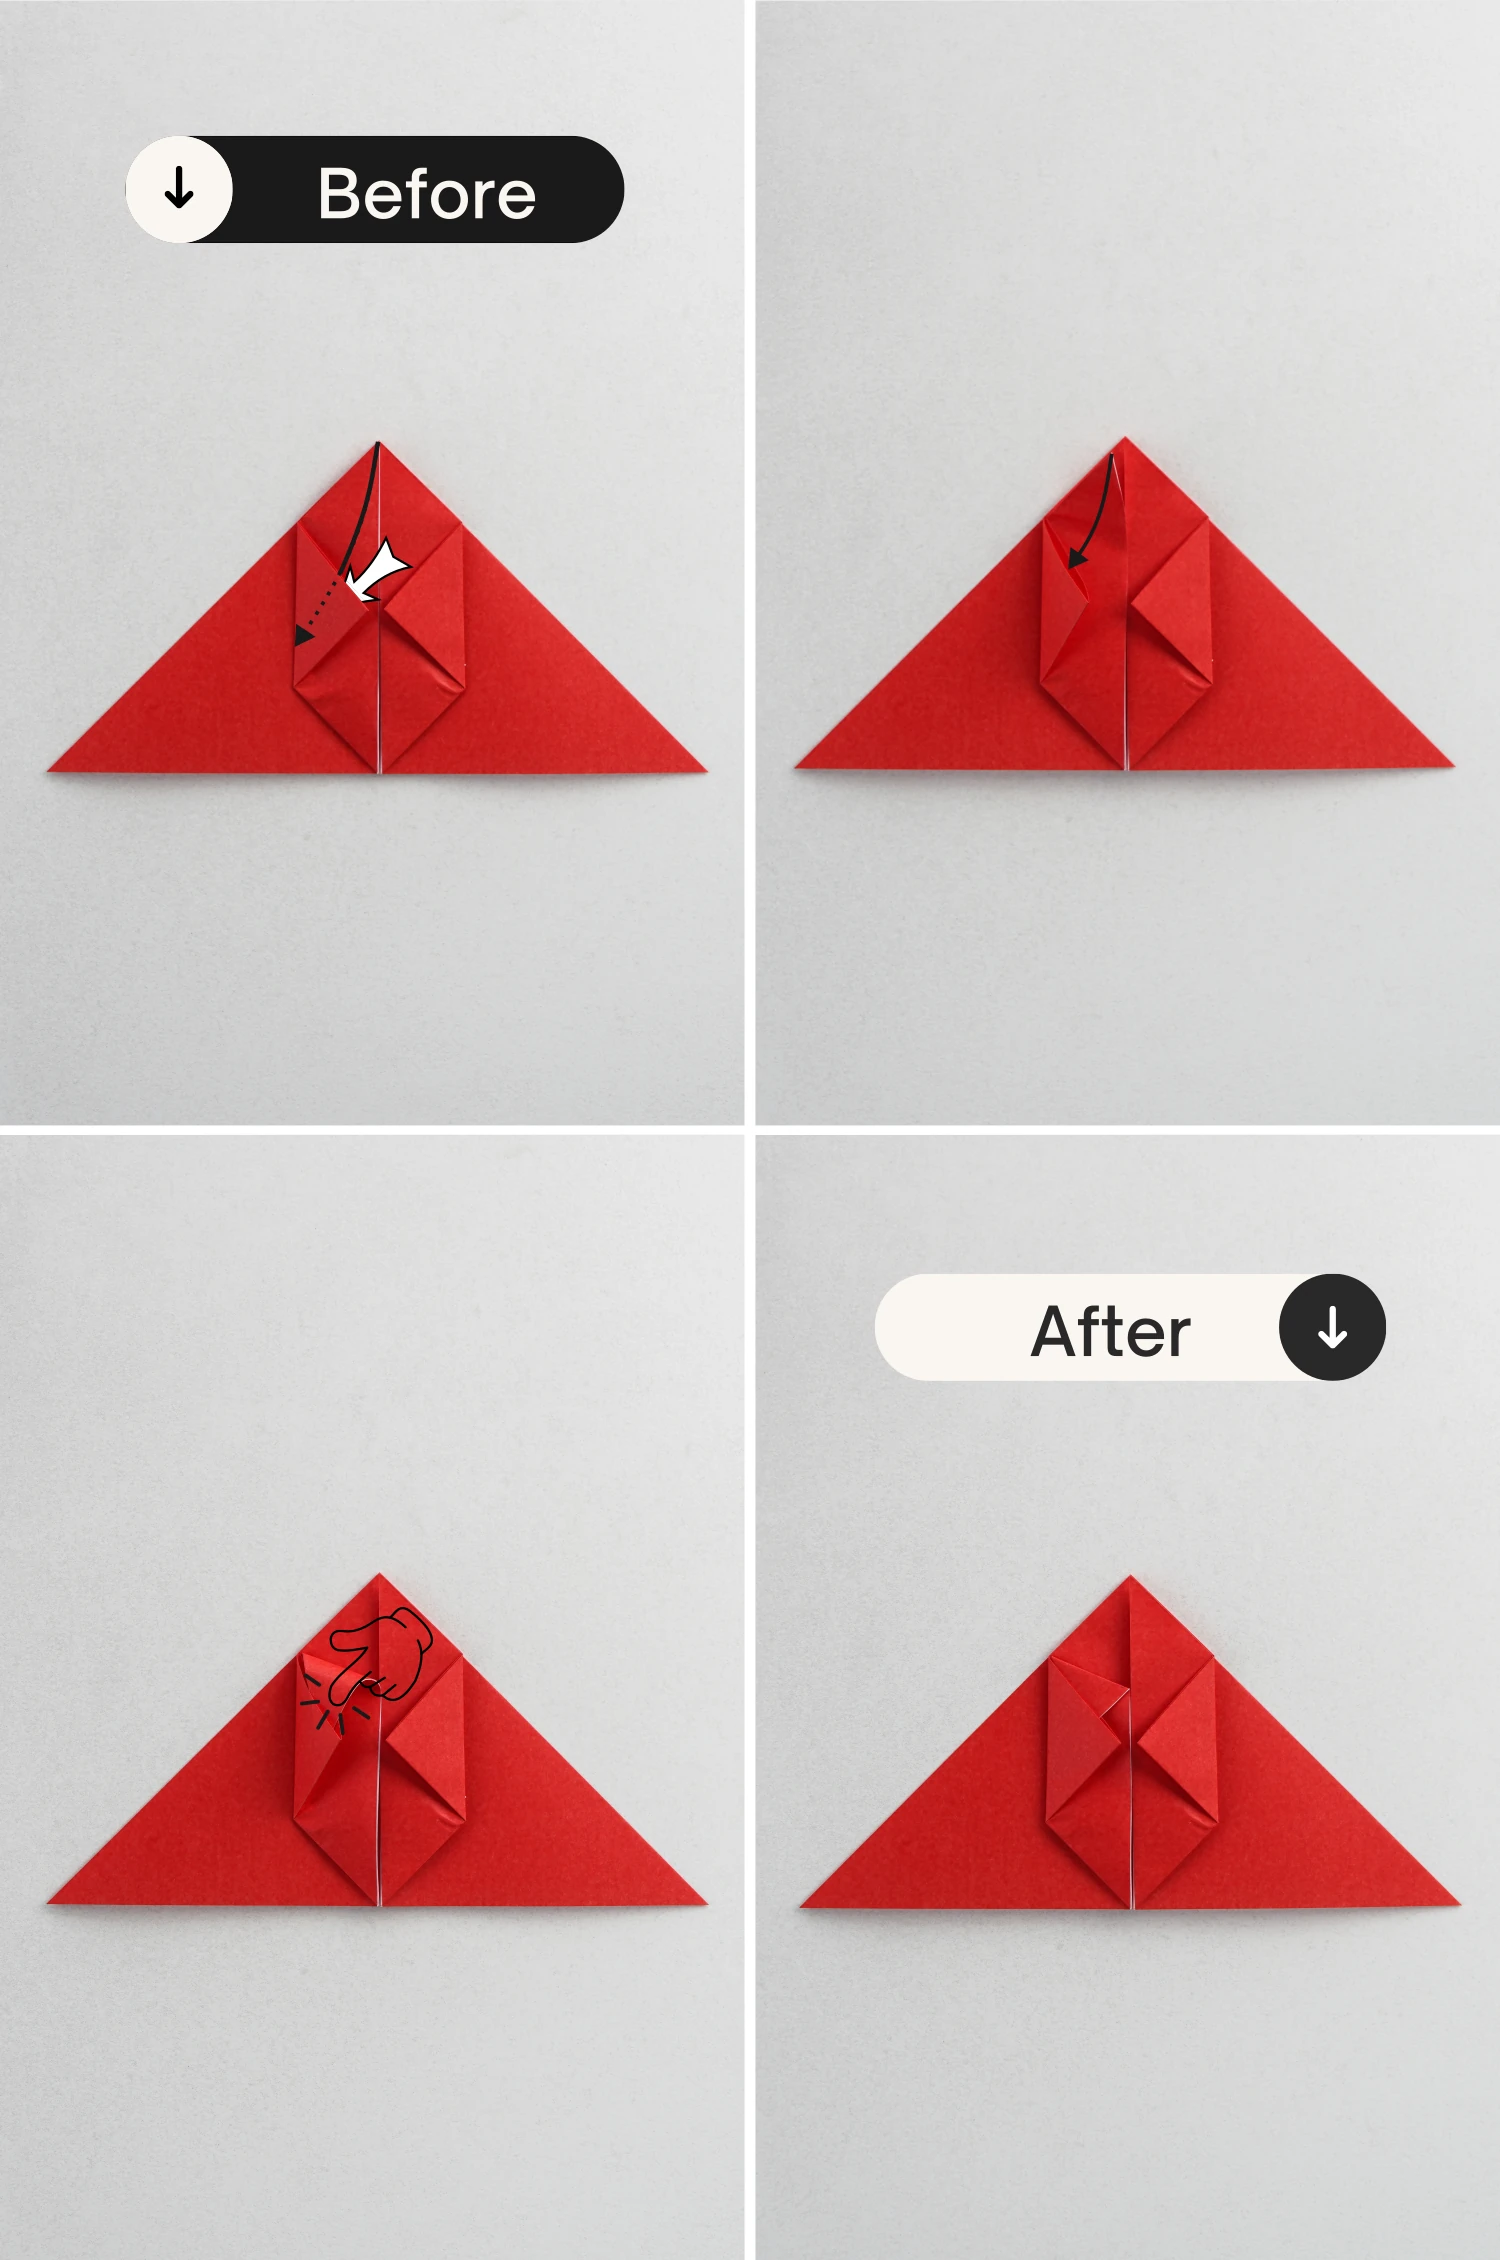
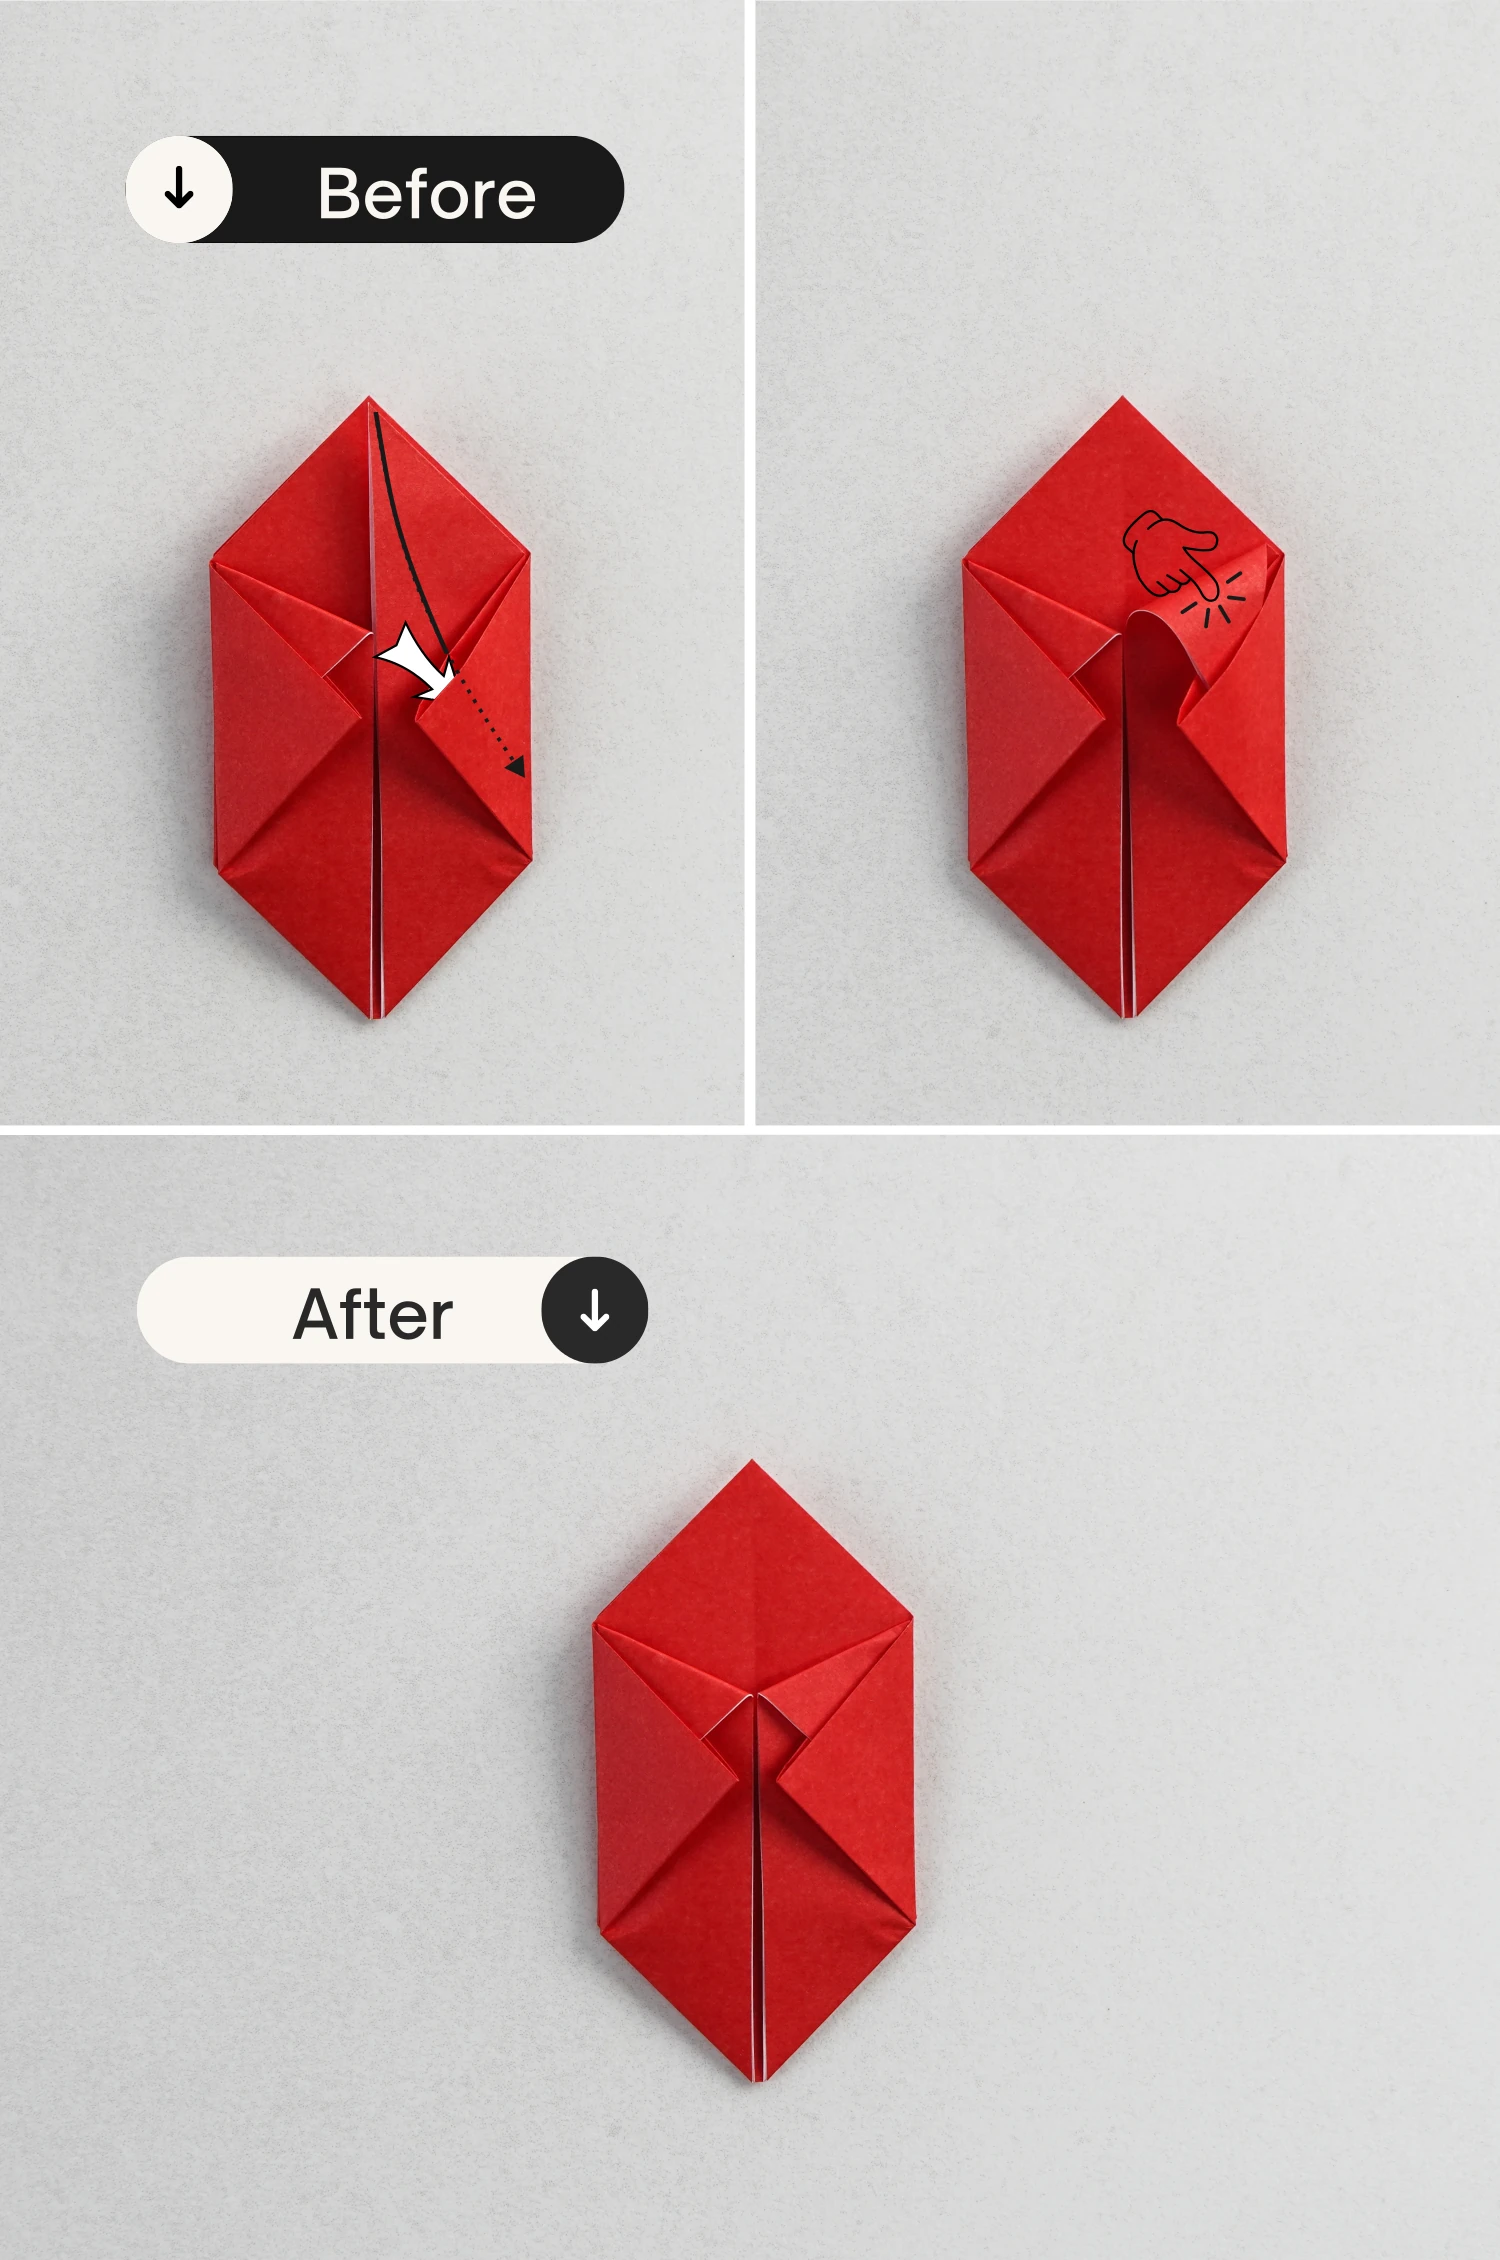
Step 11
Repeat this for the right side.
Step 12
Flip it over again.
Step 13
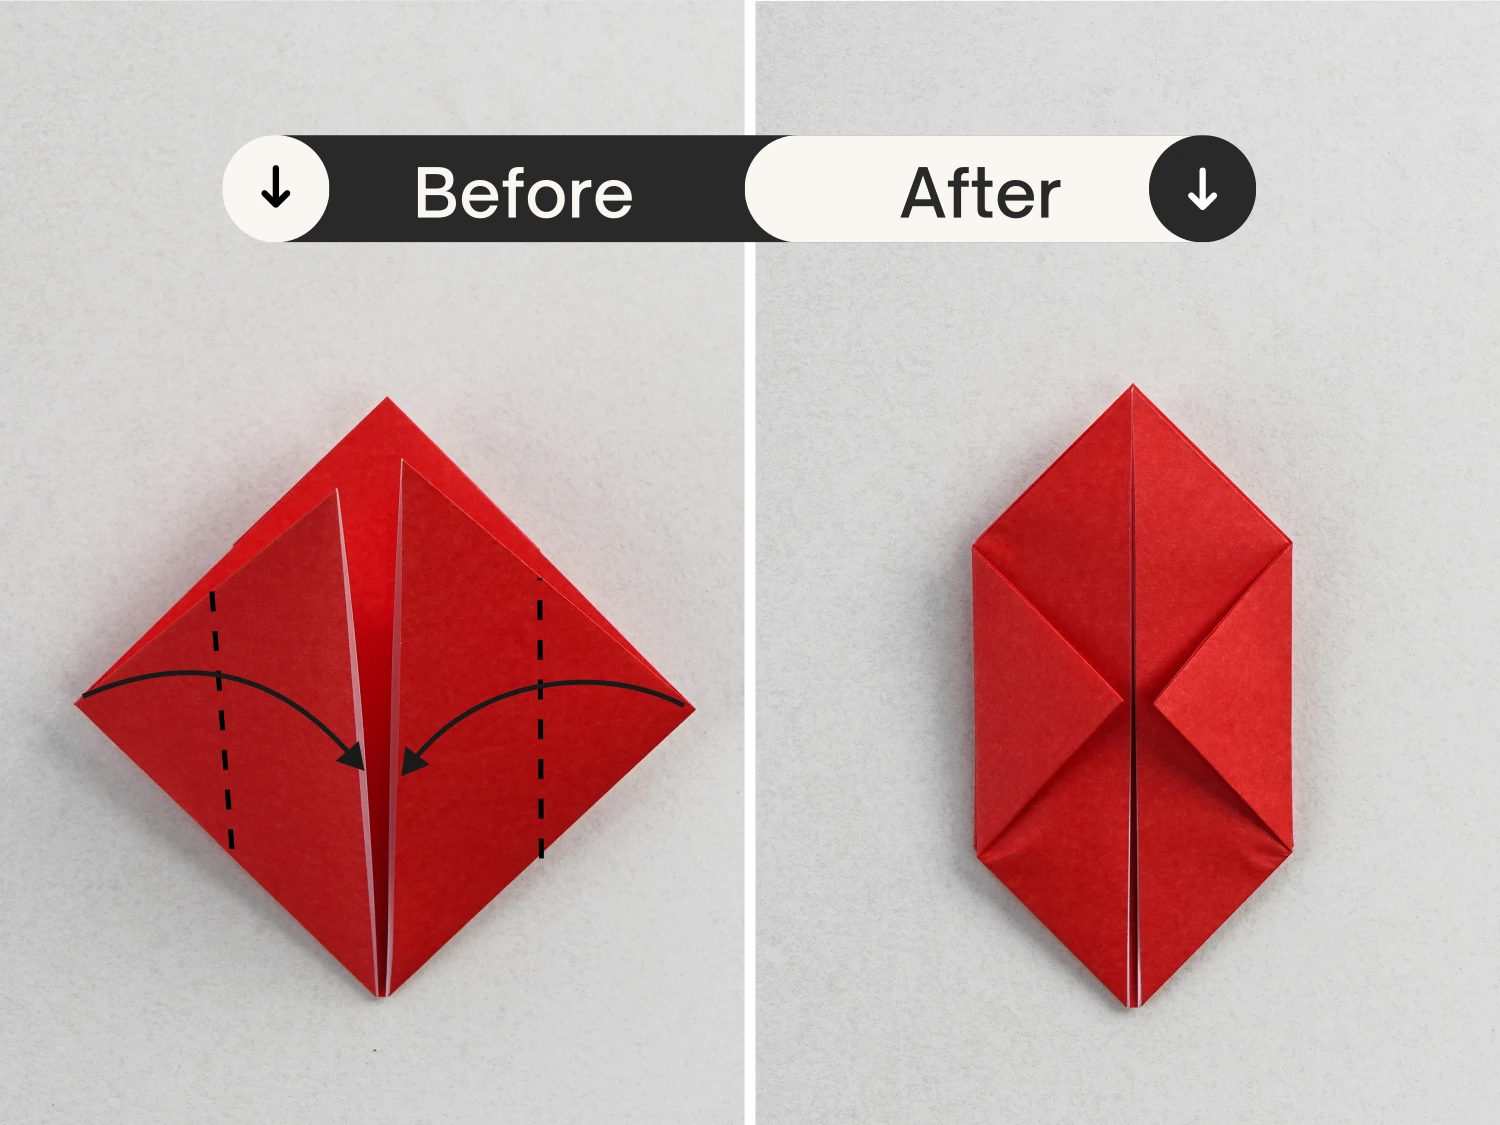
Fold the left and right corners up diagonally to meet the top corner.
Step 14
Fold the left and right corners to the center along the dotted line.
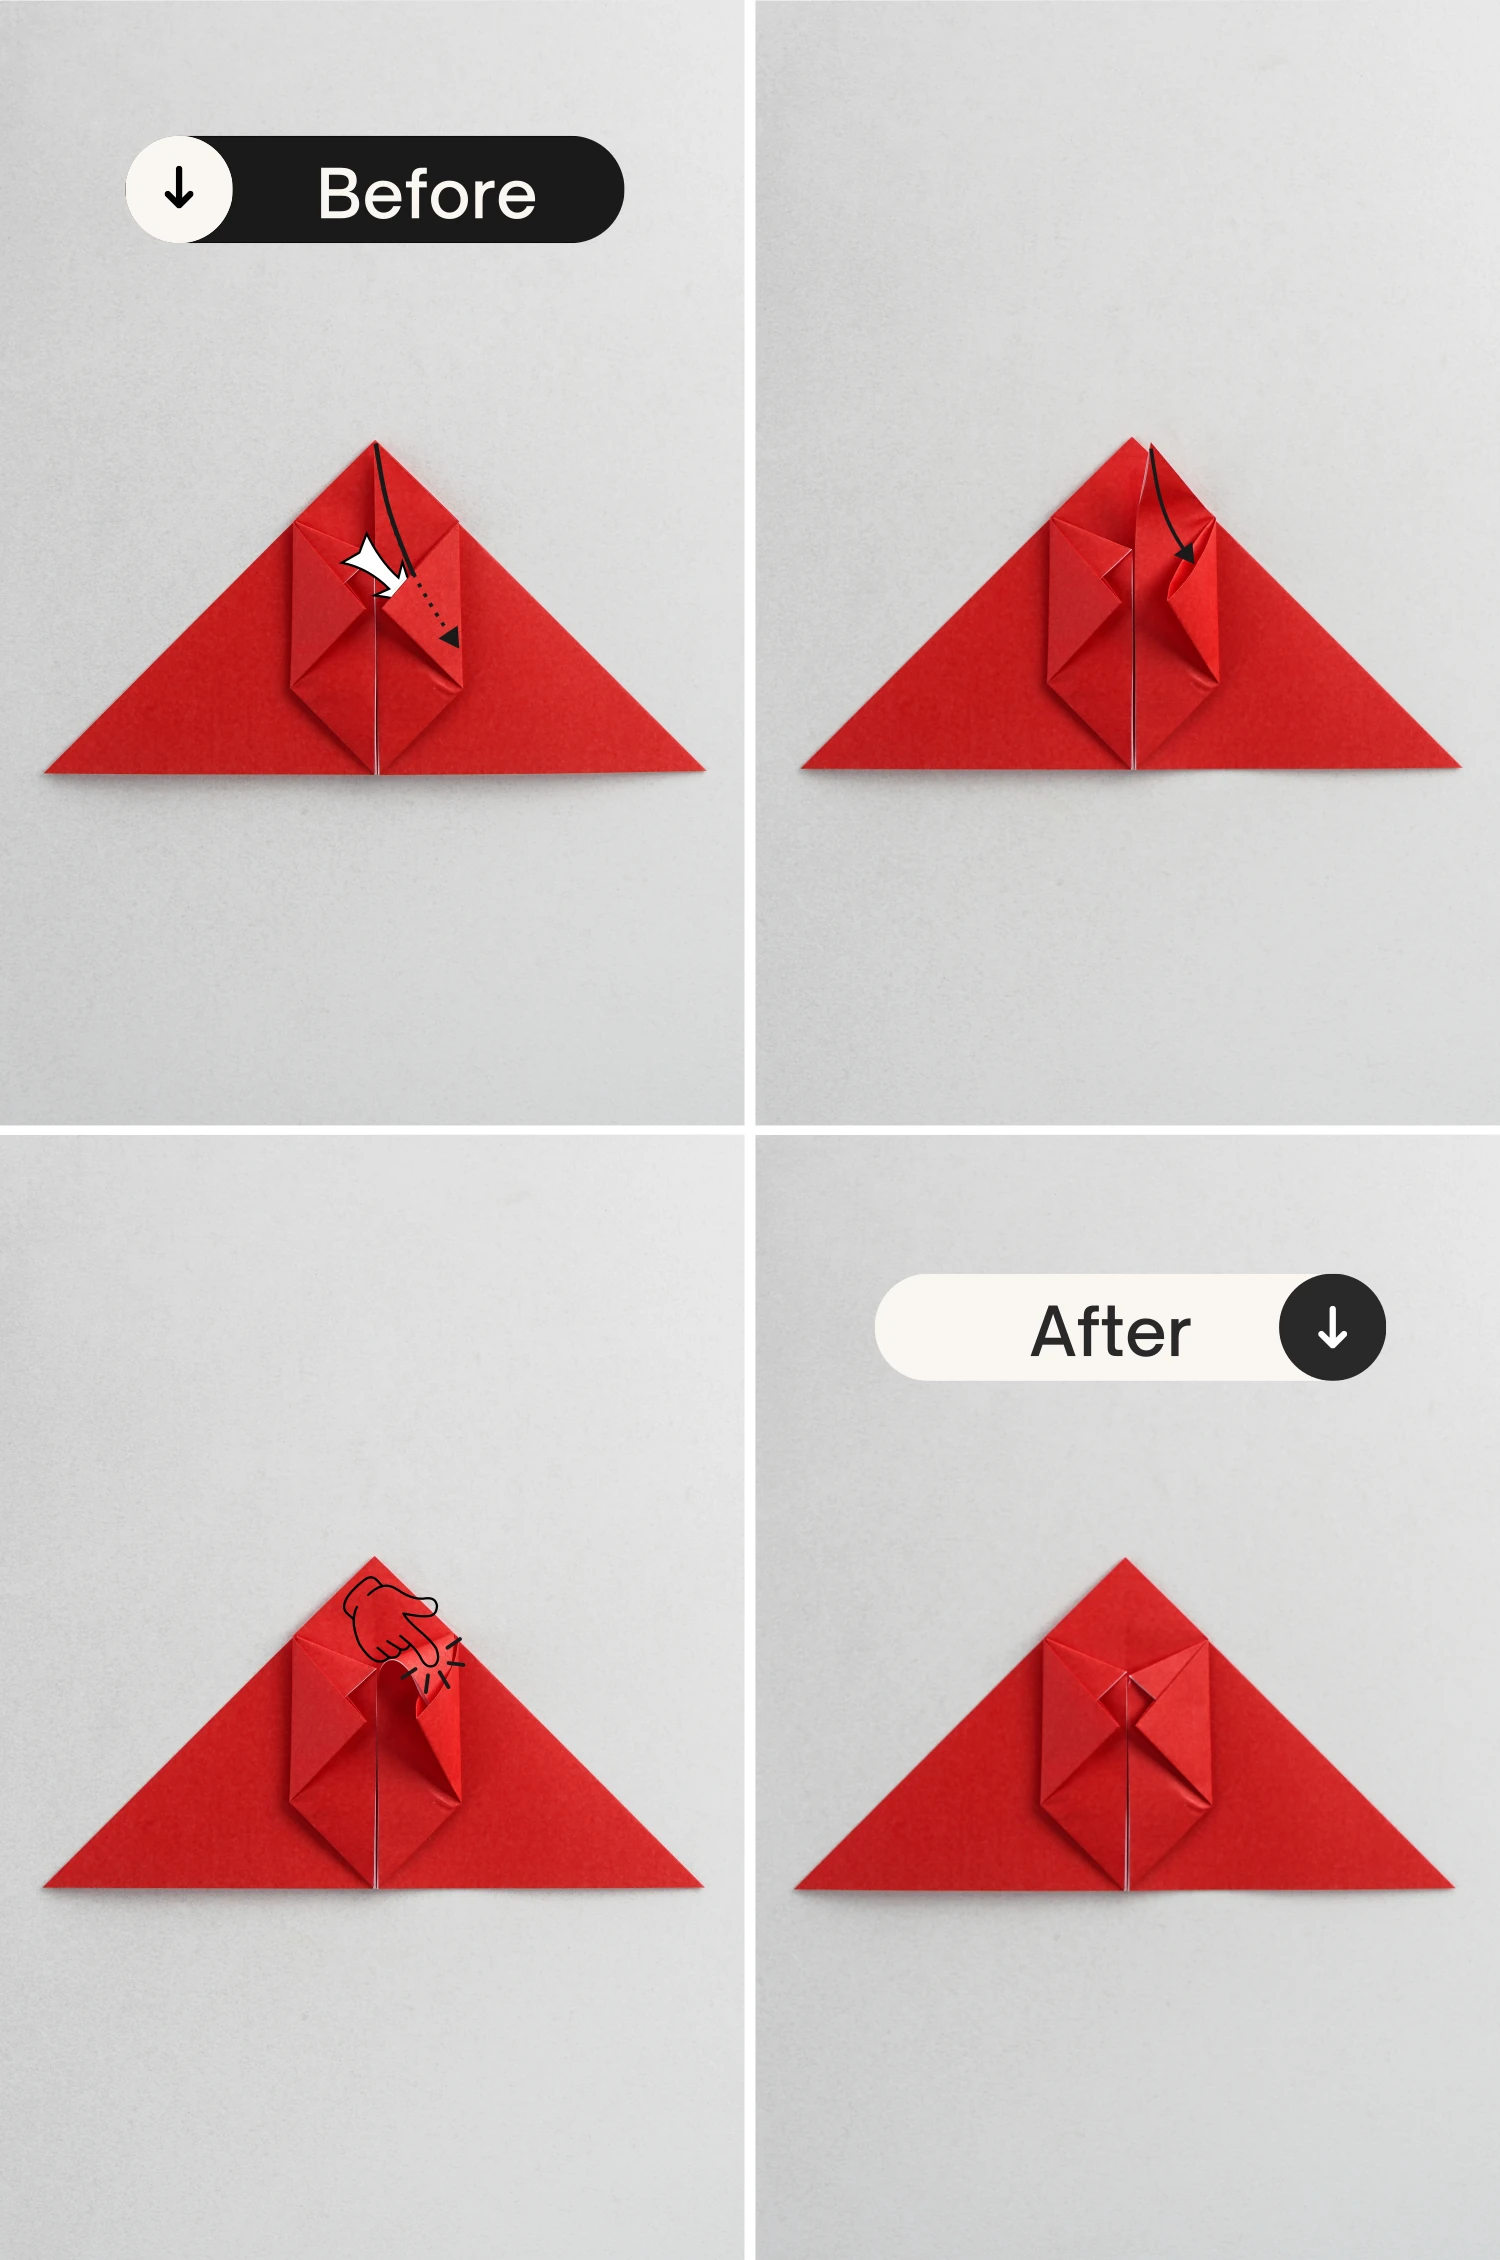
Step 15
Repeat step 10.
Step 16
Repeat again.
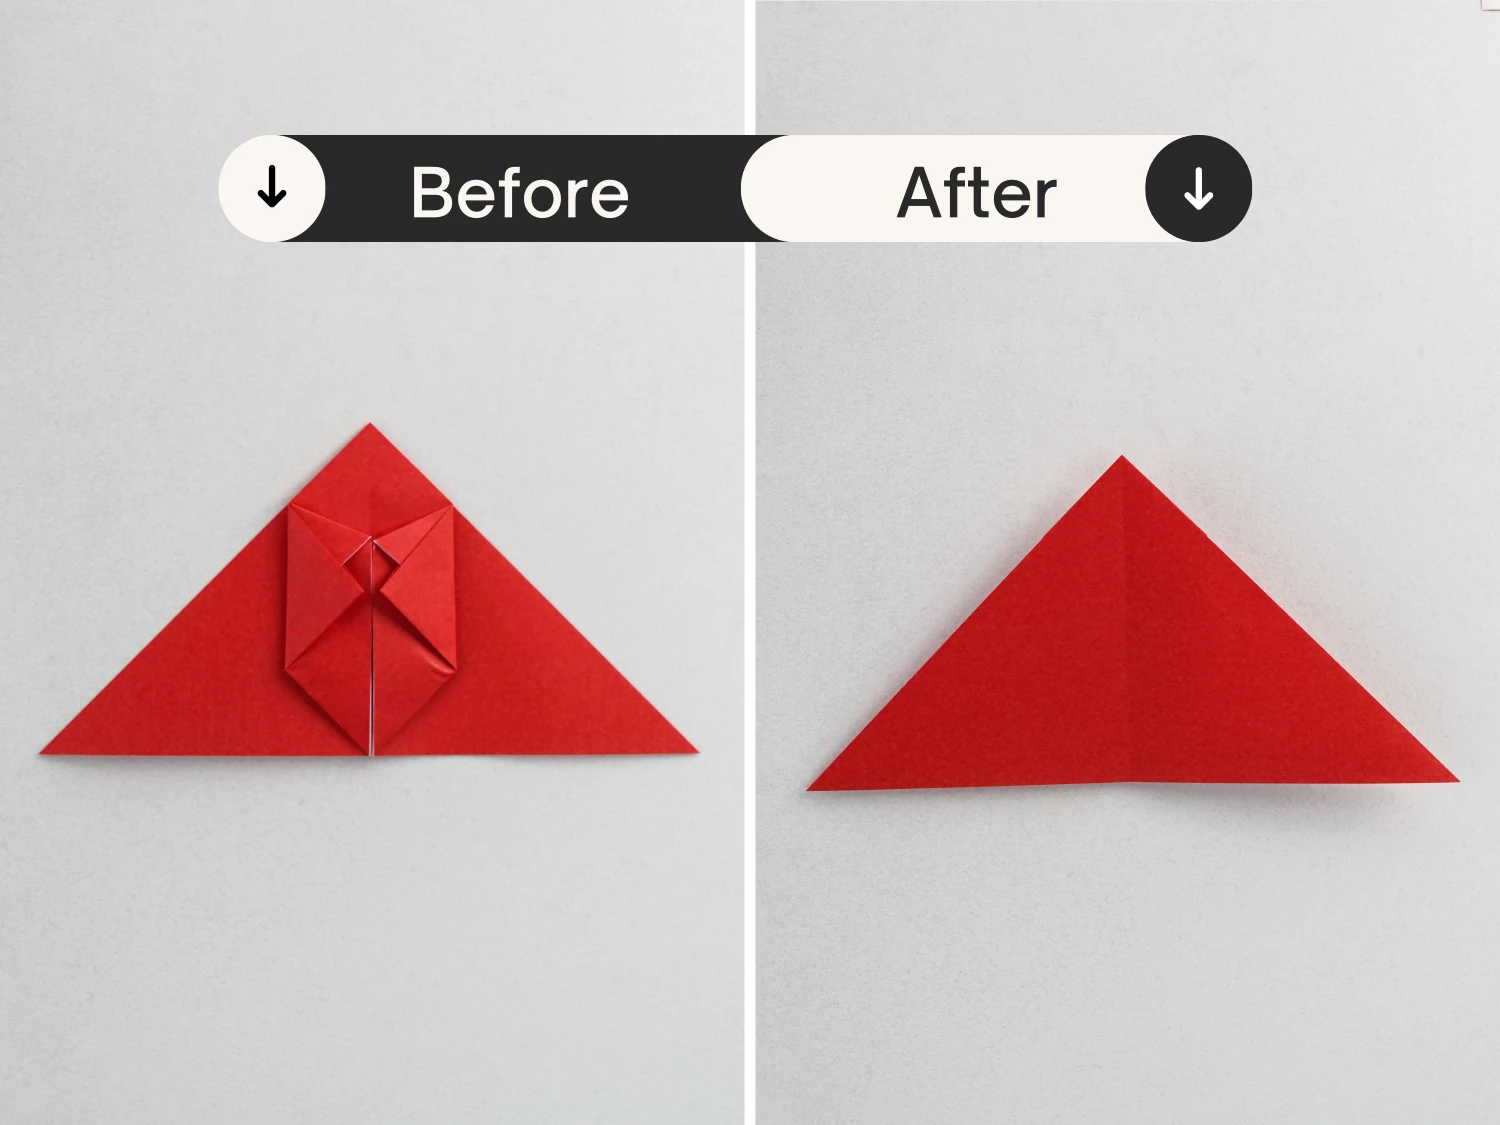
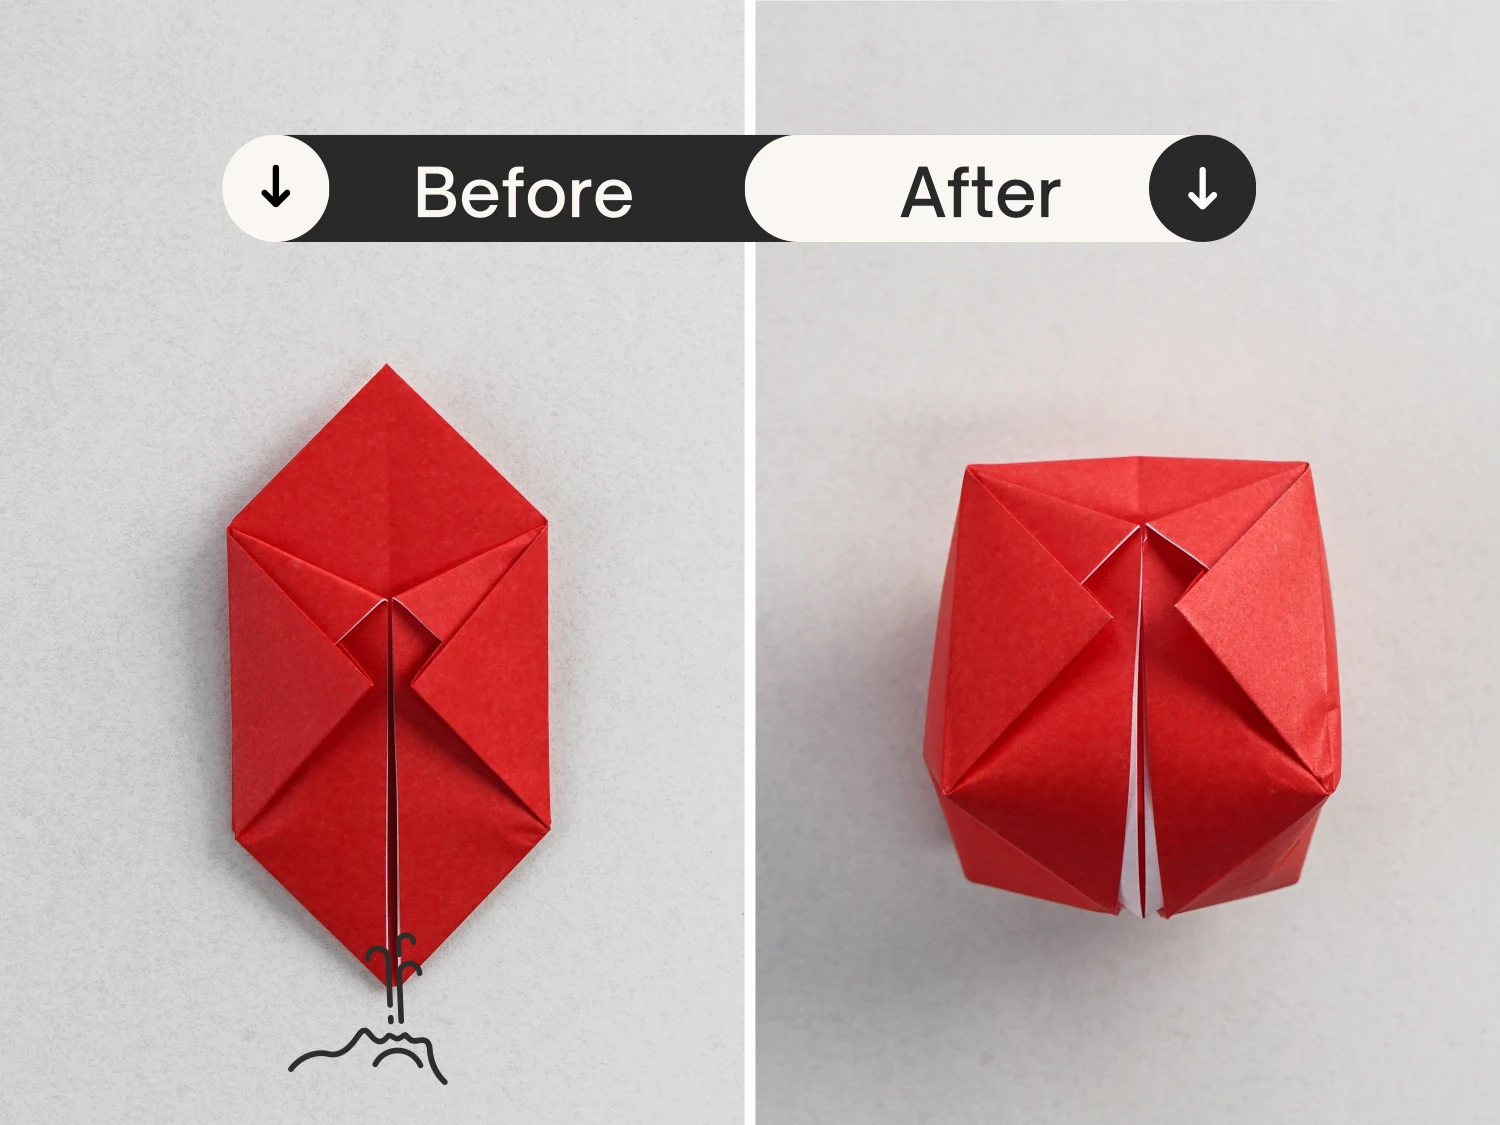
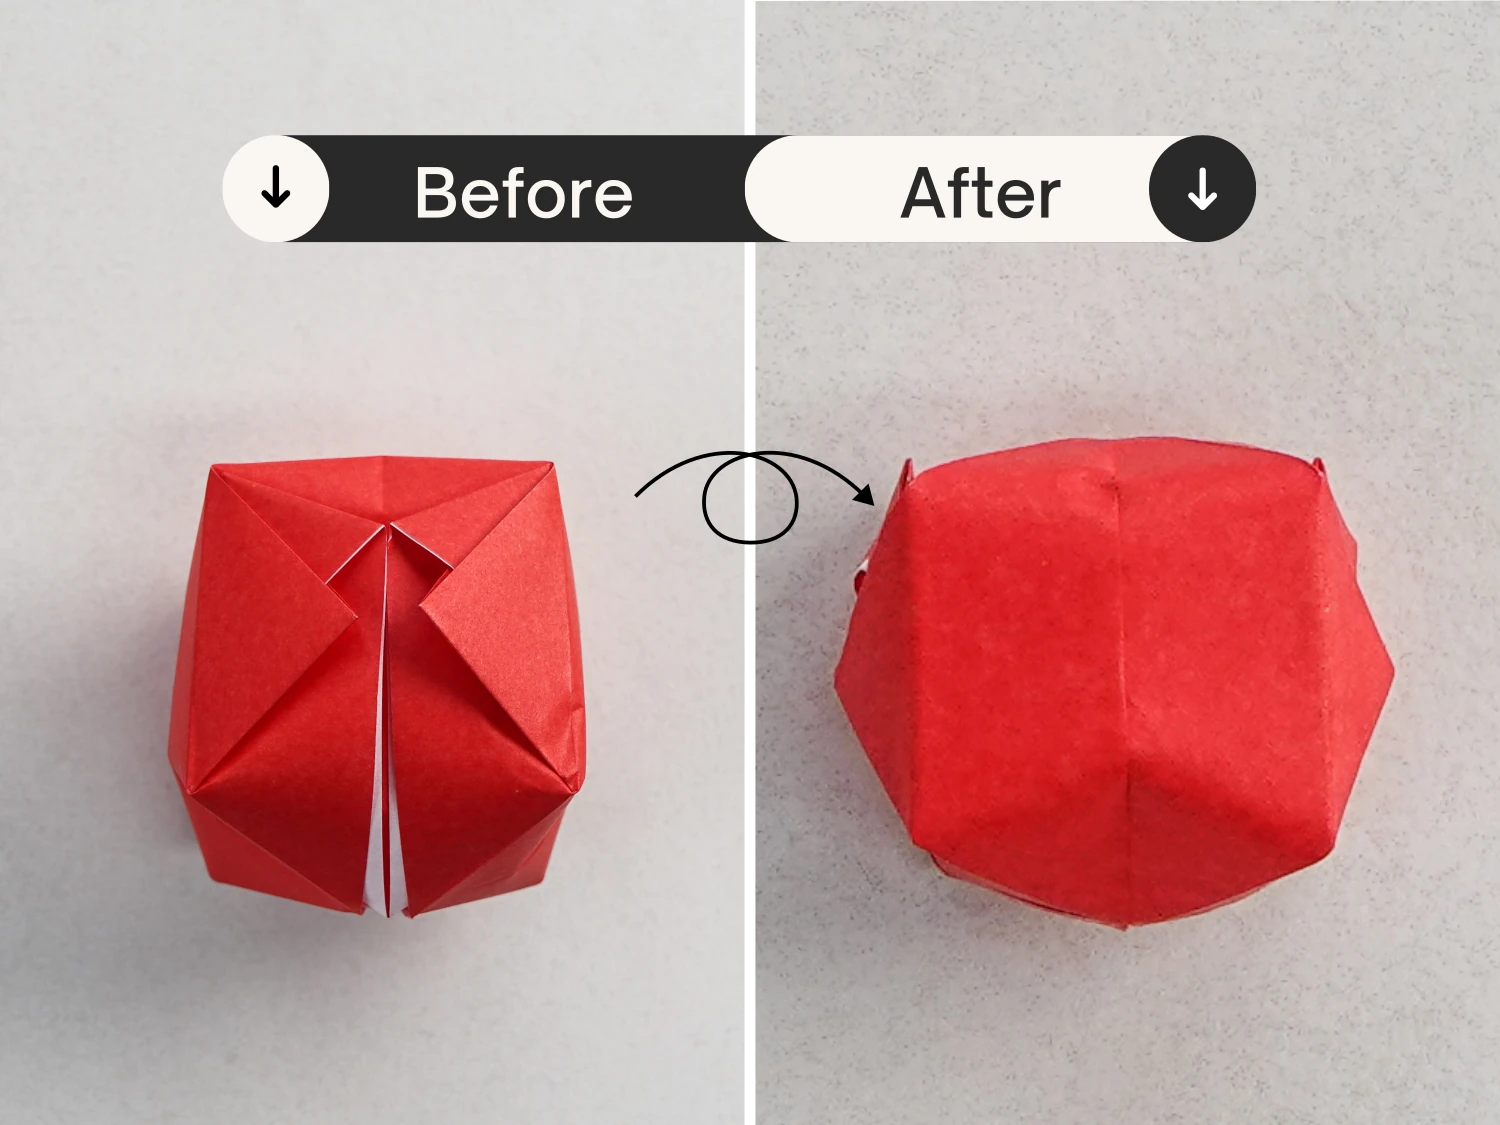
Step 17
Blow into it through the hole in the bottom to inflate it.
Step 18
Flip it over.
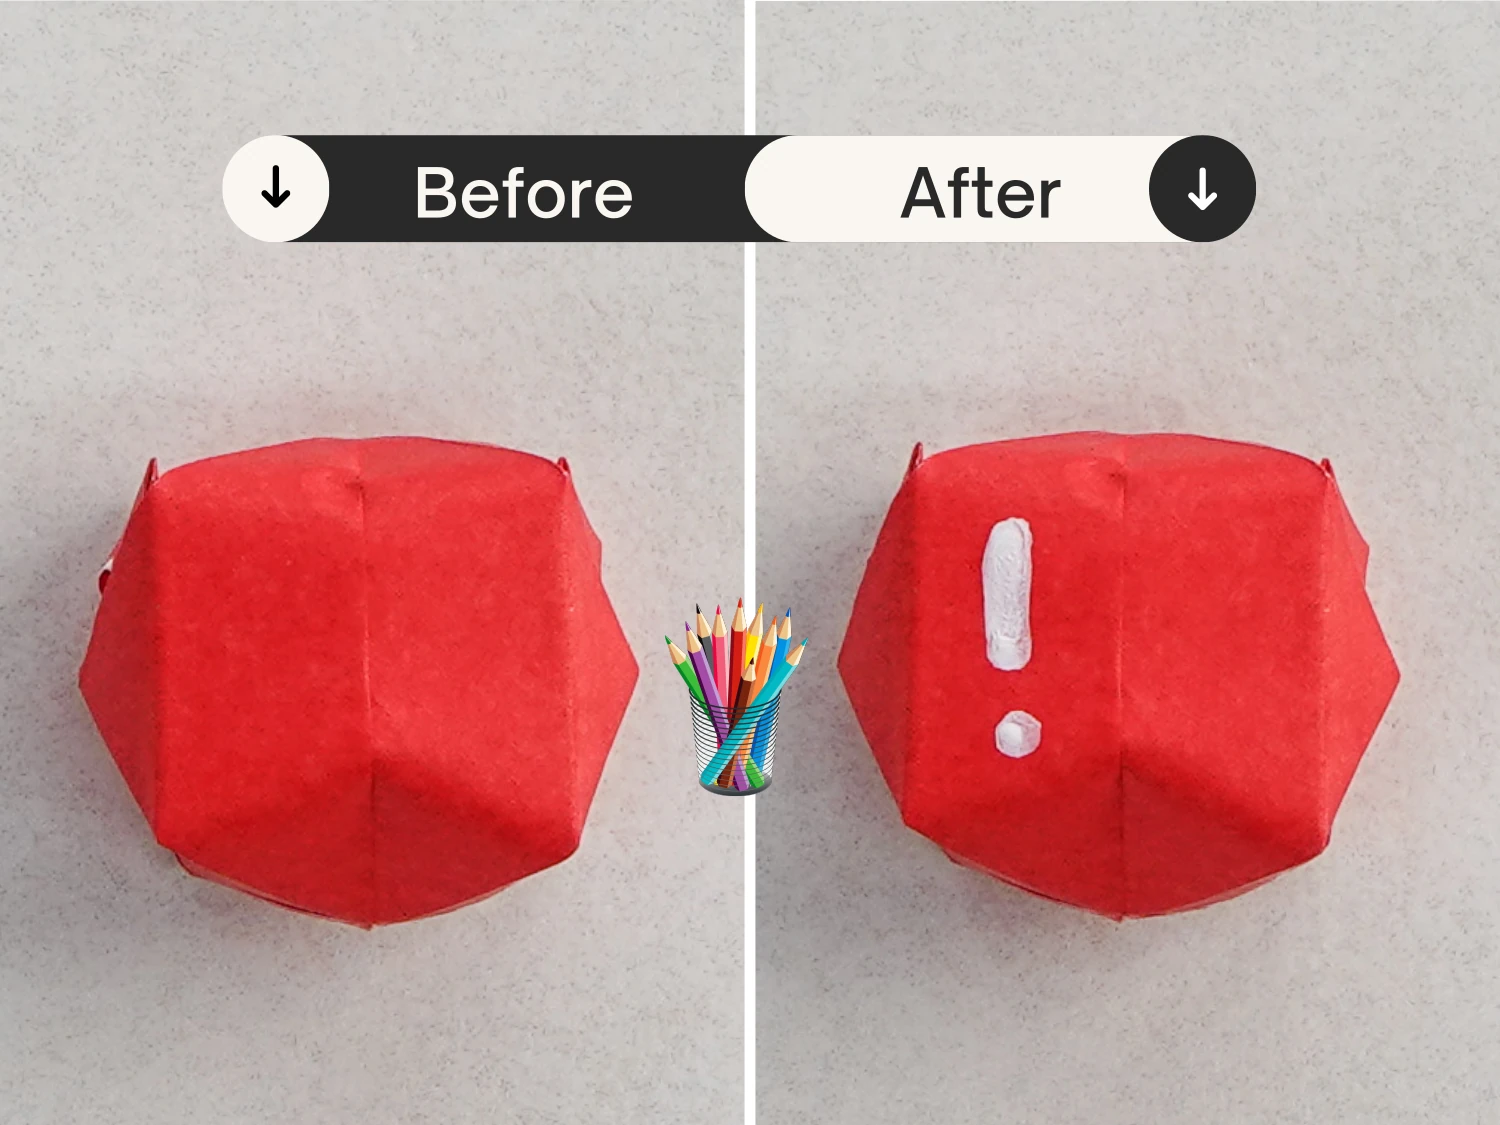
Step 19
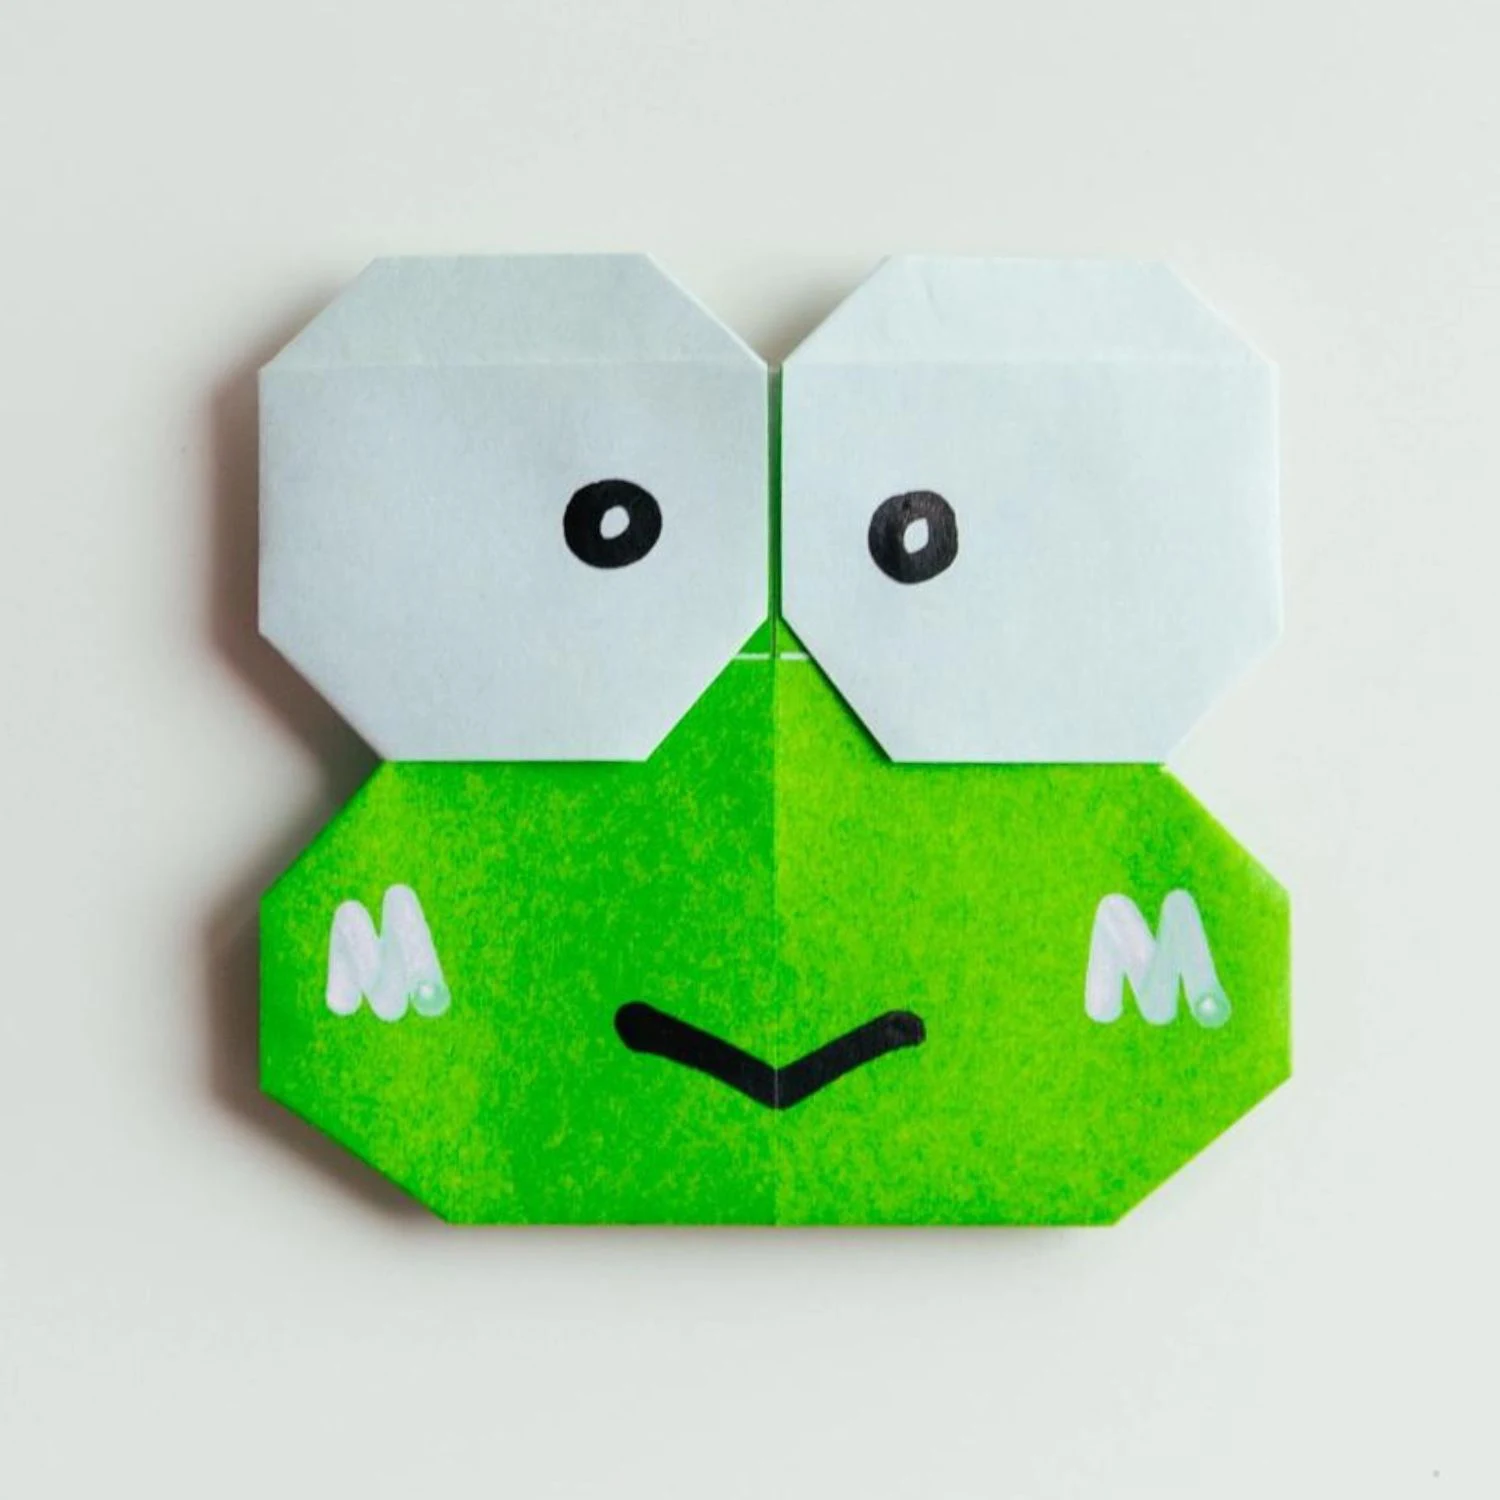
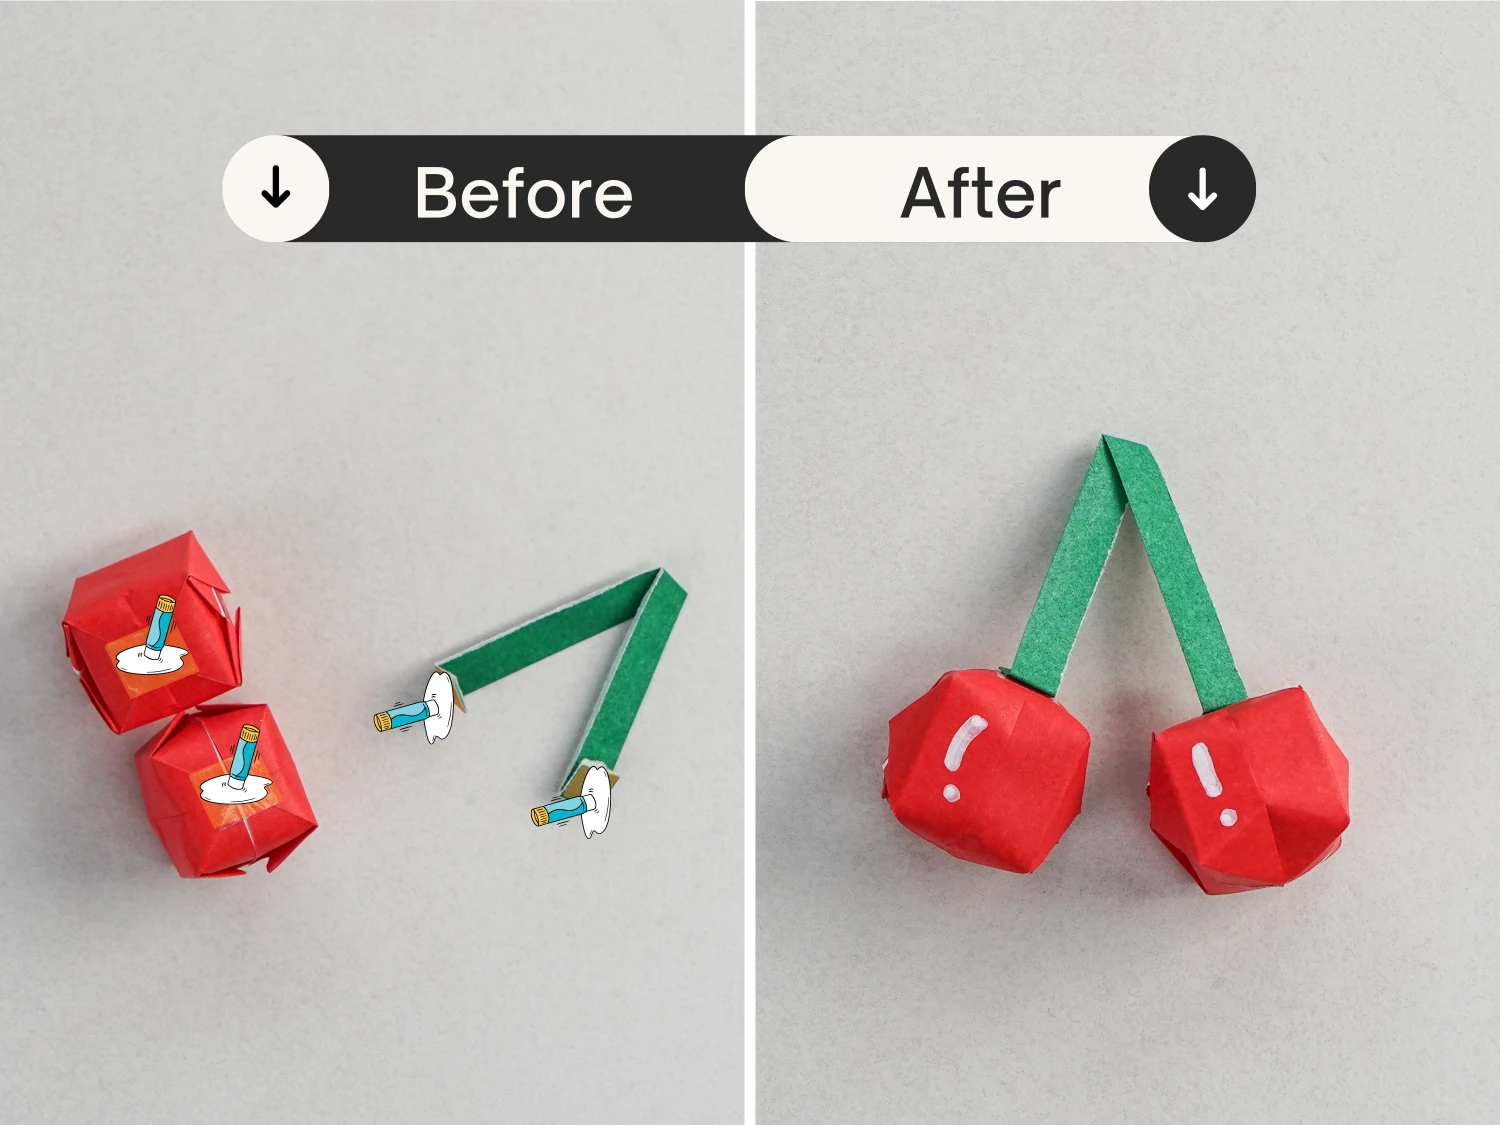
Use a pen to add highlights to it to make it cuter. You can make another cherry by following the steps above to get a perfect finished product at the end.
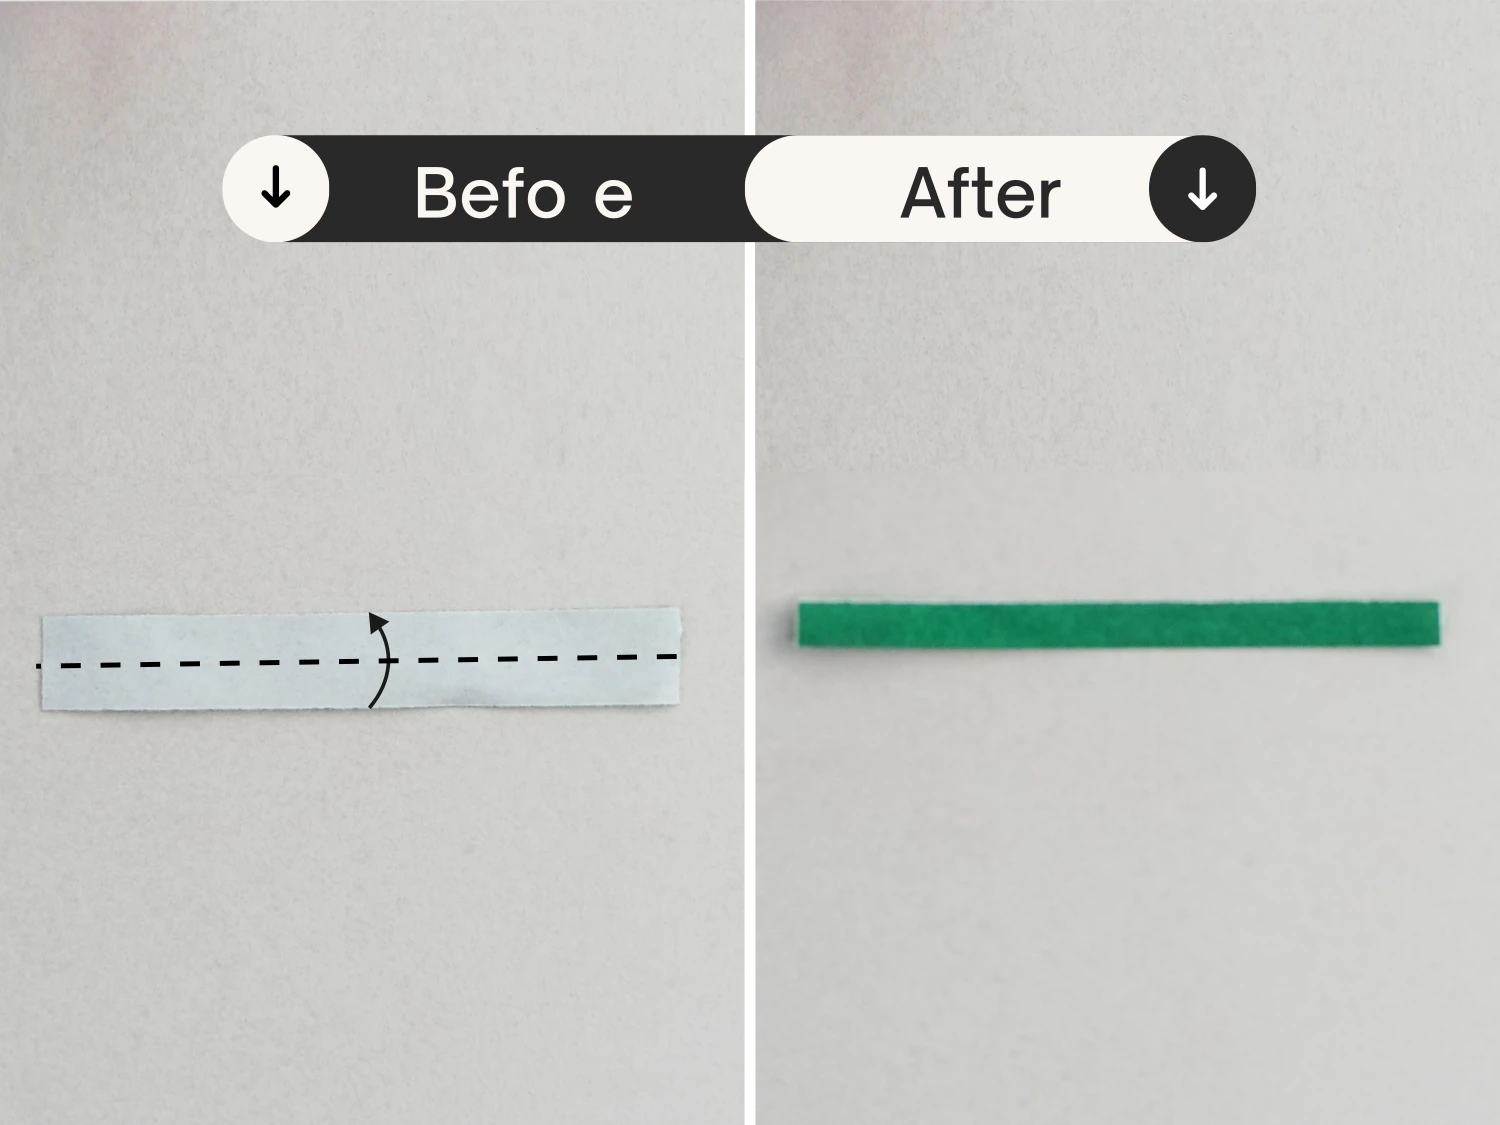
Step 20
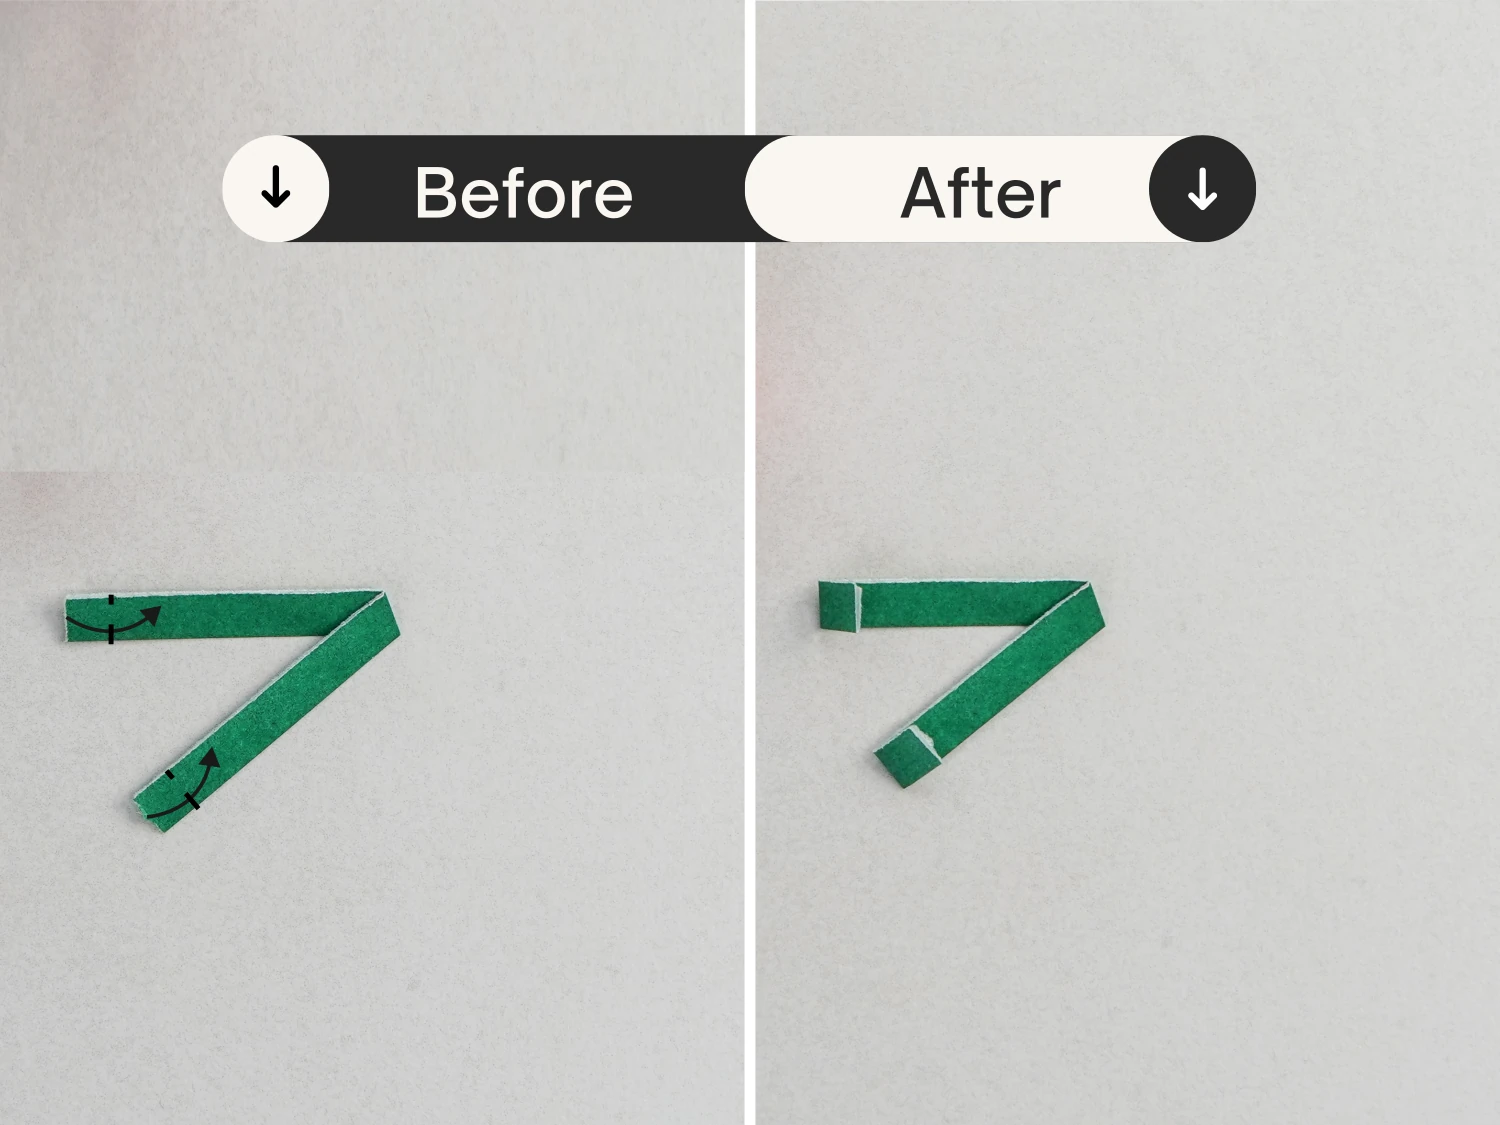
Take the green paper, start with the white side of the paper facing up, fold it in half.
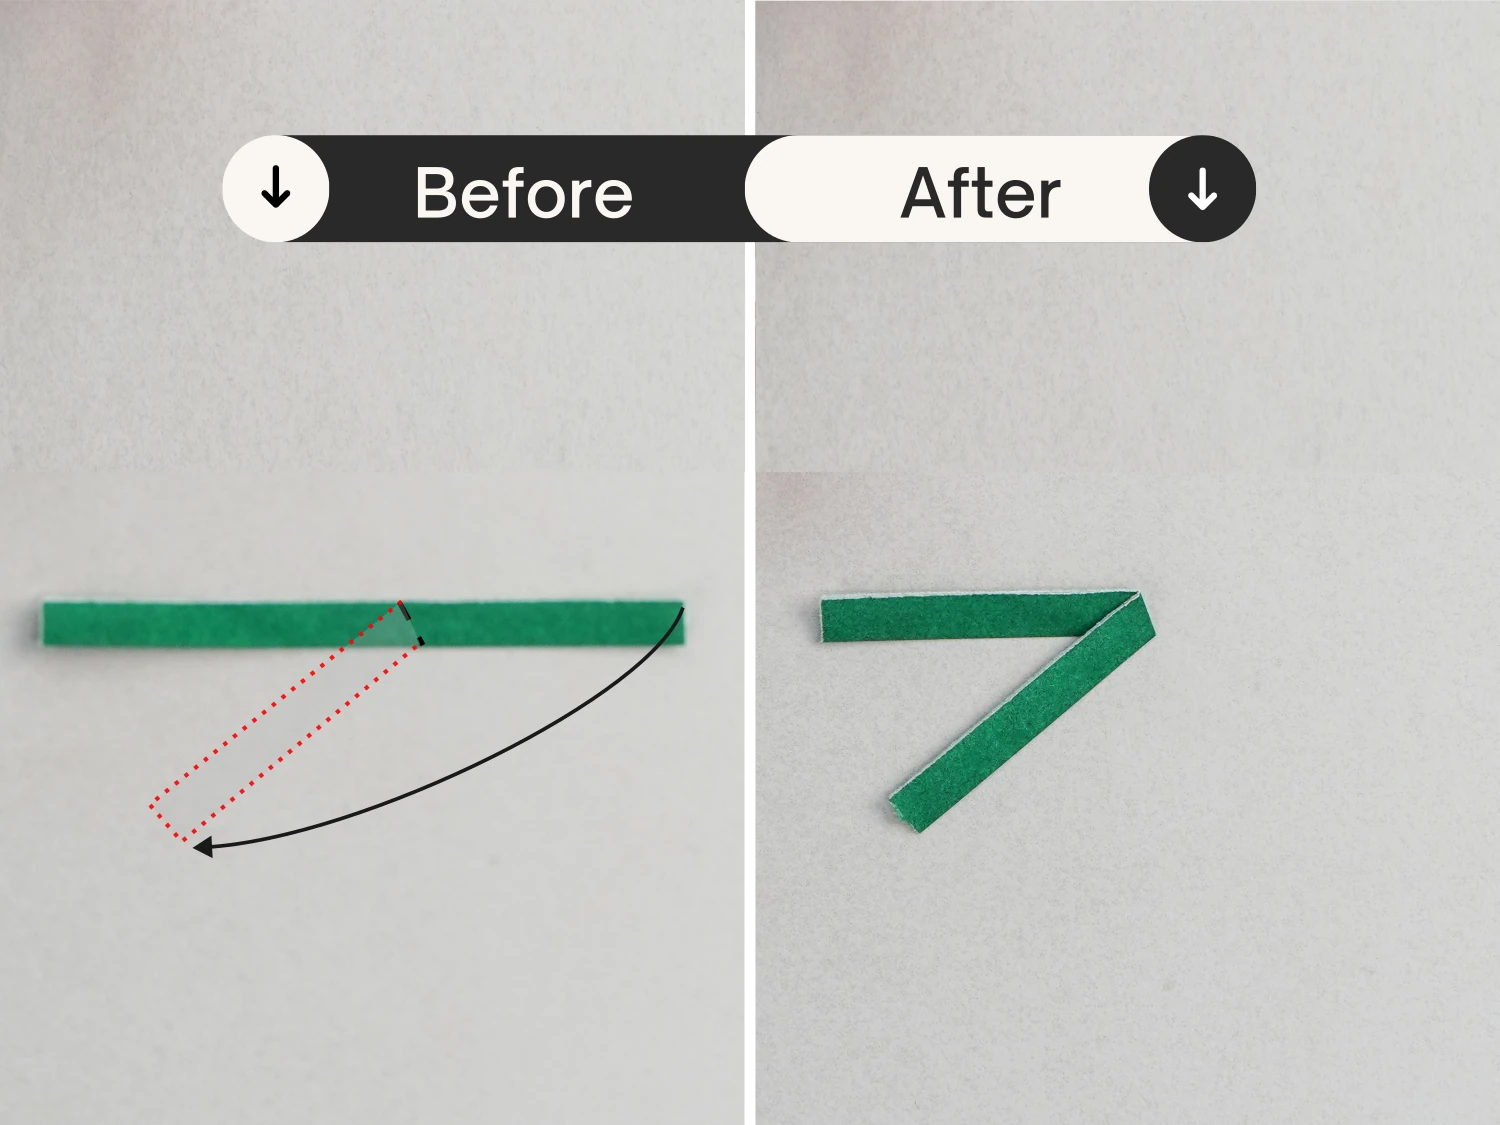
Step 21
Fold the right part to the bottom left along the dotted line.
Step 22
Fold both ends of the paper a little inward.
Step 23
Glue the top of the cherry and the part of the green paper just folded over, and stick them together.
What’s Next
This is your little lovely cherry, don’t forget to draw highlights for it to make it cuter. We also offer other easy origami fruit instructions, they are all easy and adorable, enjoy folding!
Other easy origami fruit ideas