How to Make Origami Flat Flower
Calling all sunshine crafters! Unfold a burst of cheer with this easy Origami Flat Flower. It’s the perfect pop of yellow for your desk, gift wrapping, or even a hair clip! Now, let’s get folding!
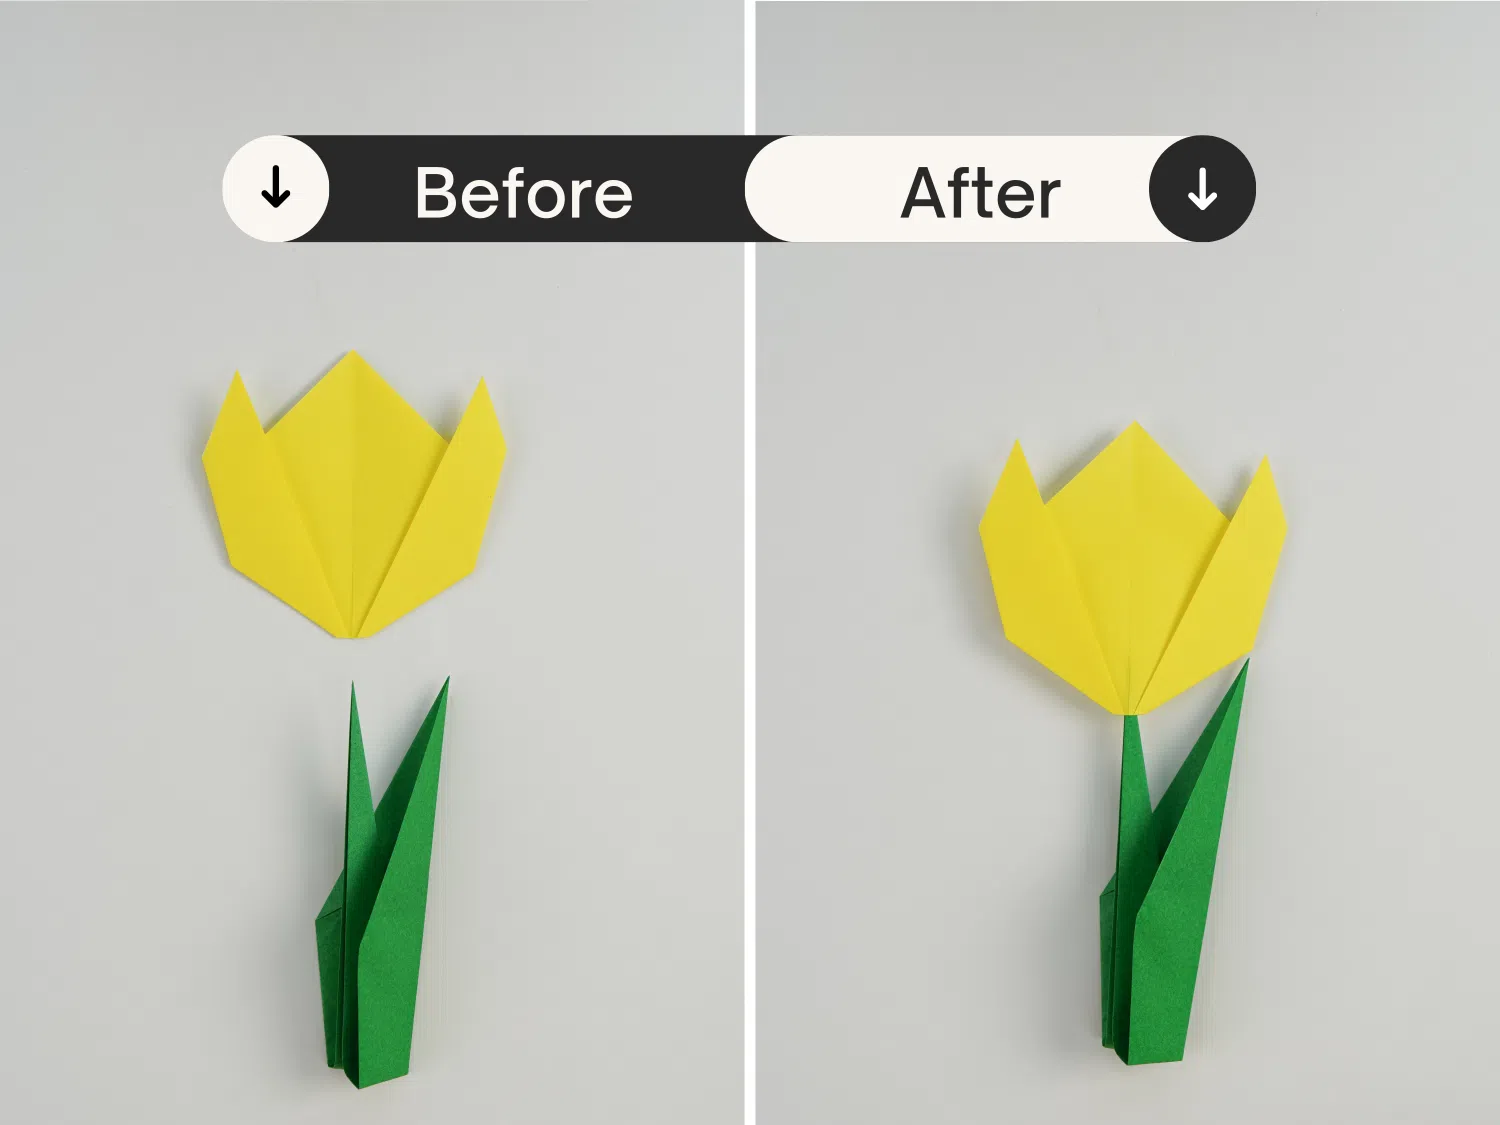
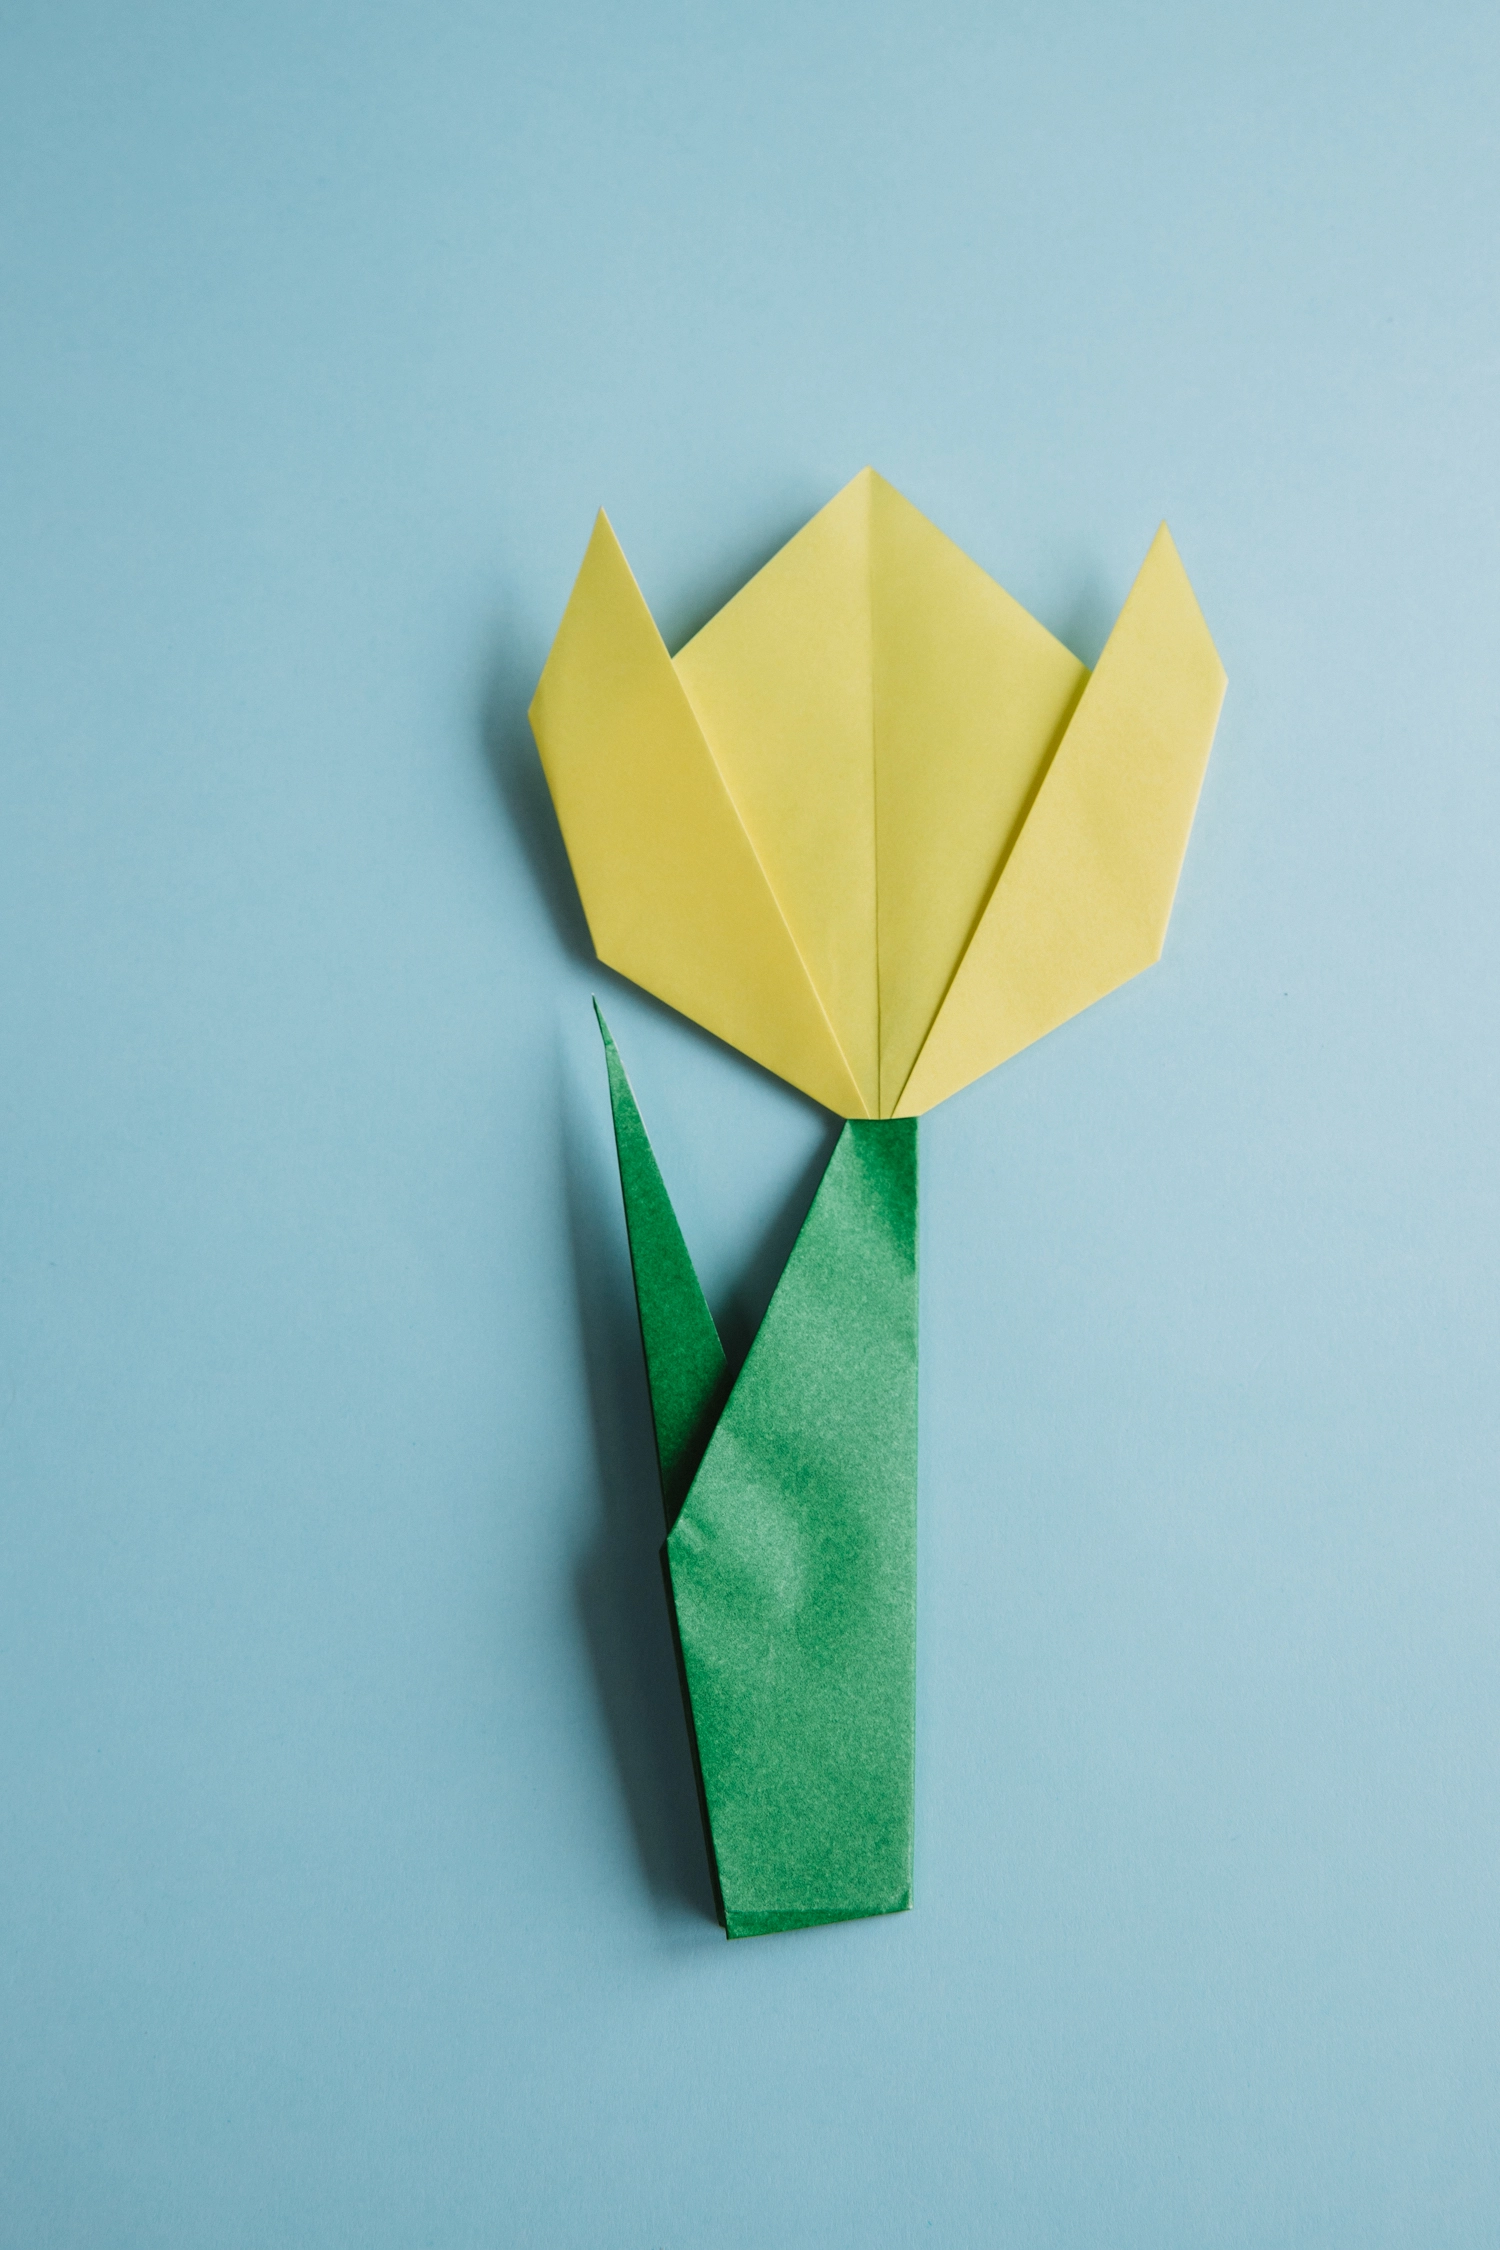
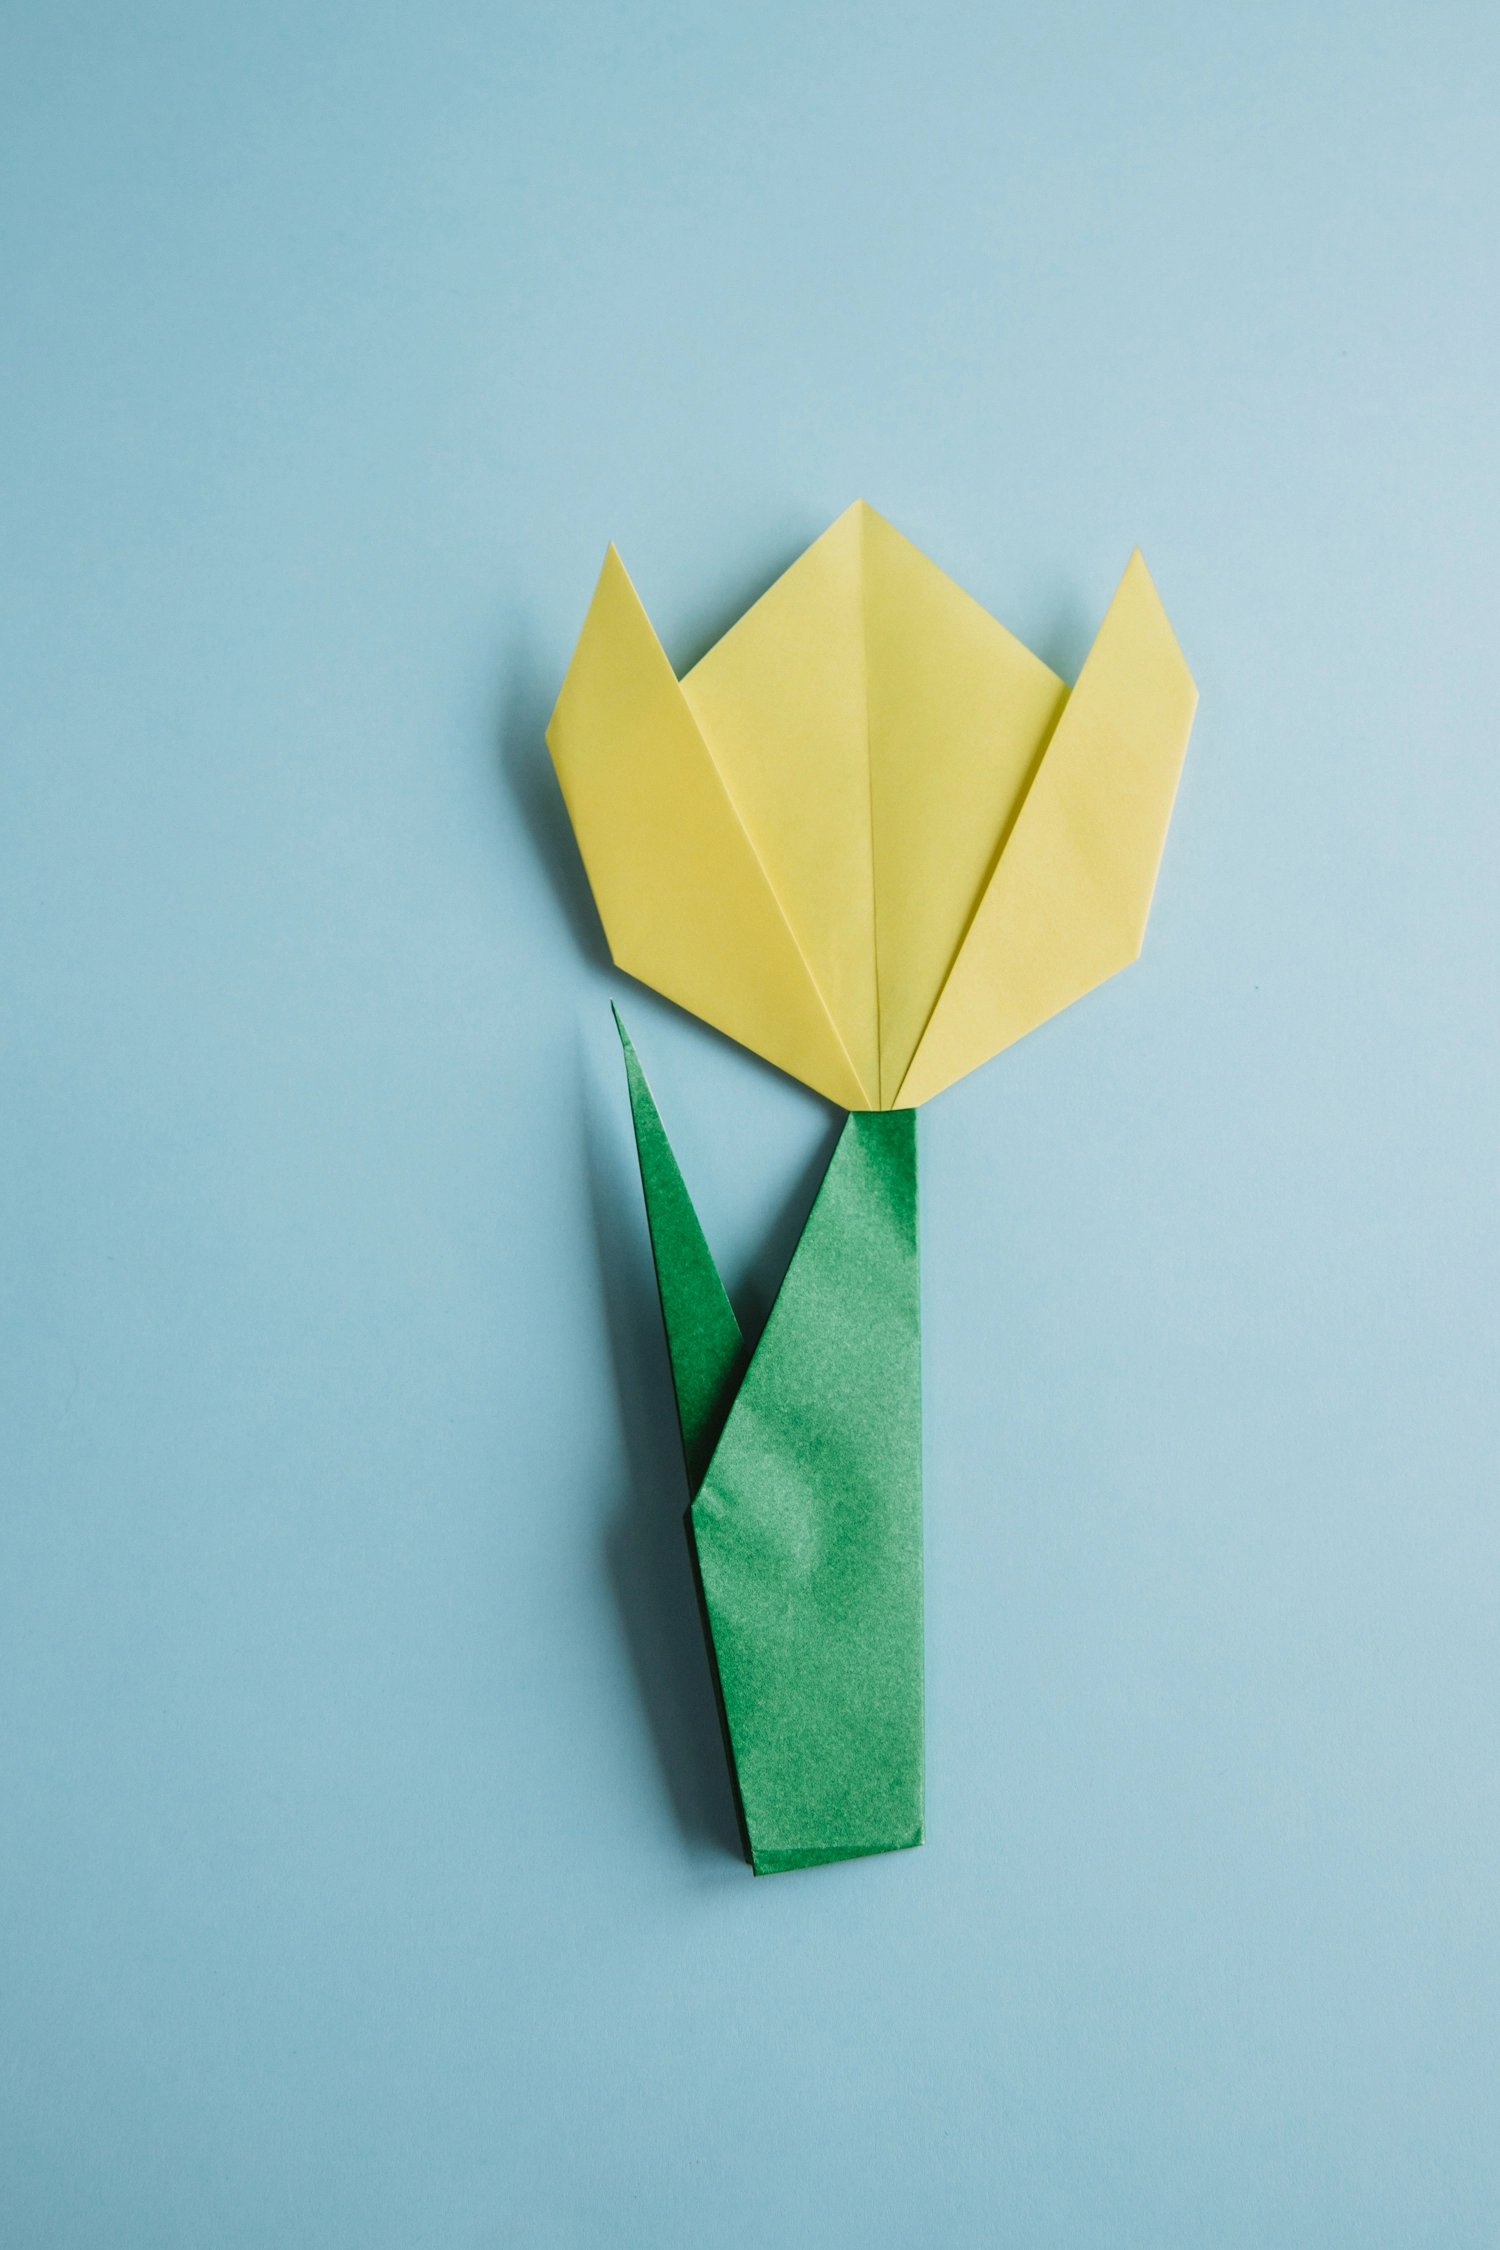
This is a lovely flat tulip. You can either make a single one or a group.
If you are new to origami, start here from our beginner guide to know the basics and how to read the step-by-step instructions.
- Folding time: 10 minutes
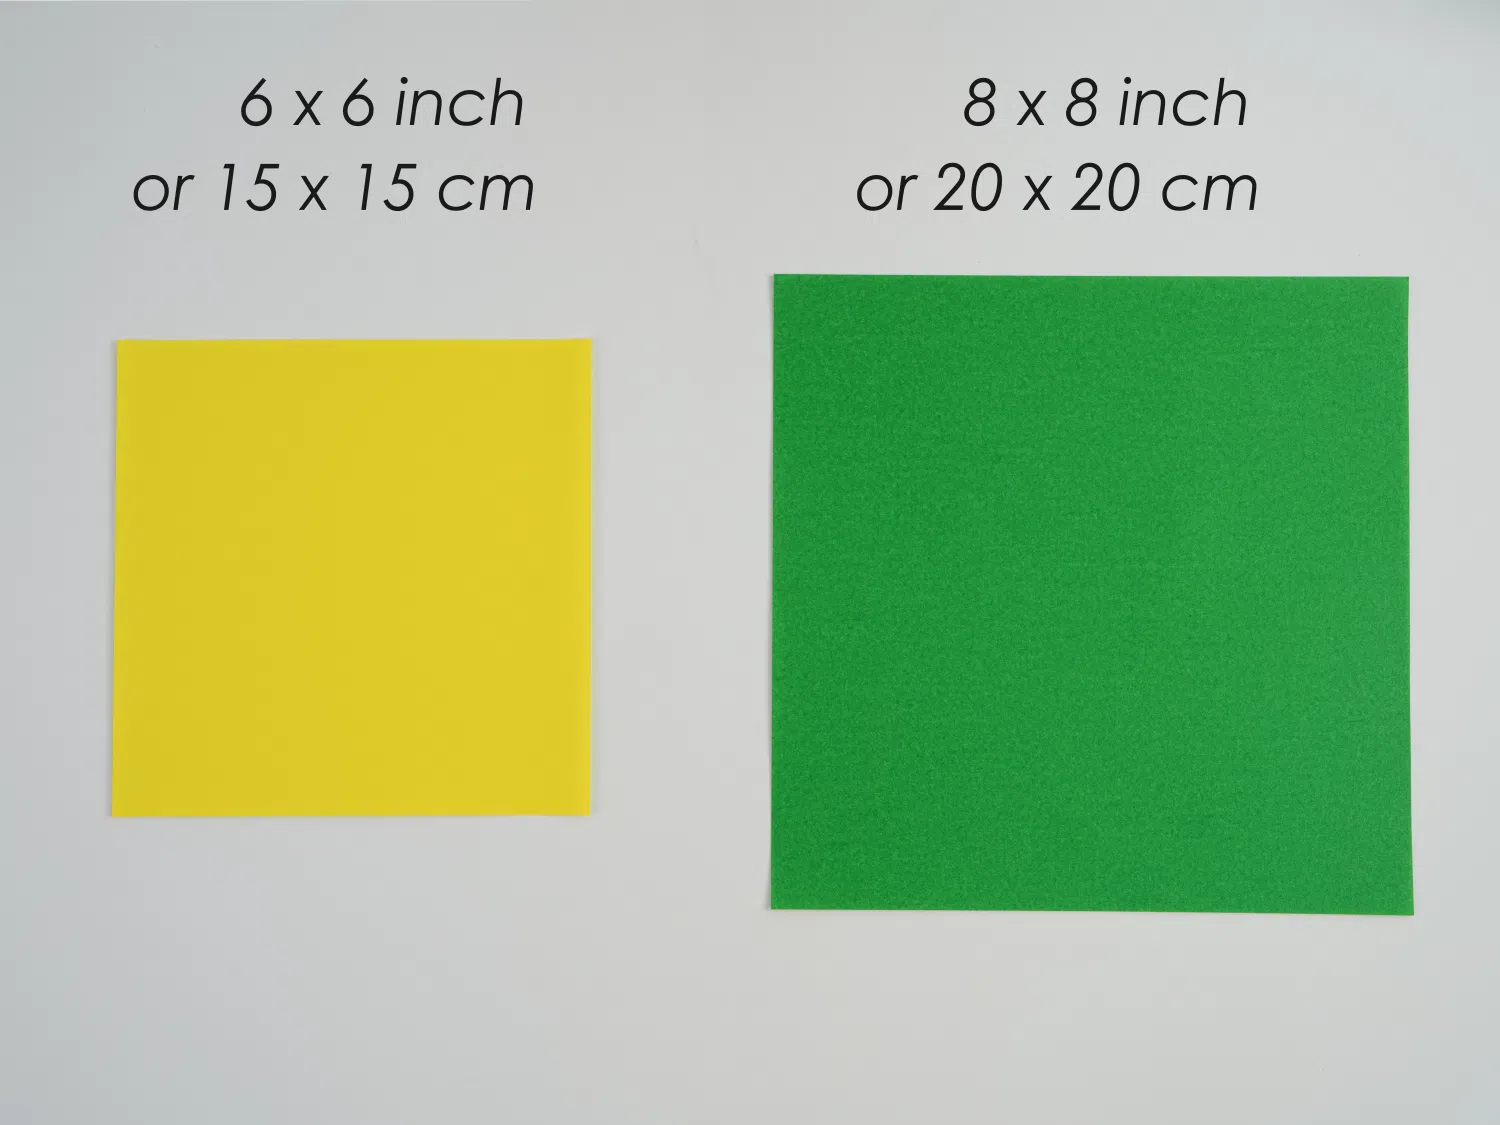
- Paper: 15×15*1, 20*20 cm*1
- Difficulty: Easy, Beginner friendly
Material
We are demonstrating with larger papers. And the flower are around 10 cm tall. If you need cute and smaller ones, use 5*5 or 10 *10 smaller papers.
Get a 15*15 cm origami paper for the flower part, with one yellow and one white side, and a 20*20 cm origami paper for the stem part, with one green and one white side.
Easy Origami Flat Flower Video
You can refer to the video and follow along to finish or follow our step-by-step picture tutorial.
Step by Step
First, here is the stem part of the flower.
Step 1
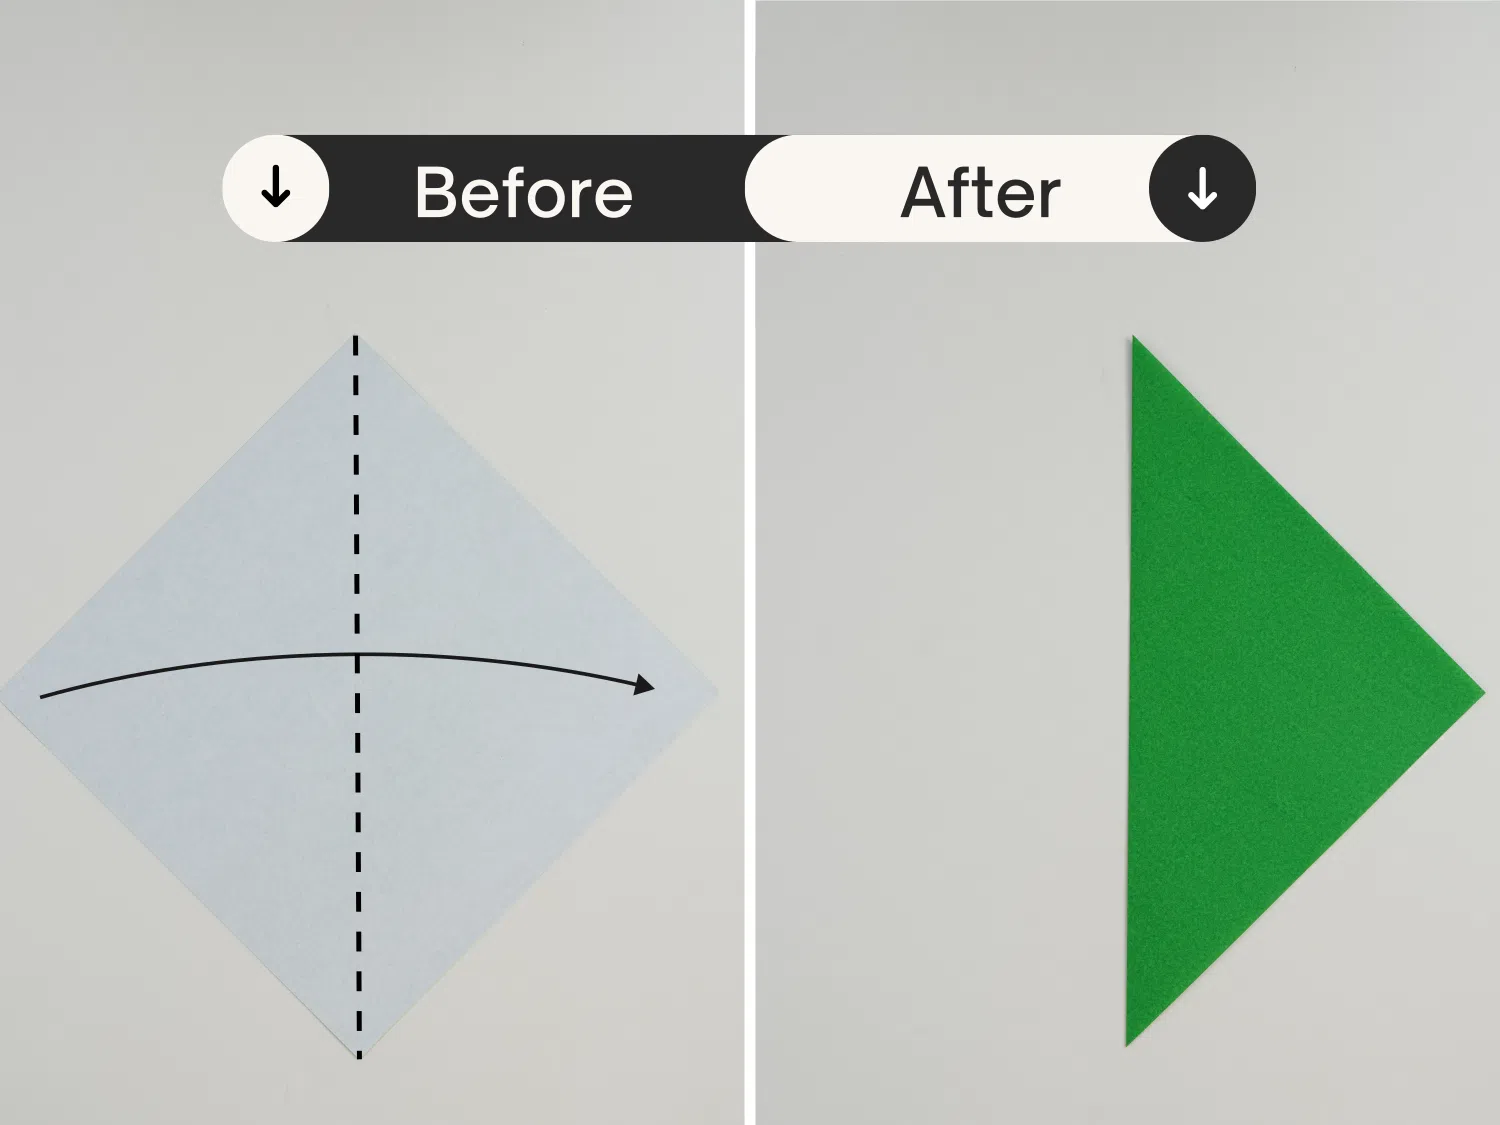
Take the green paper, start with the white side facing up, and fold the paper in half diagonally.
Step 2
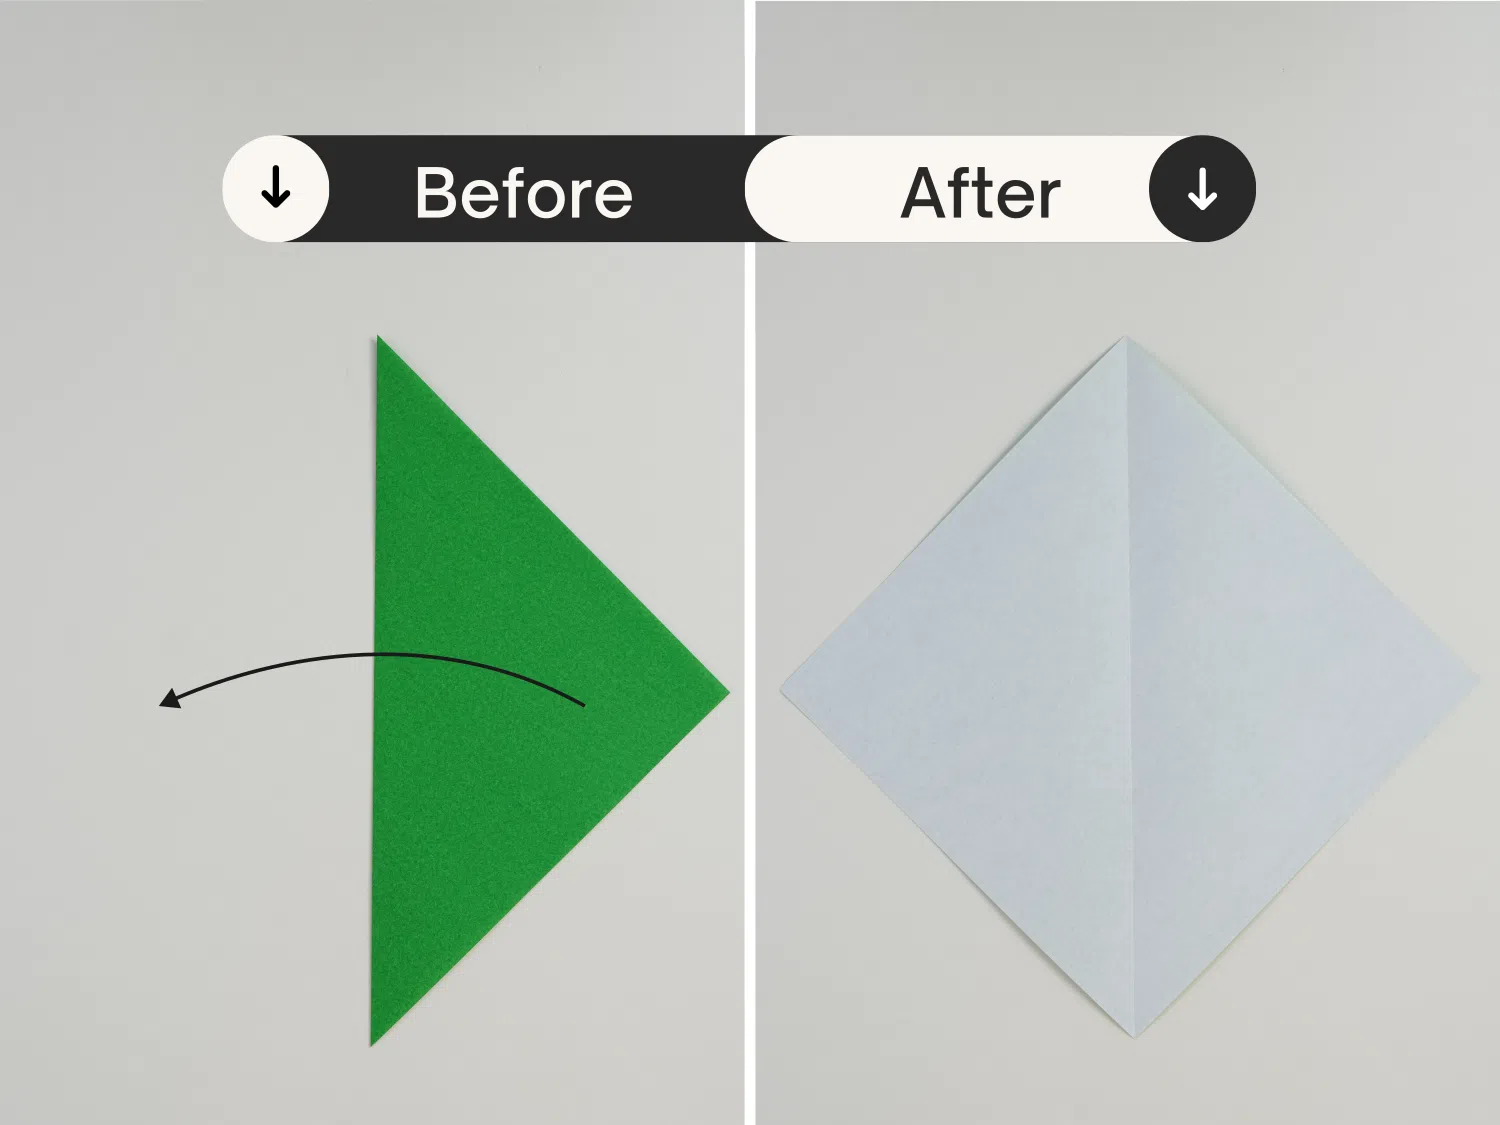
Unfold it, and we can see there is a center crease.
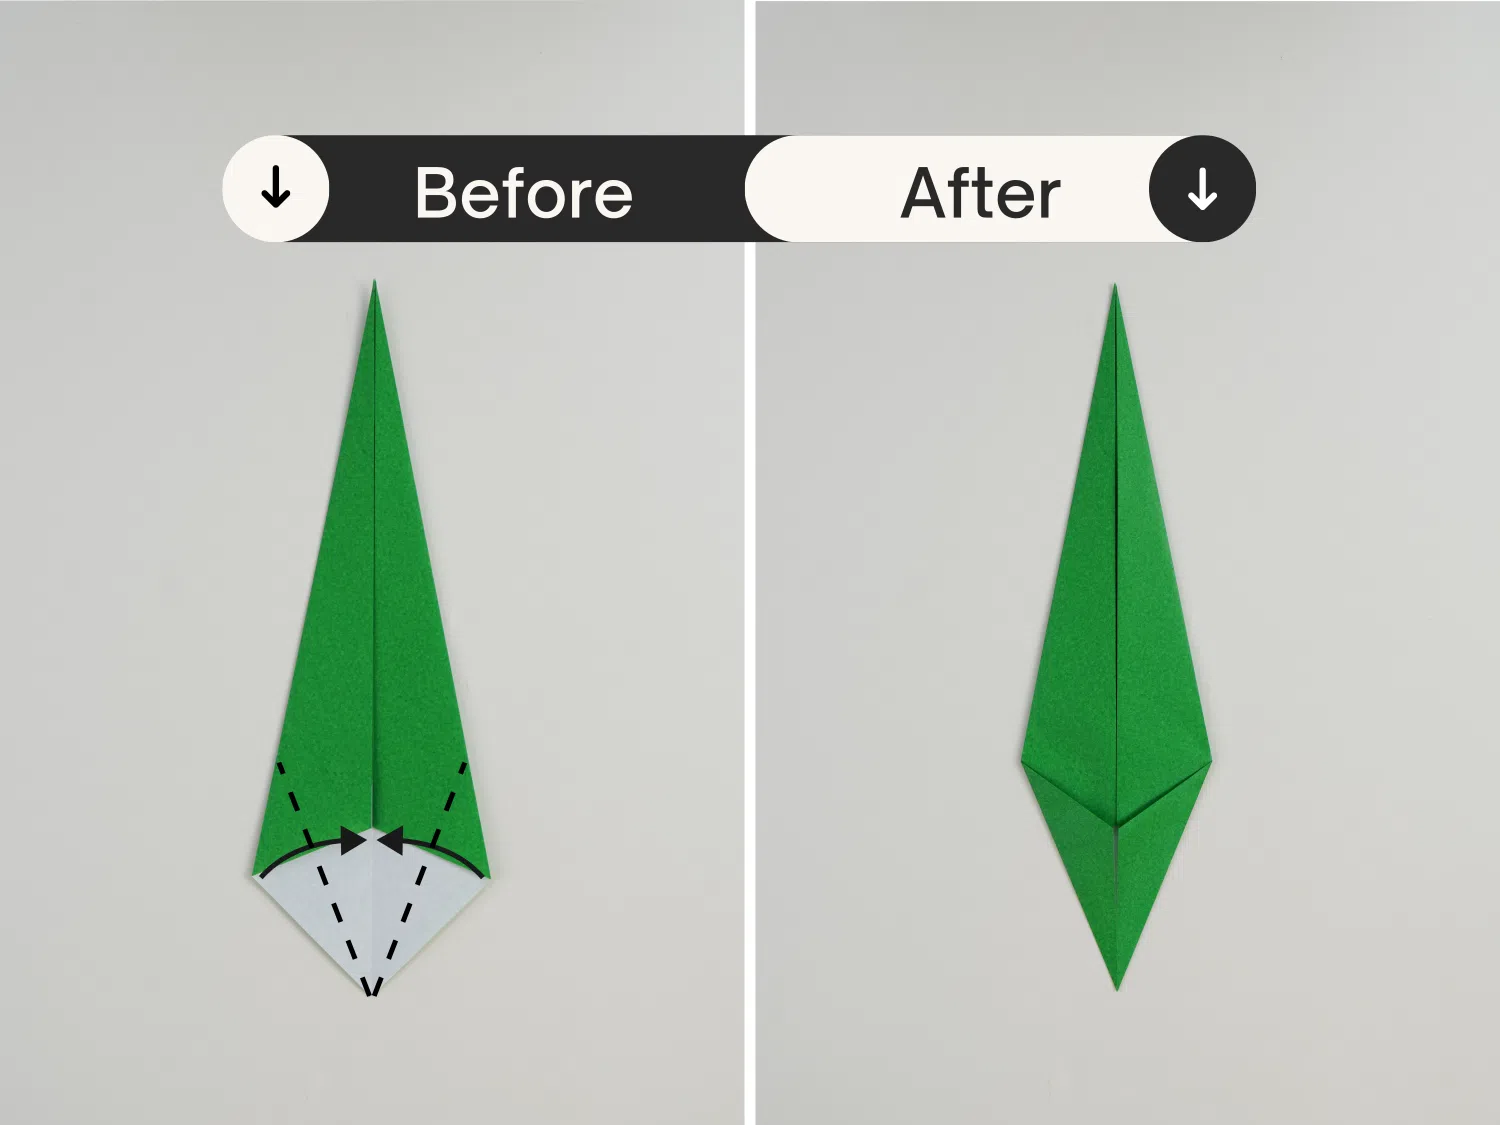
Step 3
Fold the left and right beveled edges down along the dotted lines, and make sure to meet the center crease.
Step 4
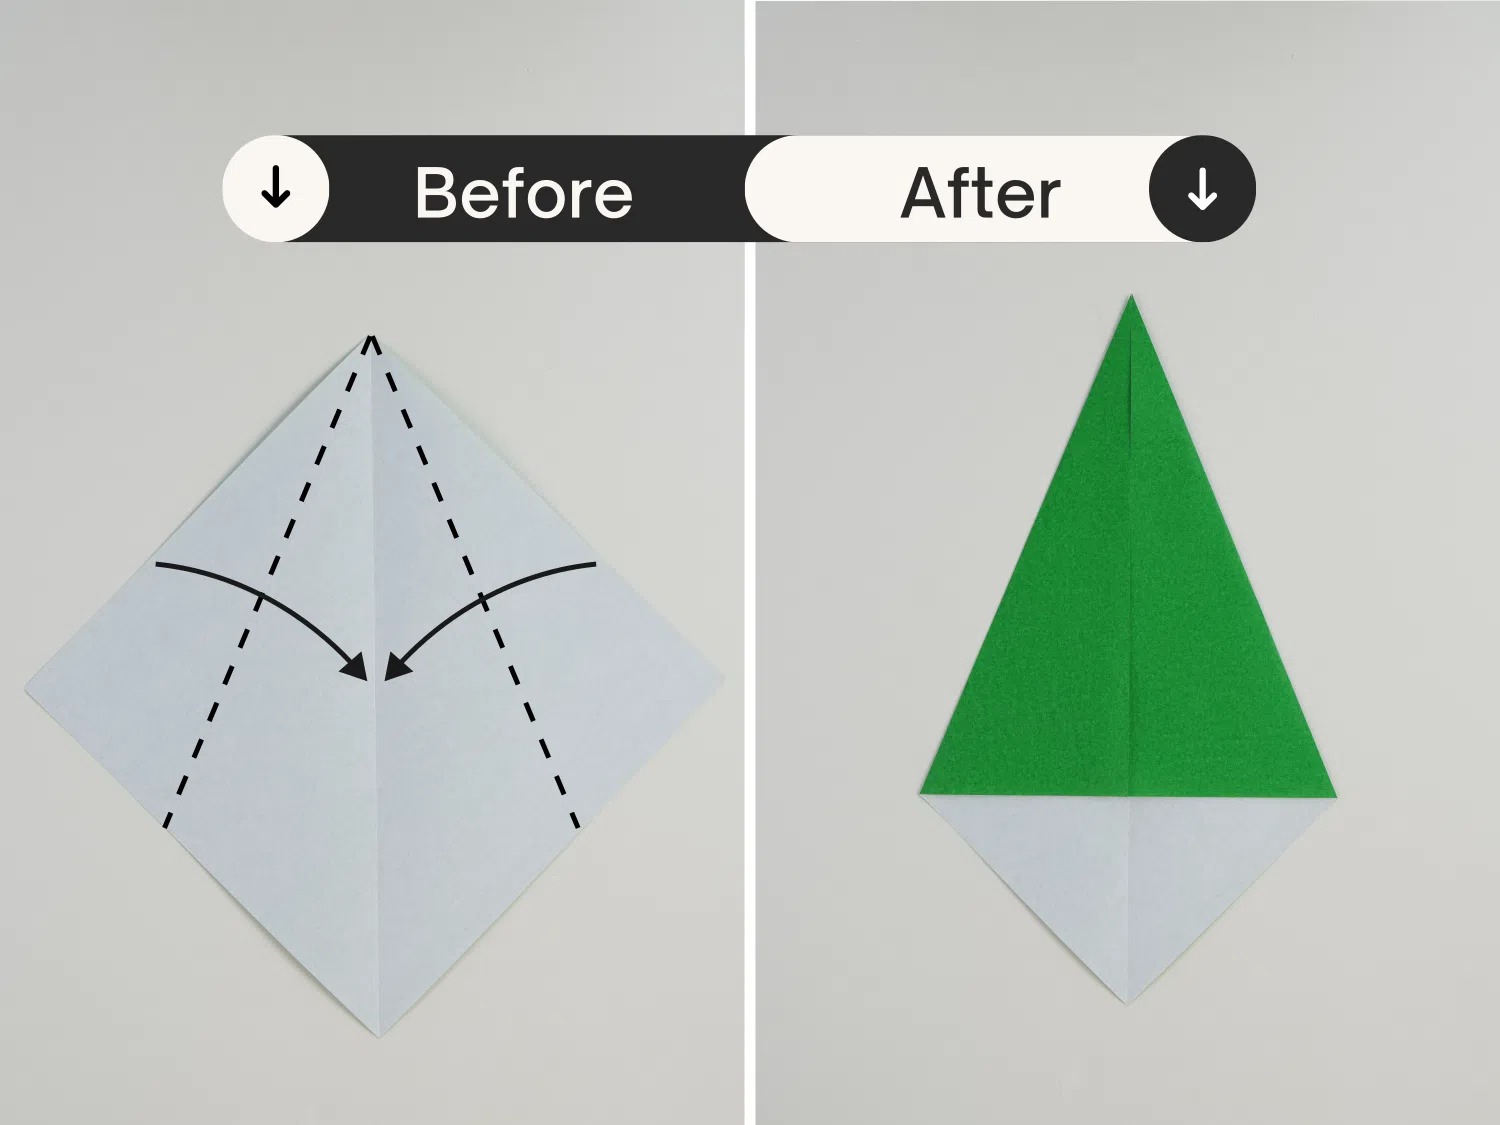
Fold the two edges again like in the previous step, also making sure to meet the center crease.
Step 5
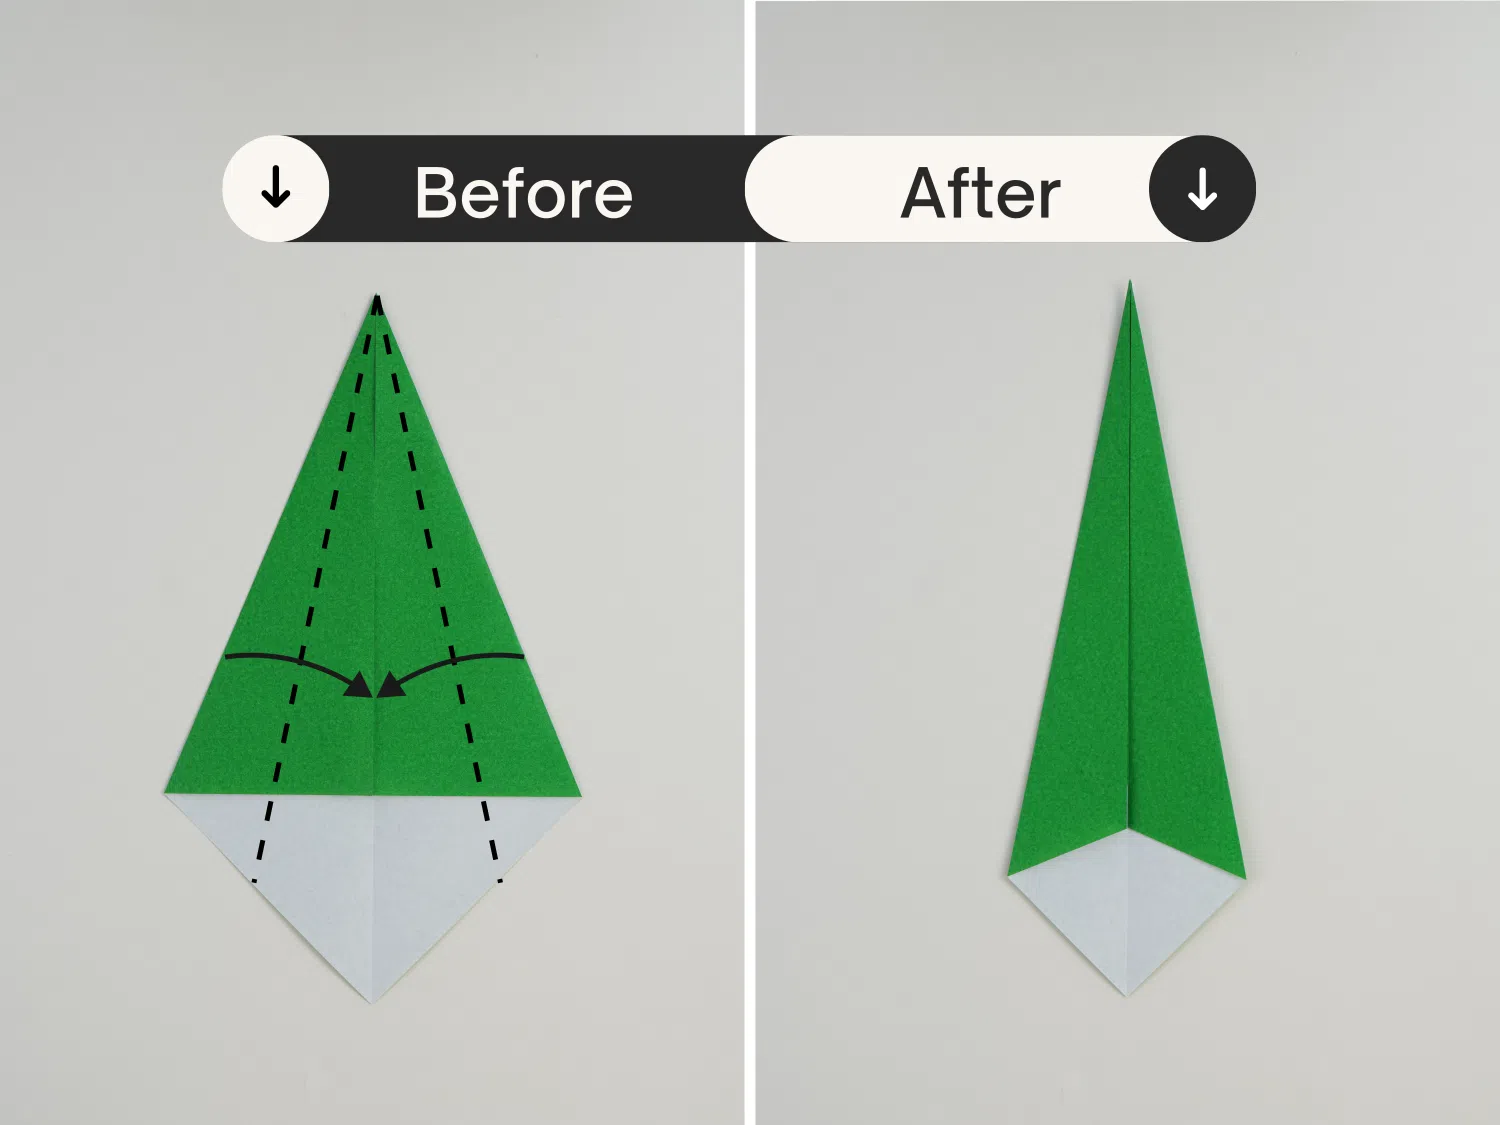
Then fold the bottom two left and right short, beveled edges up in the same manner and meet the center crease.
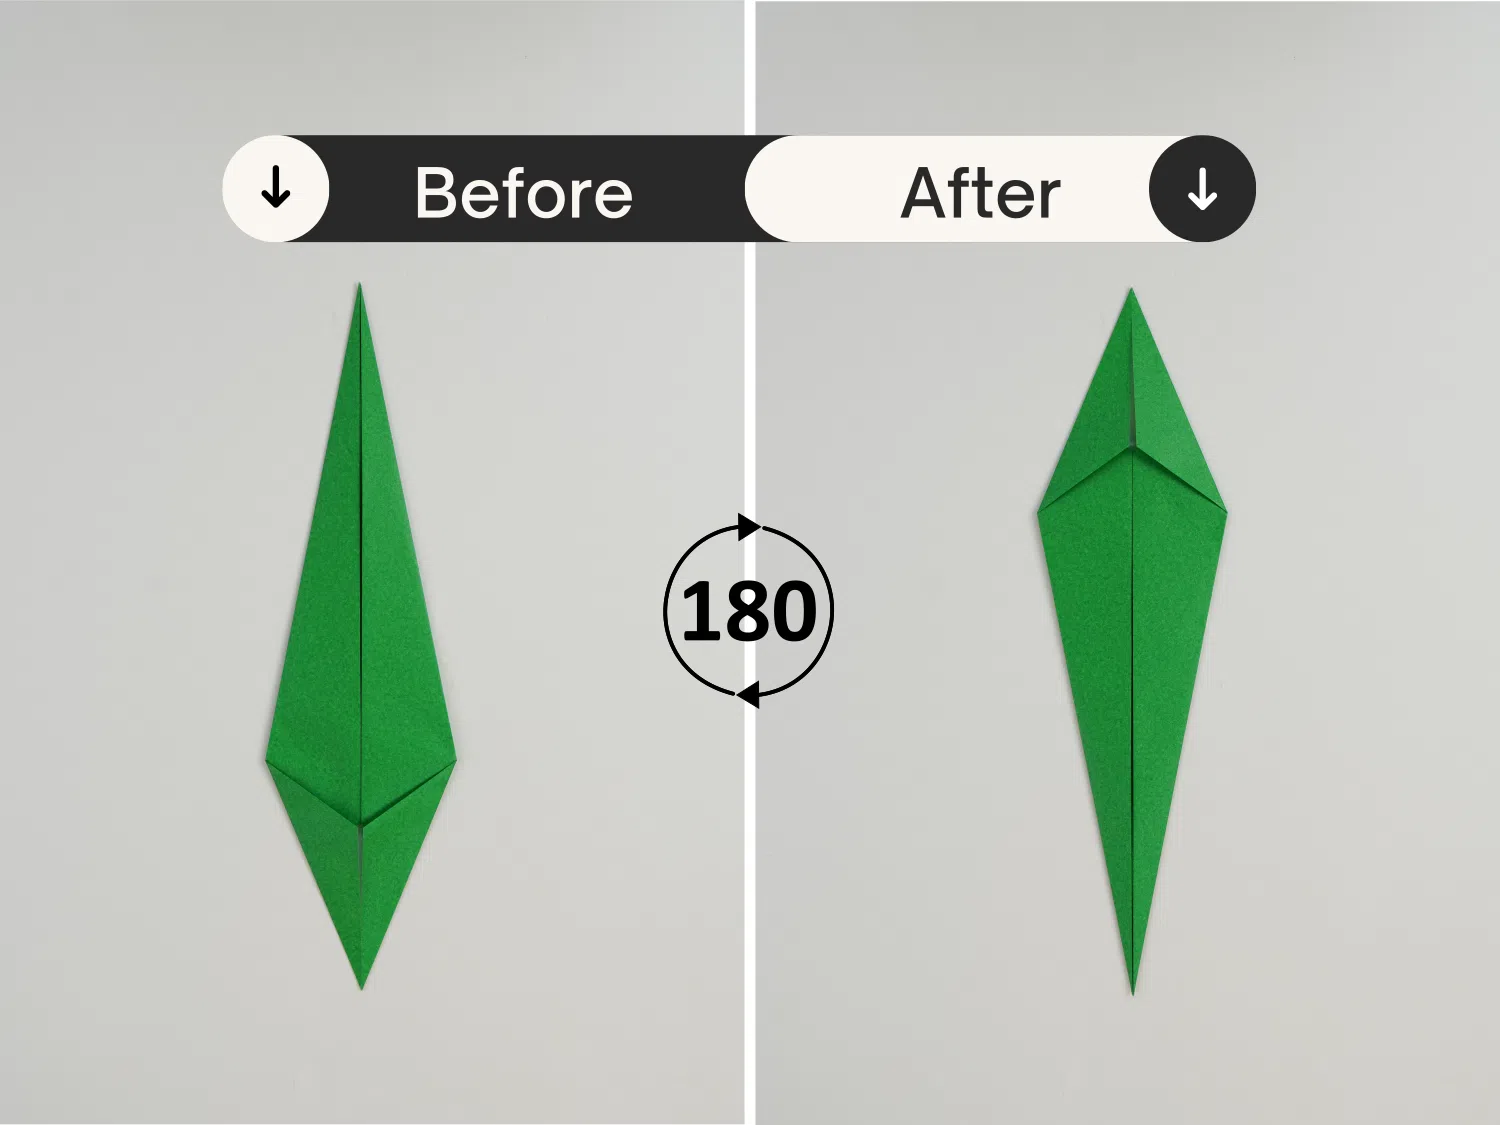
Step 6
Rotate the paper 180 degrees clockwise.
Step 7
Fold it in half bottom to top.
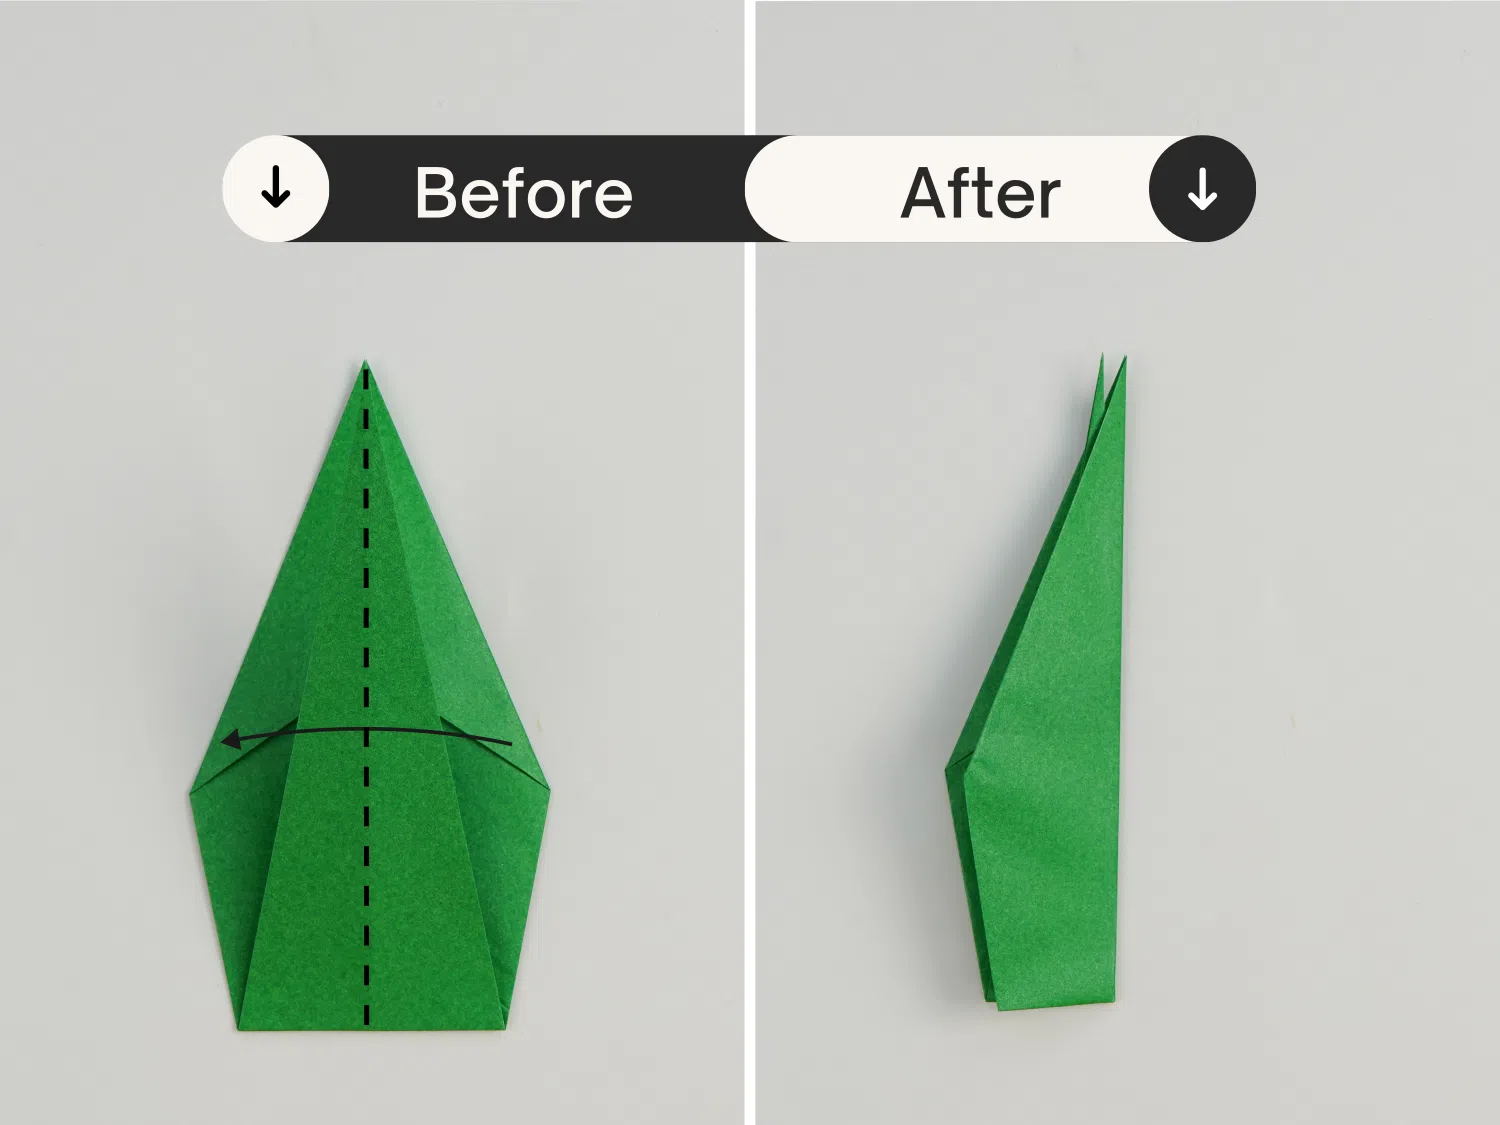
Step 8
Fold it in half right to left.
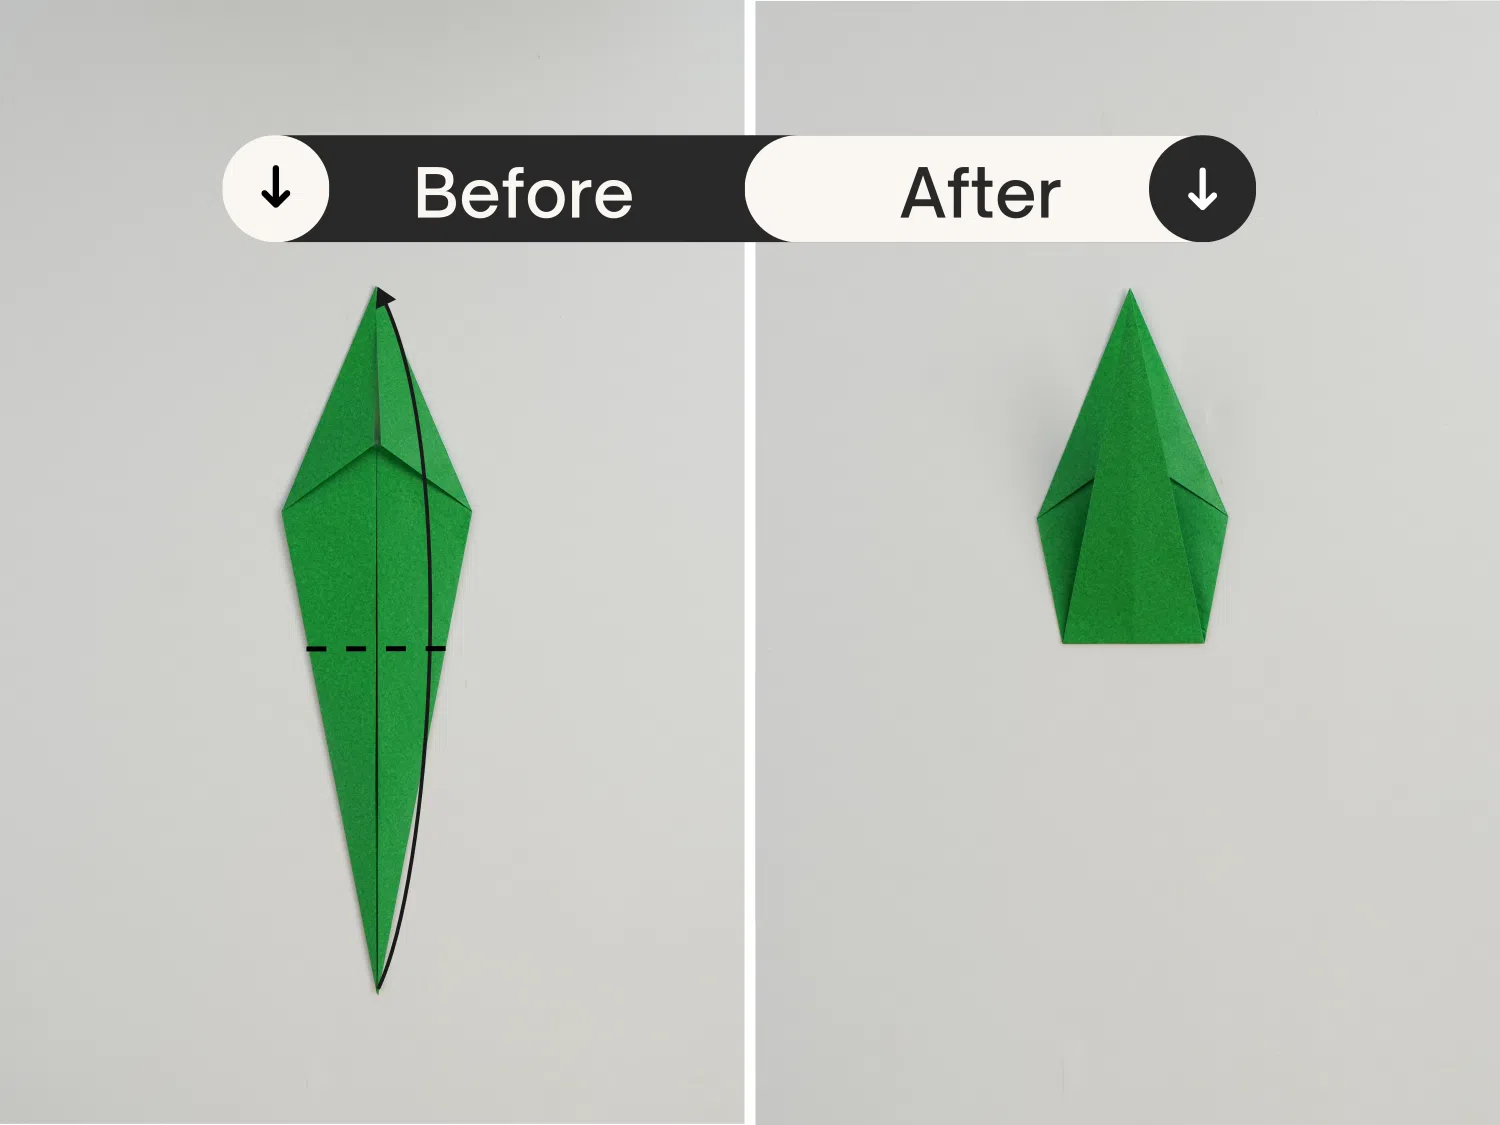
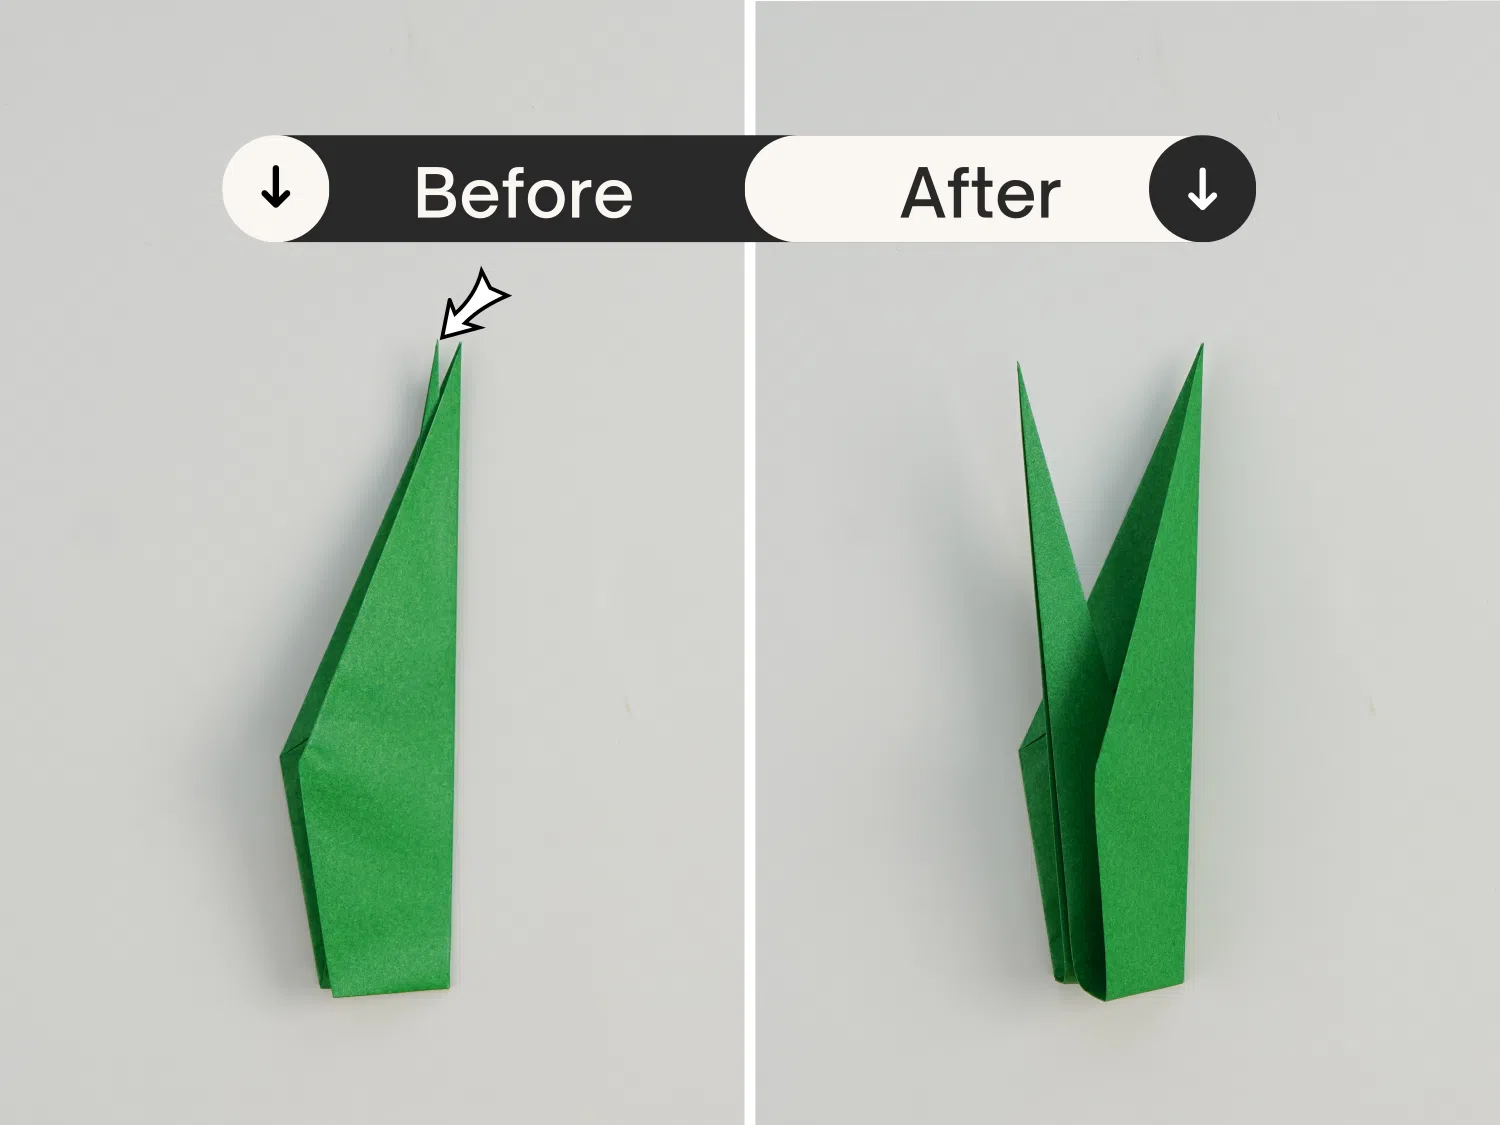
Step 9
Pull the top two corners away. The stem part of the flower is ready.
Then it is the flower part
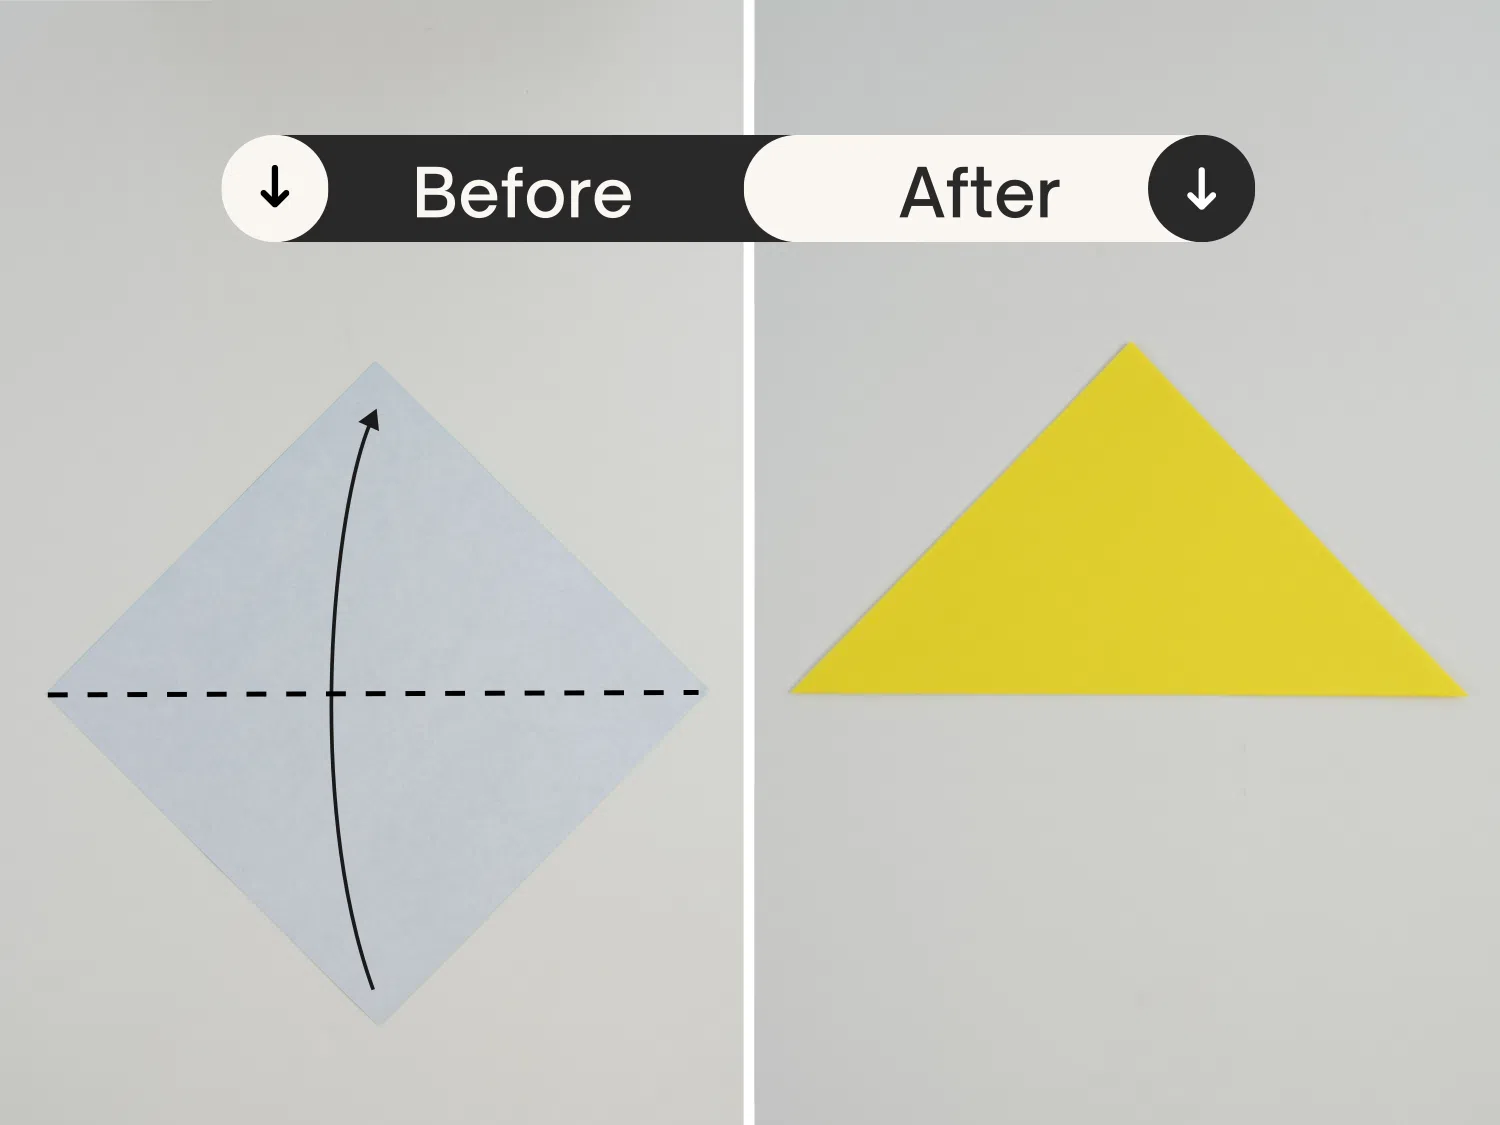
Step 1
Take the yellow paper, start with the white side facing up, and fold the paper in half diagonally.
Step 2
Fold the triangle in half diagonally.
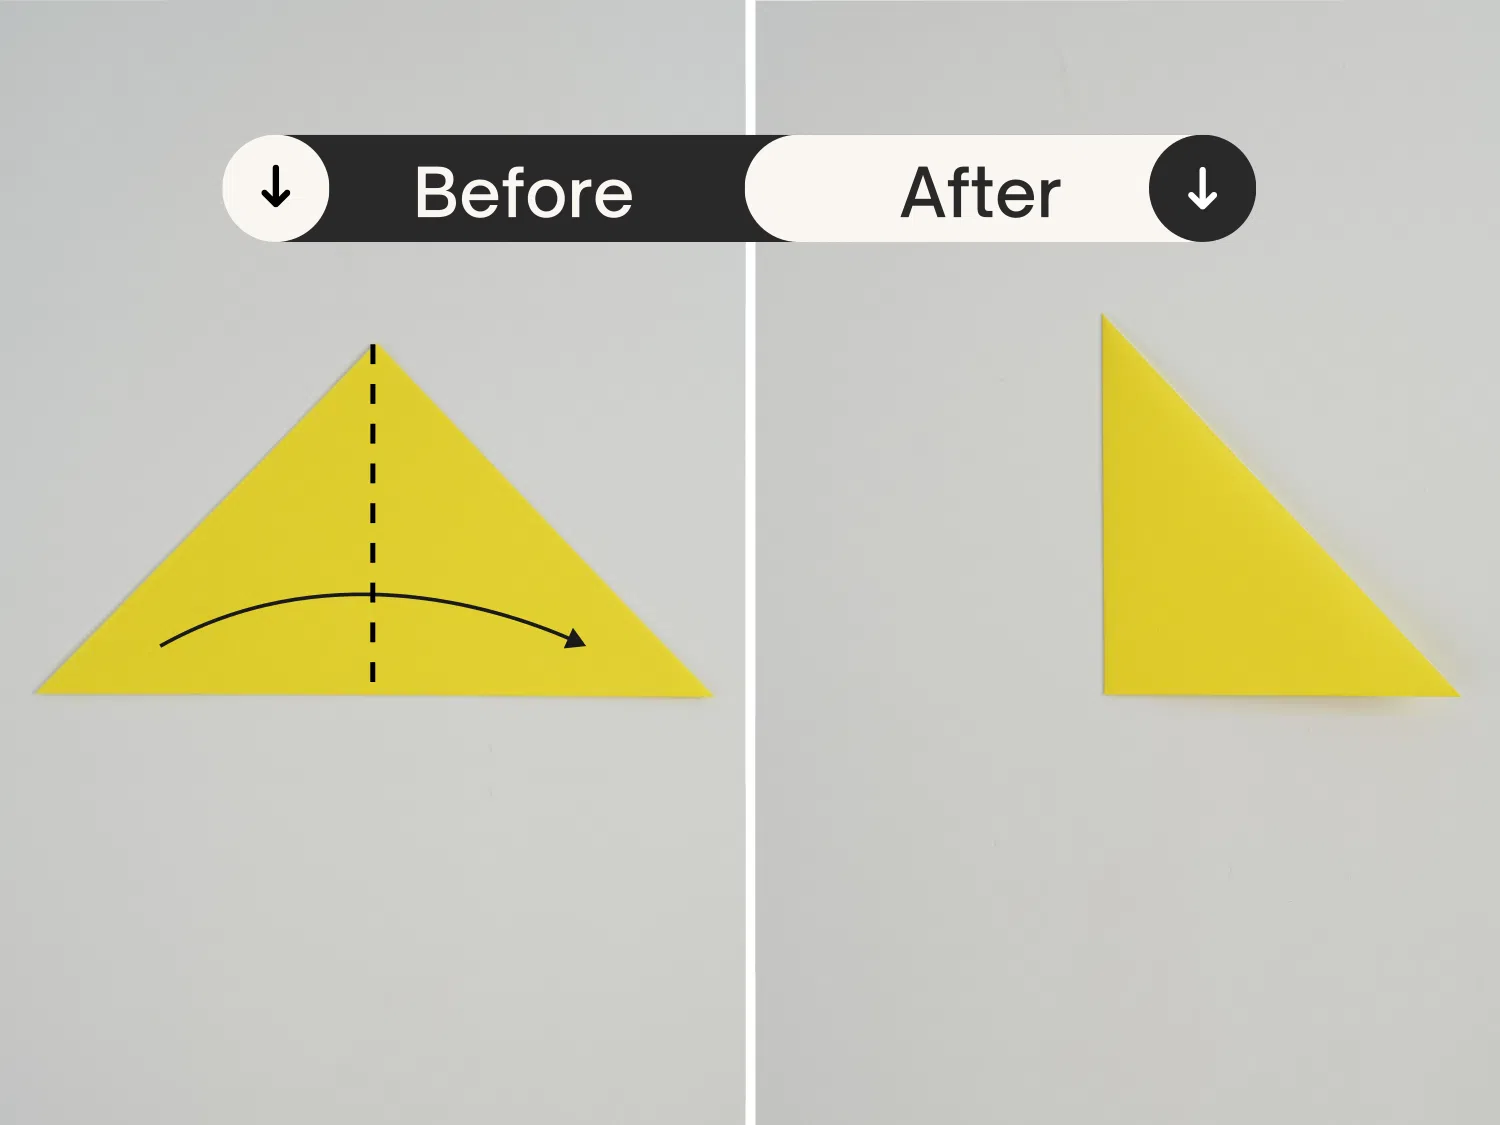
Step 3
Unfold it.
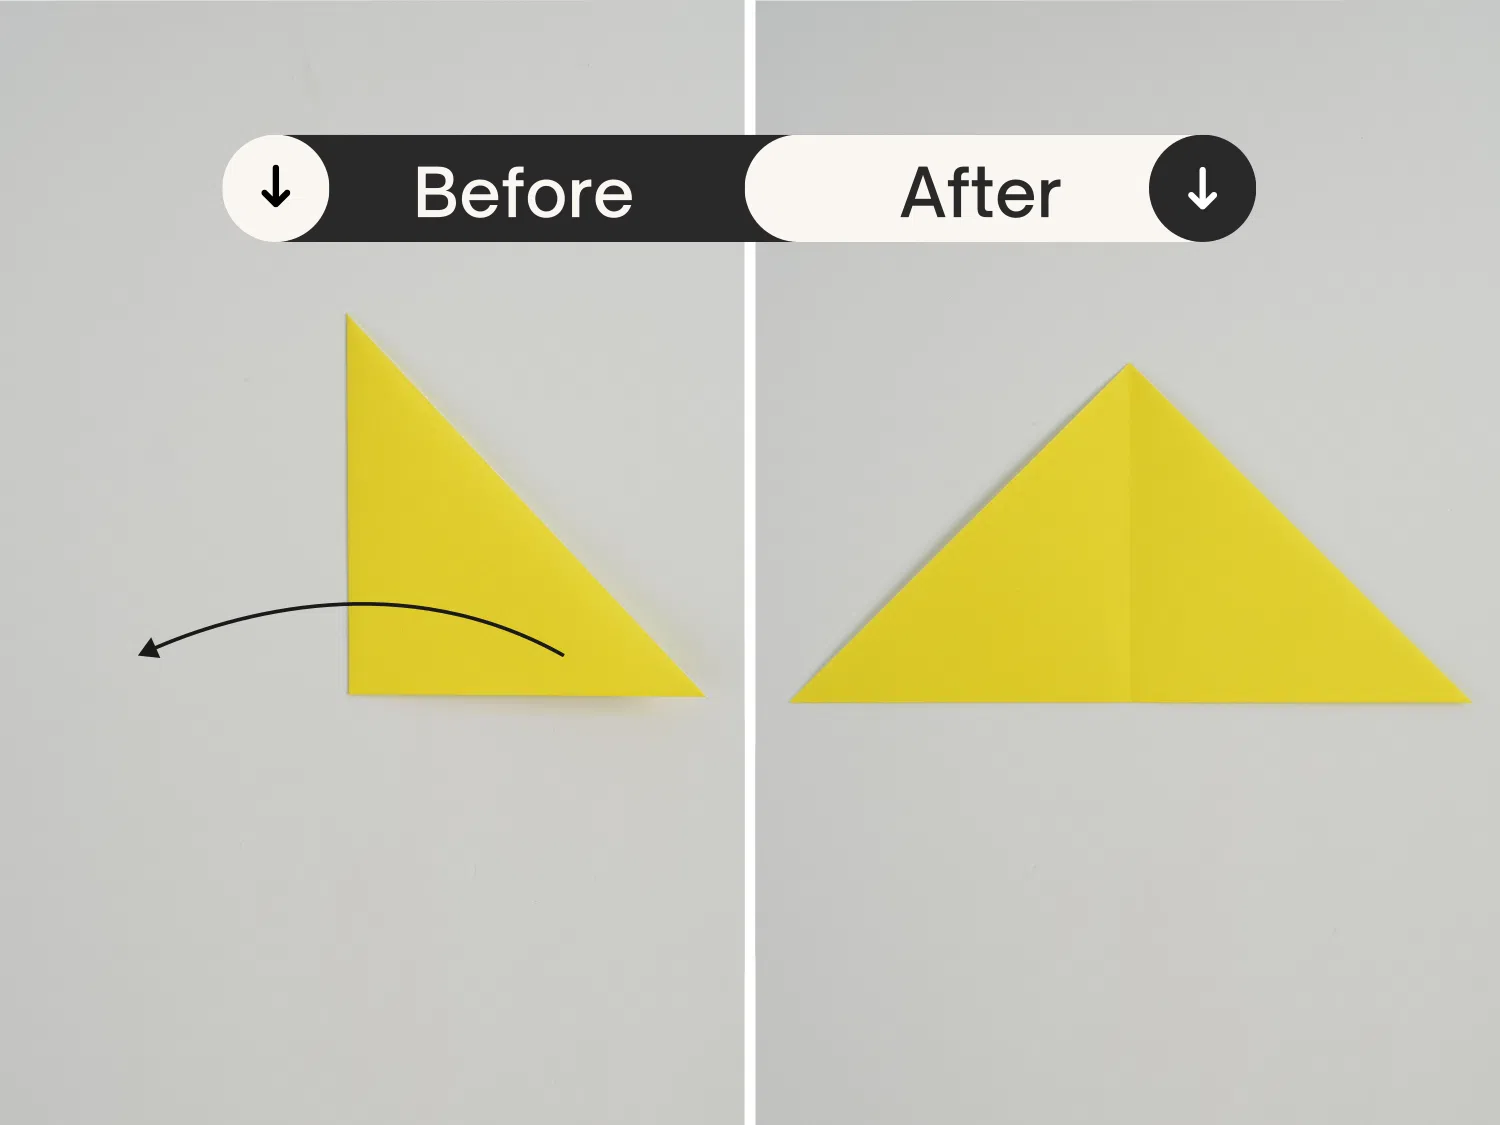
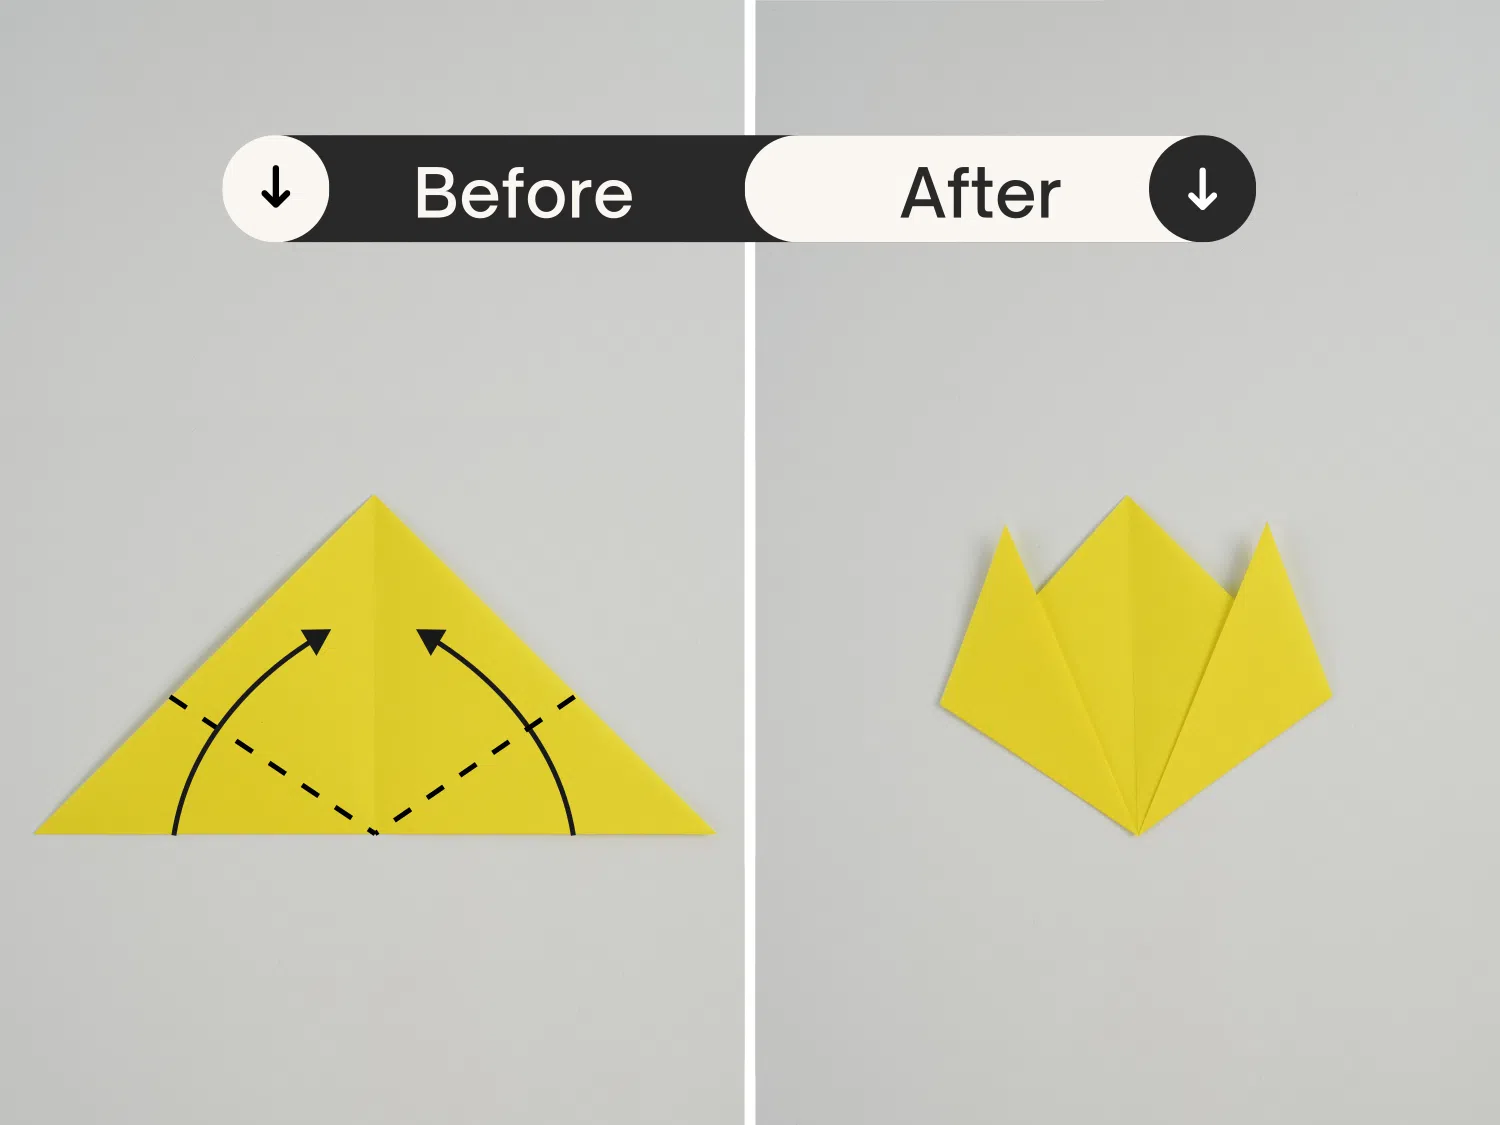
Step 4
Take the right point, bring it up and to the right at an angle away from the top.
Repeat the other side too.
Step 5
Flip it over.
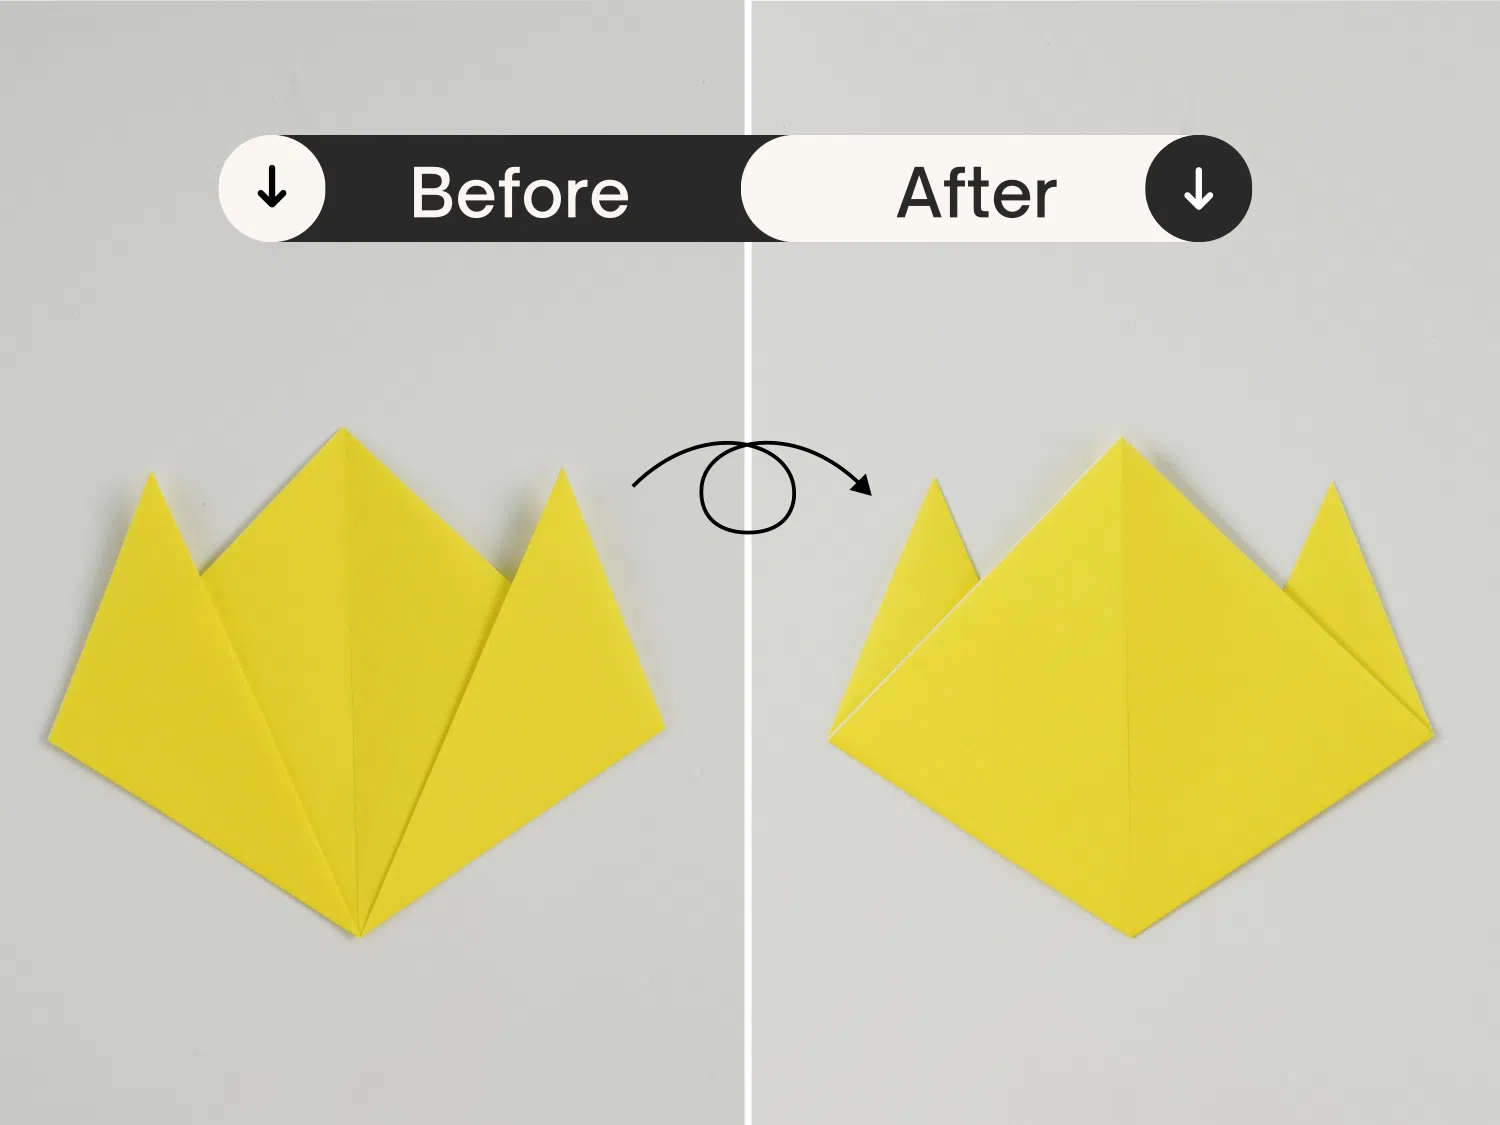
Step 6
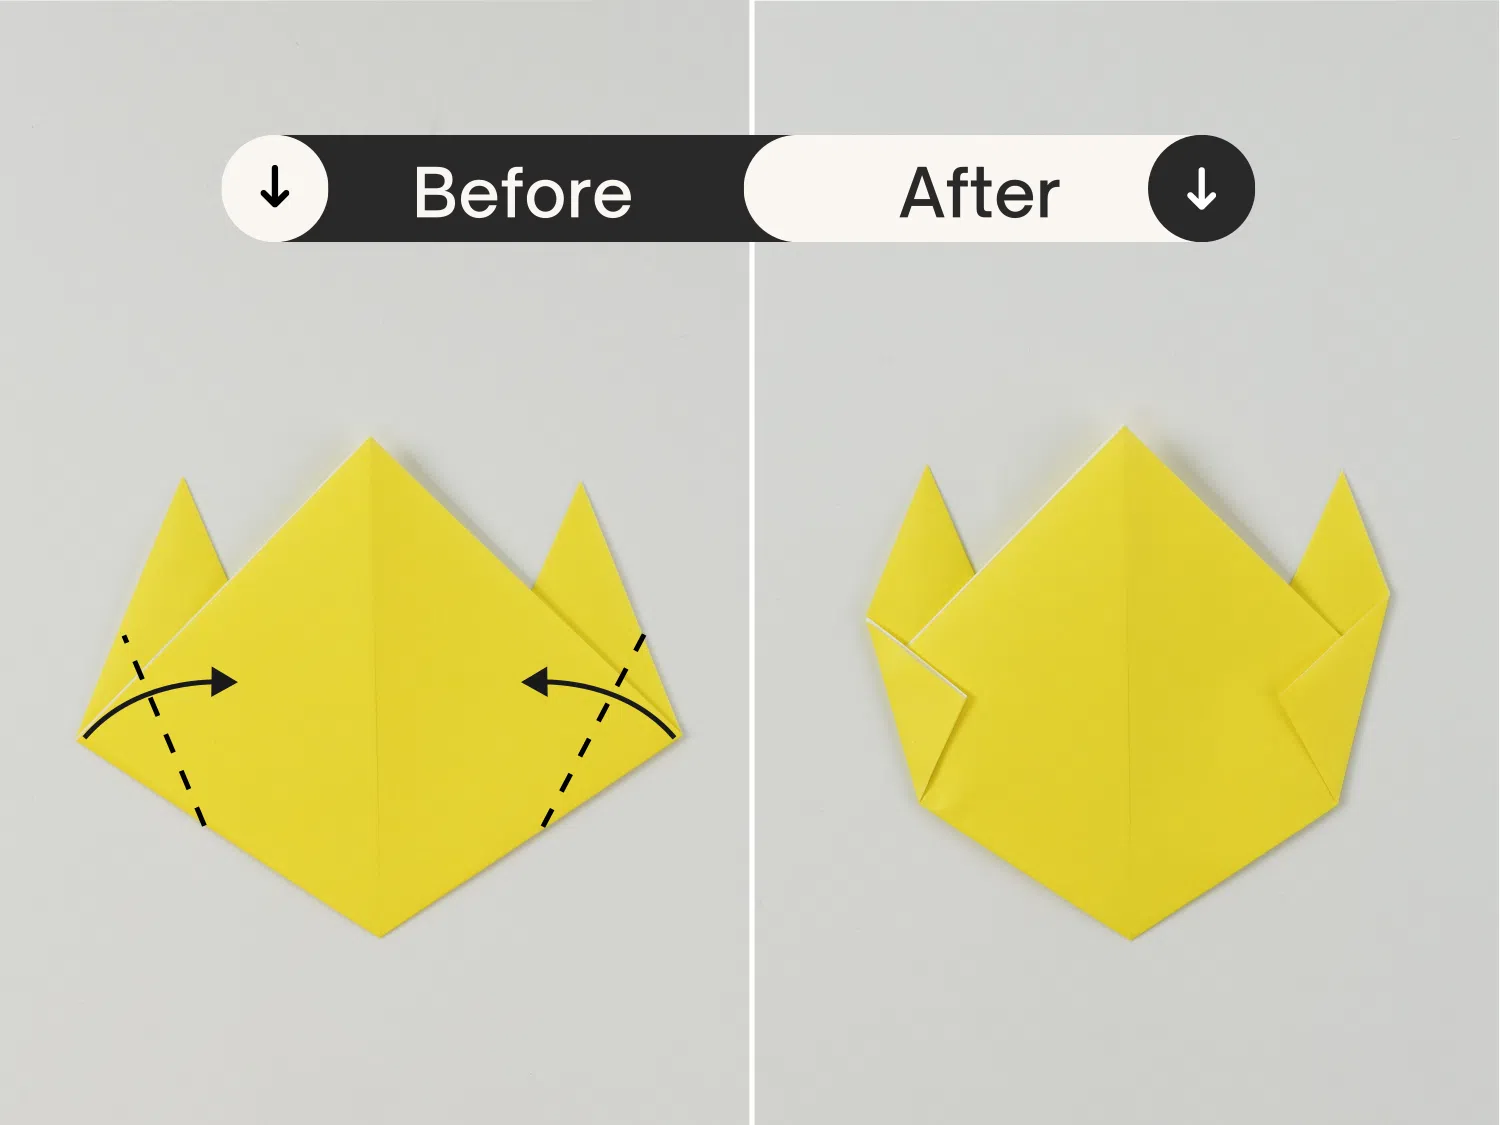
Now fold both the right corner and left corner a little.
Step 7
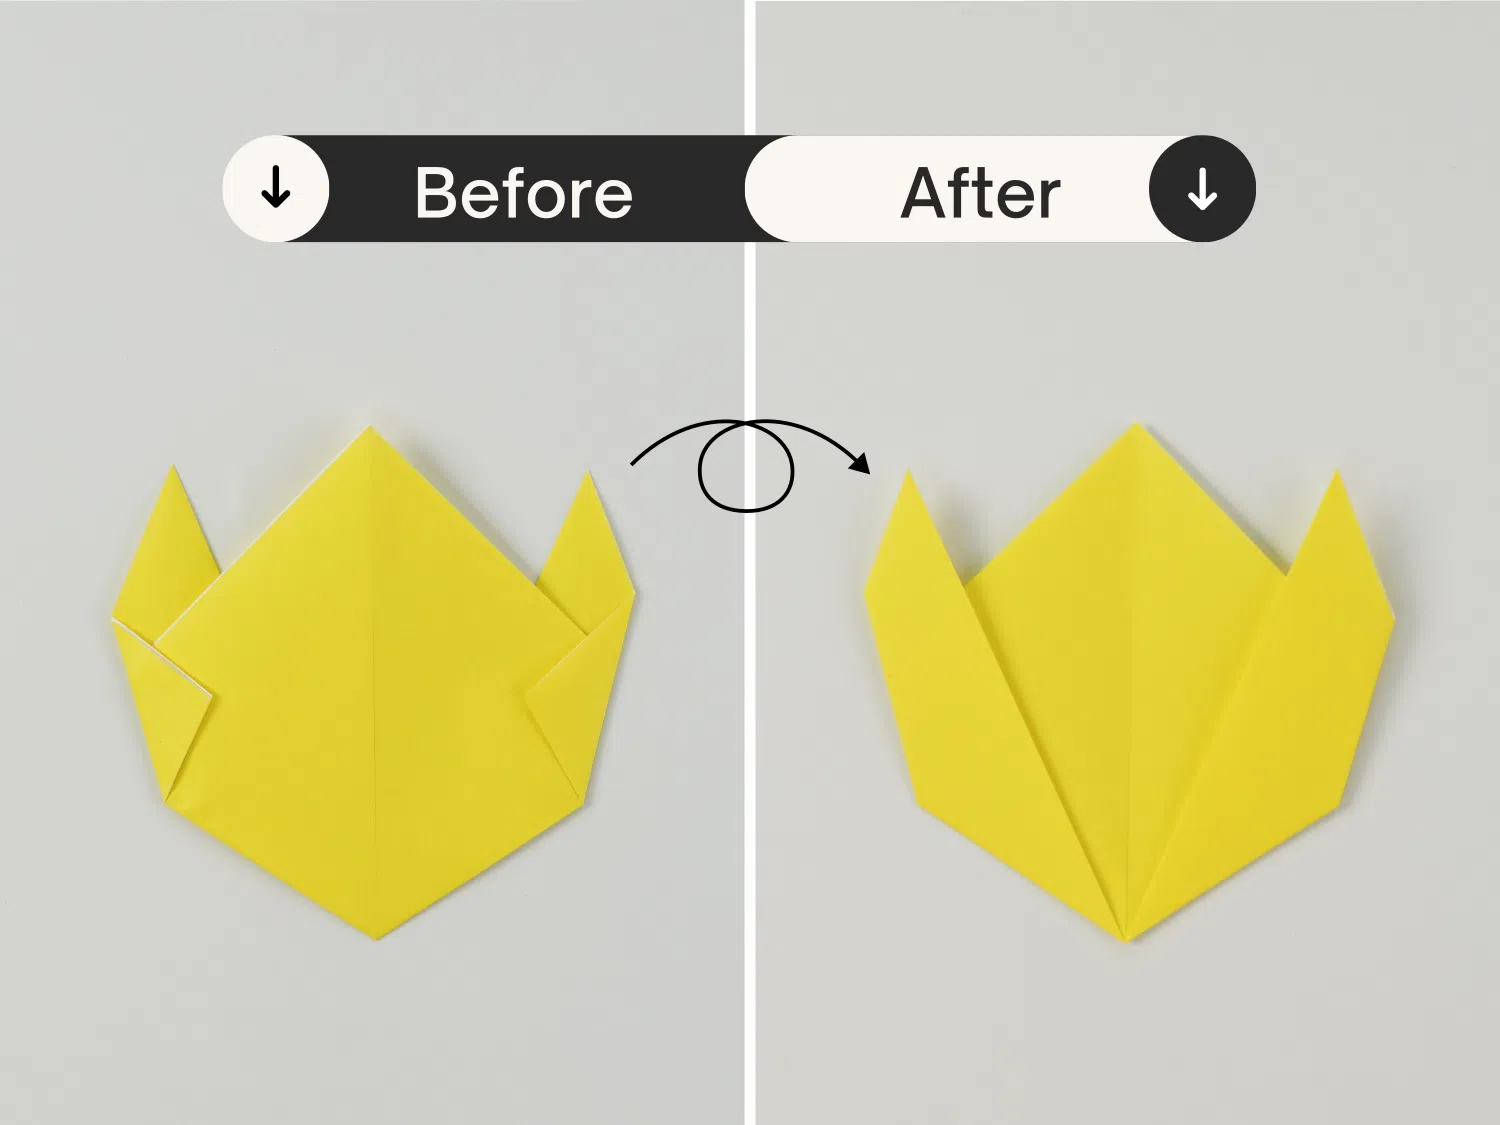
Flip the paper over again, here is the lovely flower.
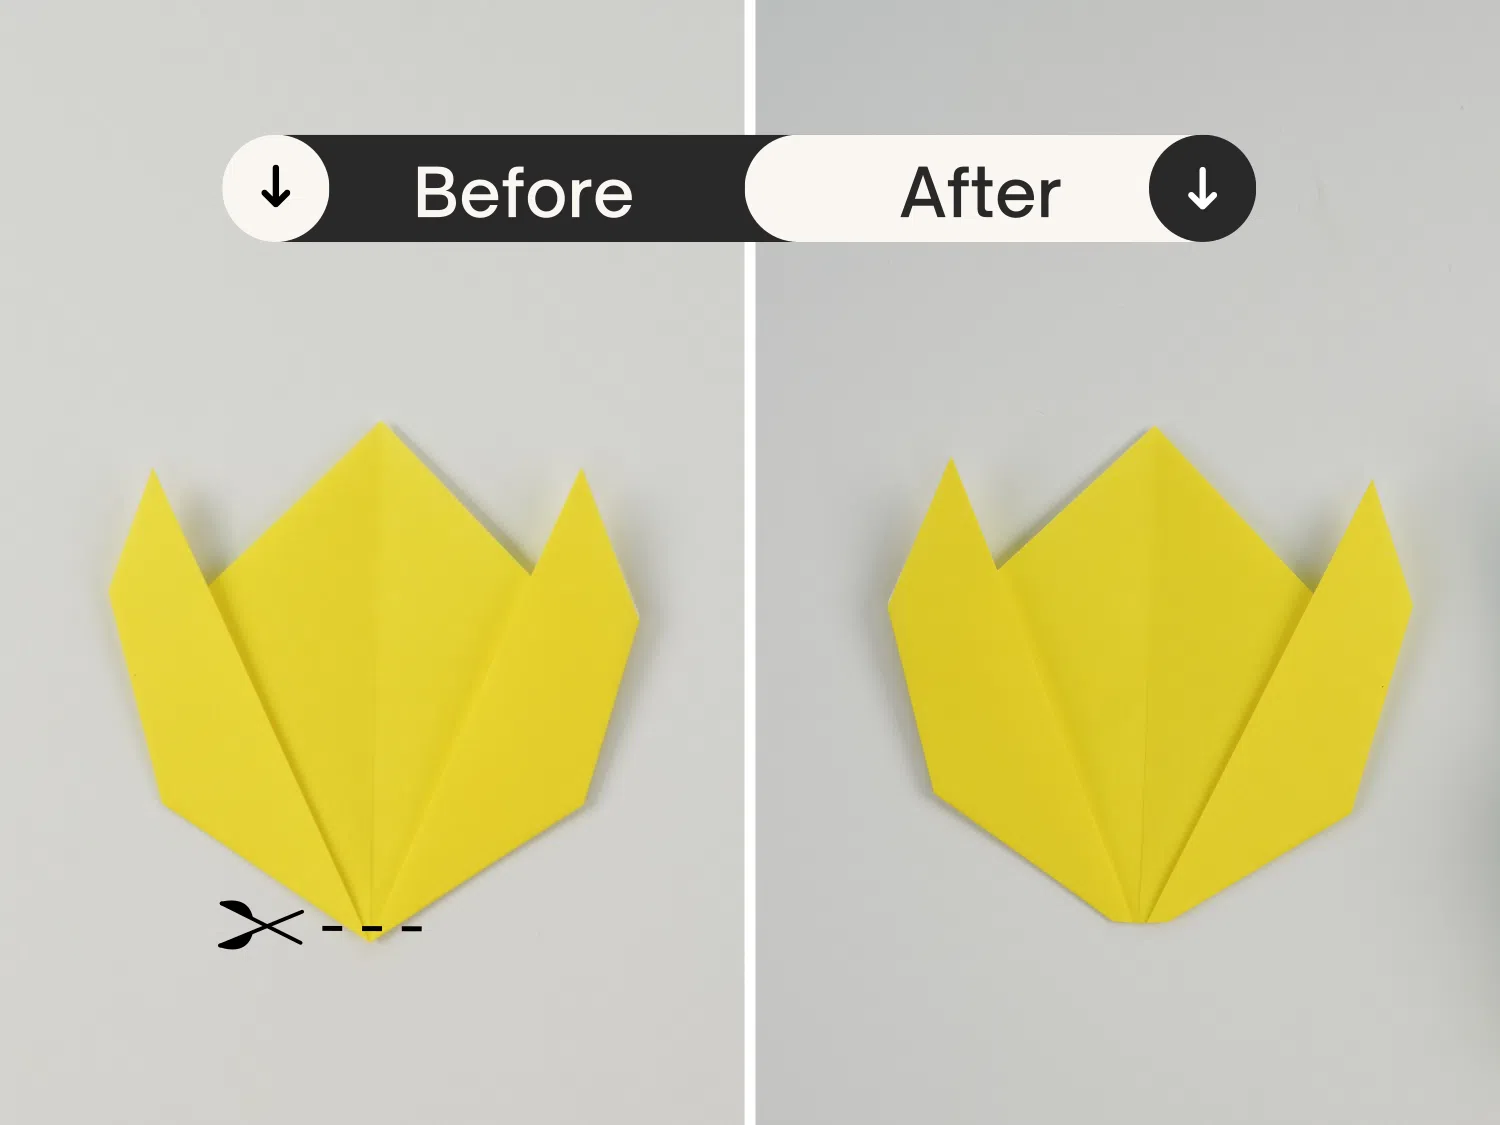
Step 8
Cut a little off the bottom to make it easier to assemble the stem.
Assemble
Step 1
Get the flower and the stem.
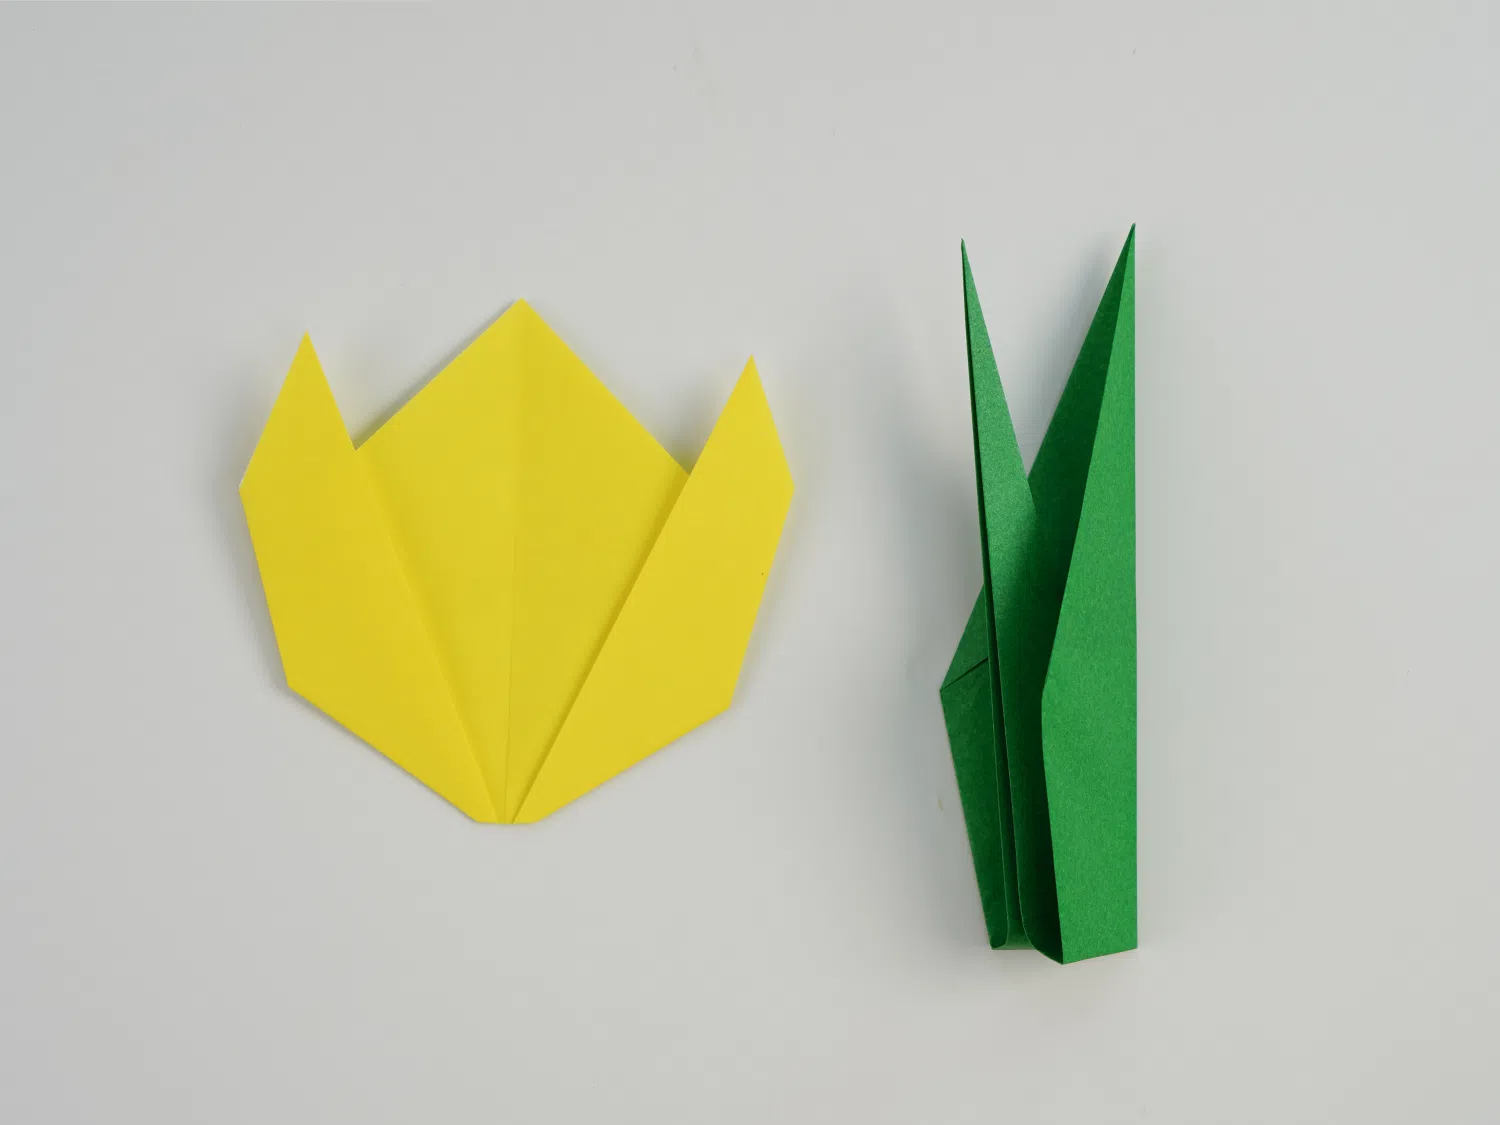
Step 2
Insert the top corner of the left side of the stem part into the bottom of the flower, a complete, lovely flower is done.